Eucalyptus Green Technique for Paper Flowers
DISCLOSURE — When you click on my affiliate links, I may earn a commission for qualifying purchases made through Amazon.com links in this post. This commission goes directly into the maintenance of my website, the technology that goes into my courses, and my art. Want to know more? Read my Amazon Affiliate Disclaimer.
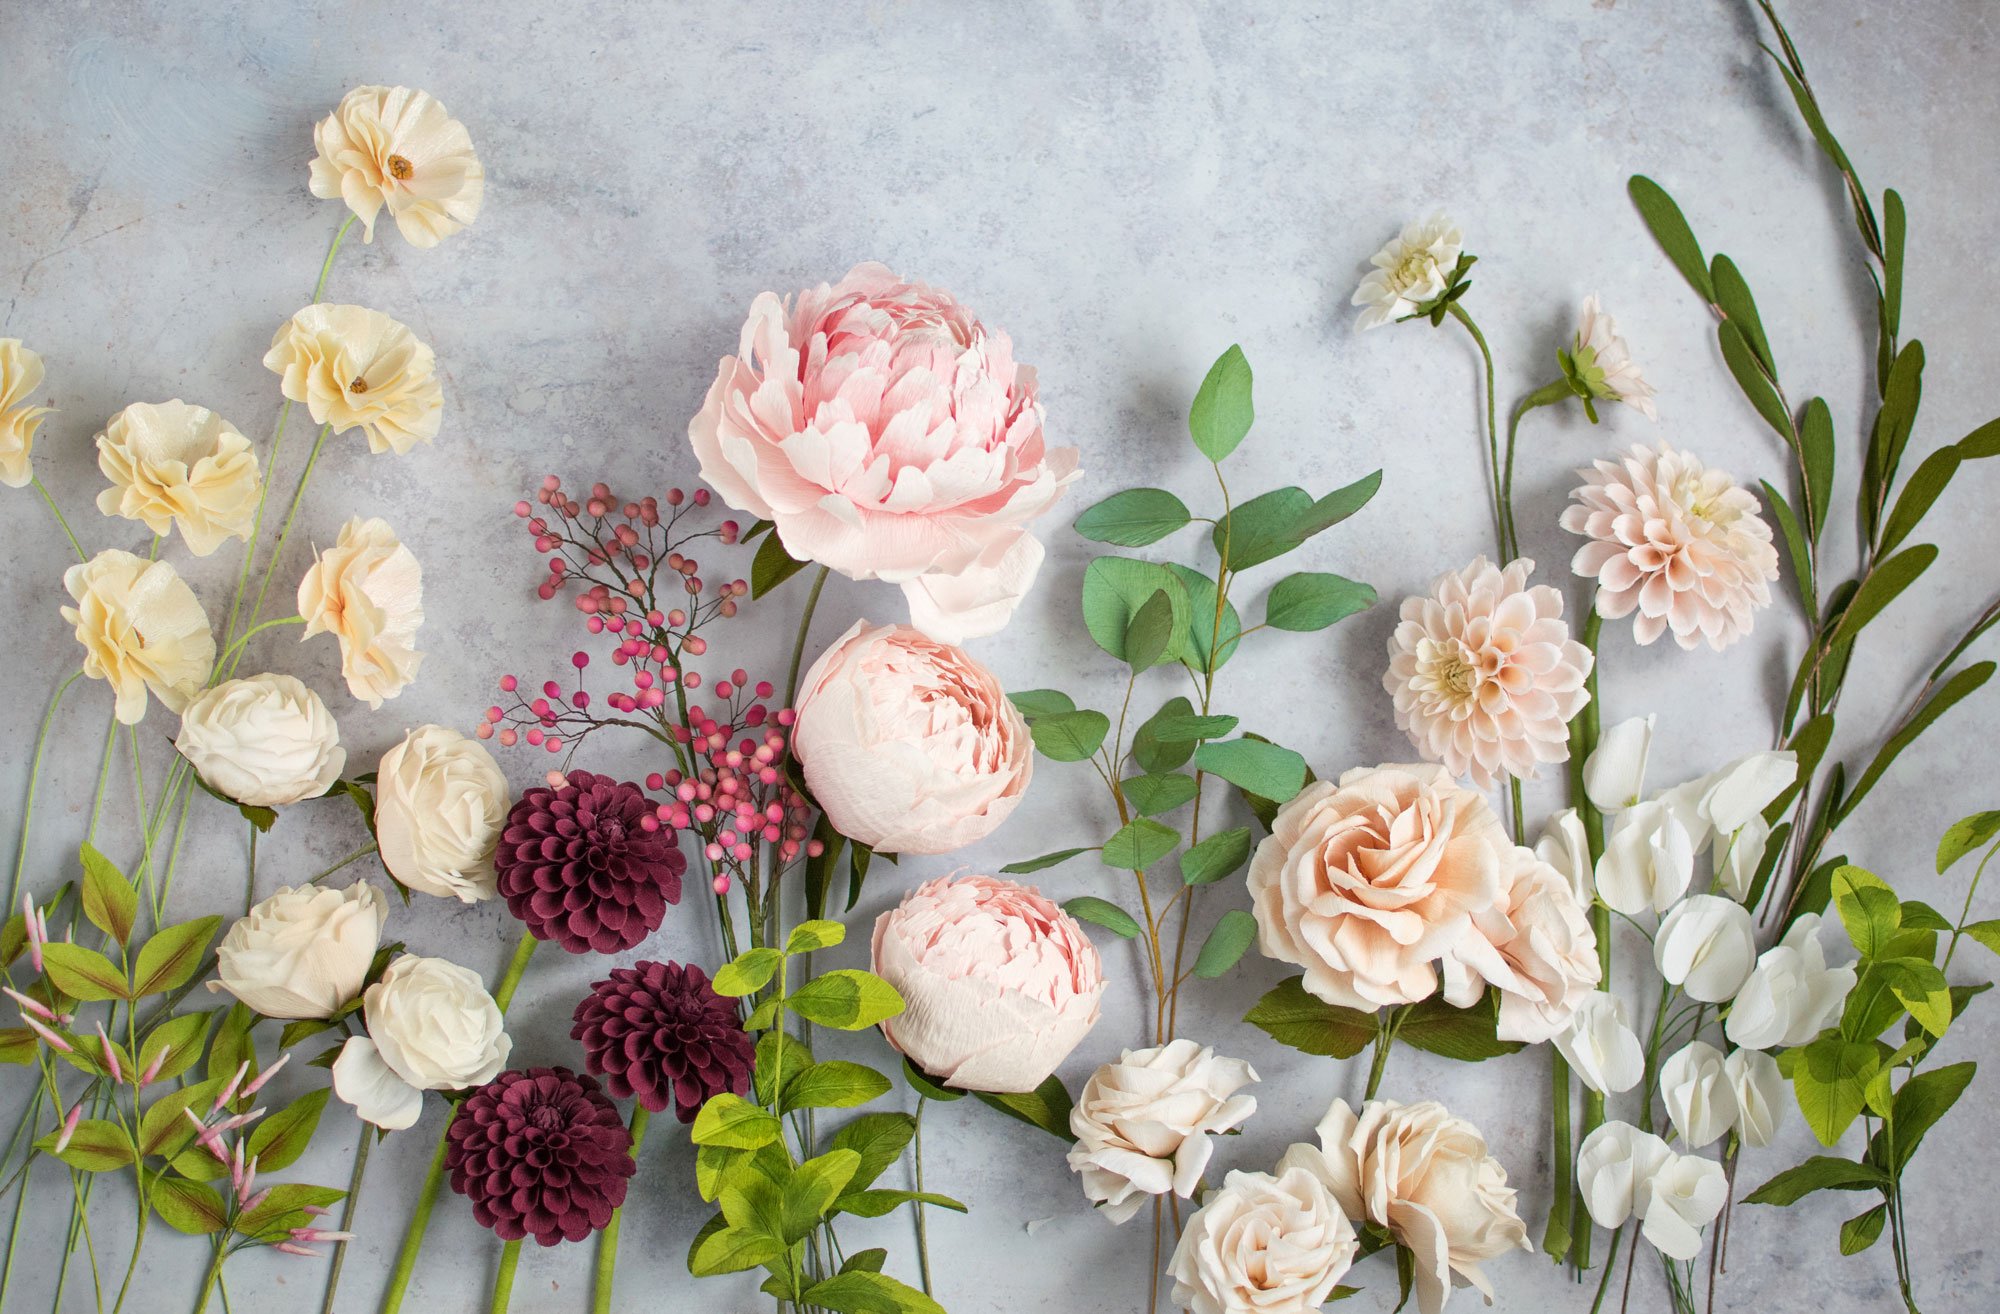
I’ve been experimenting with blue-green foliage for about a year now. I love how it brings out a different mood when paired with pinks and oranges (colours that are across the colour wheel). When mixed with yellow-greens, the contrast can be quite visually interesting.
In my book, Paper Flower Art, I teach you a technique with Pan Pastels which achieves that chalky look that eucalyptus foliage is known for. For this particular commission, I wanted to see if I could expedite the process. Returning from our 2-Day Paper Flower Workshop, I was inspired (and determined) to incorporate more Design Master sprays into my work. One of the advantages of using Design Master products is their ability to shift colours subtly - my kind of thing. Another advantage is that you can save a lot of time colouring with a spray that can be applied in minutes and dry in seconds. I’m particularly keen on using this technique on my foliages. Unfortunately, I wasn’t able to use sprays as much in my book because it wasn’t a common art medium that anyone around the globe could get their hands on easily. In my own work however, I didn’t have that constraint.
STEP ONE
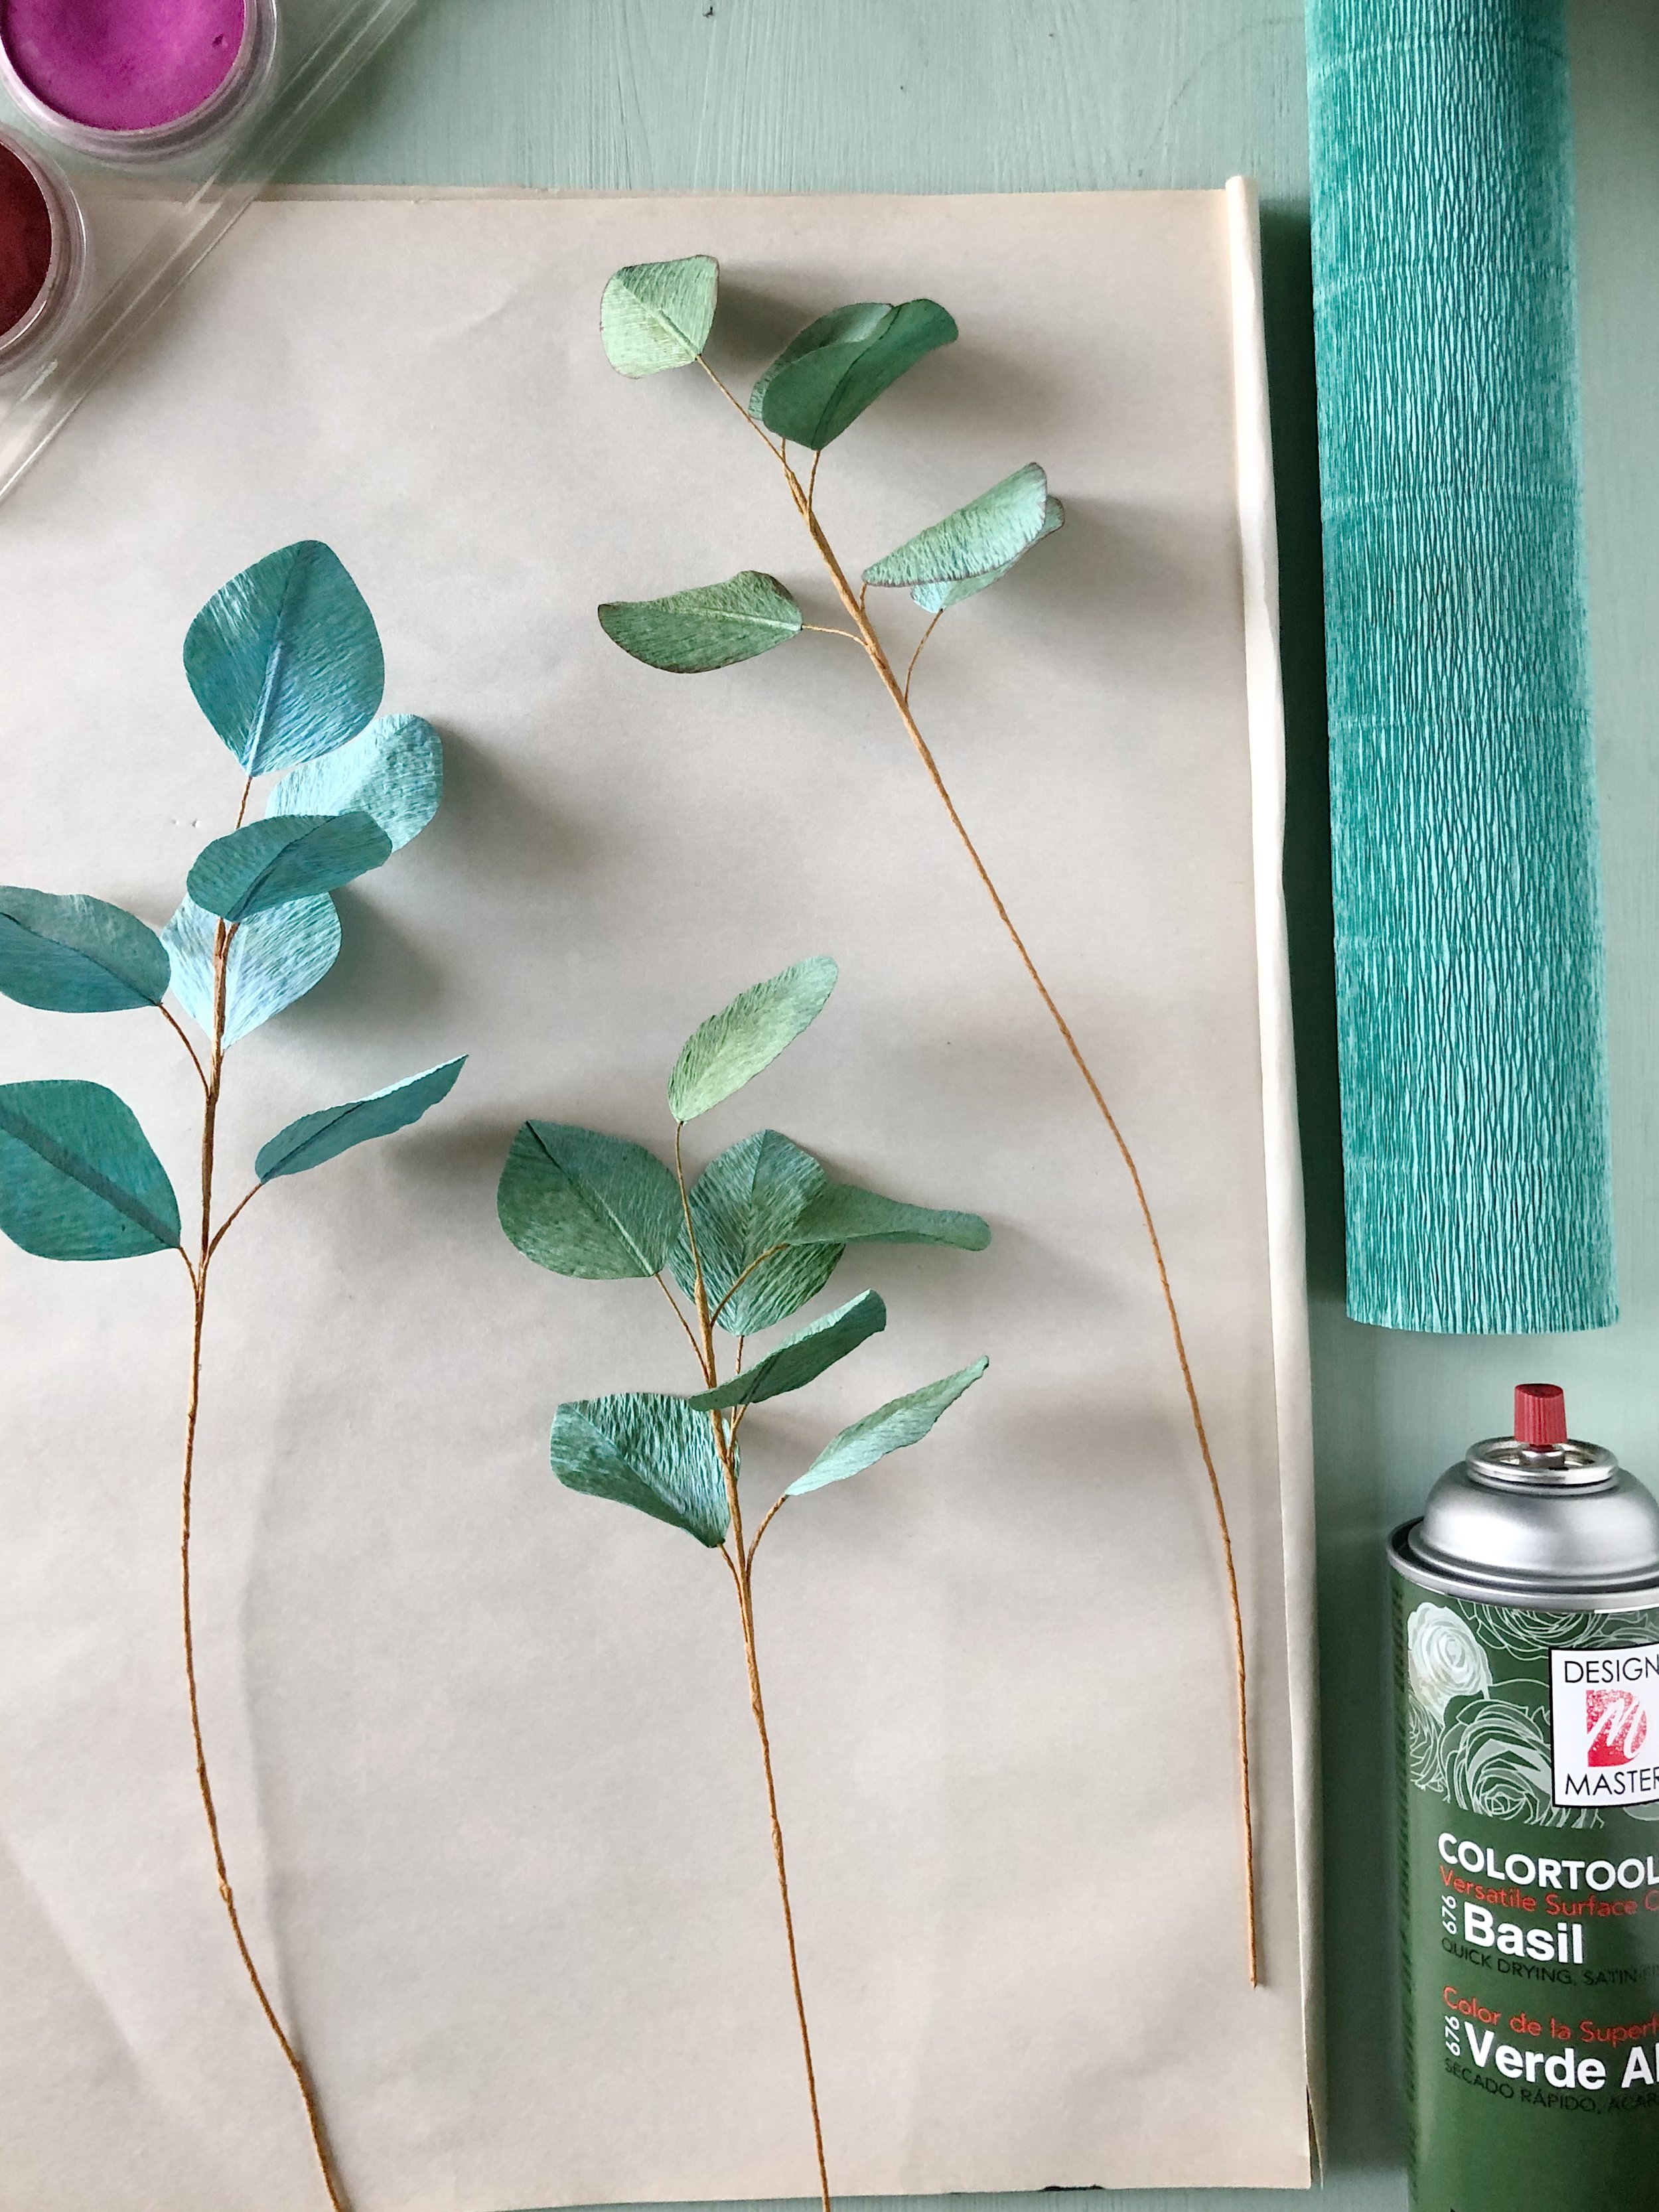
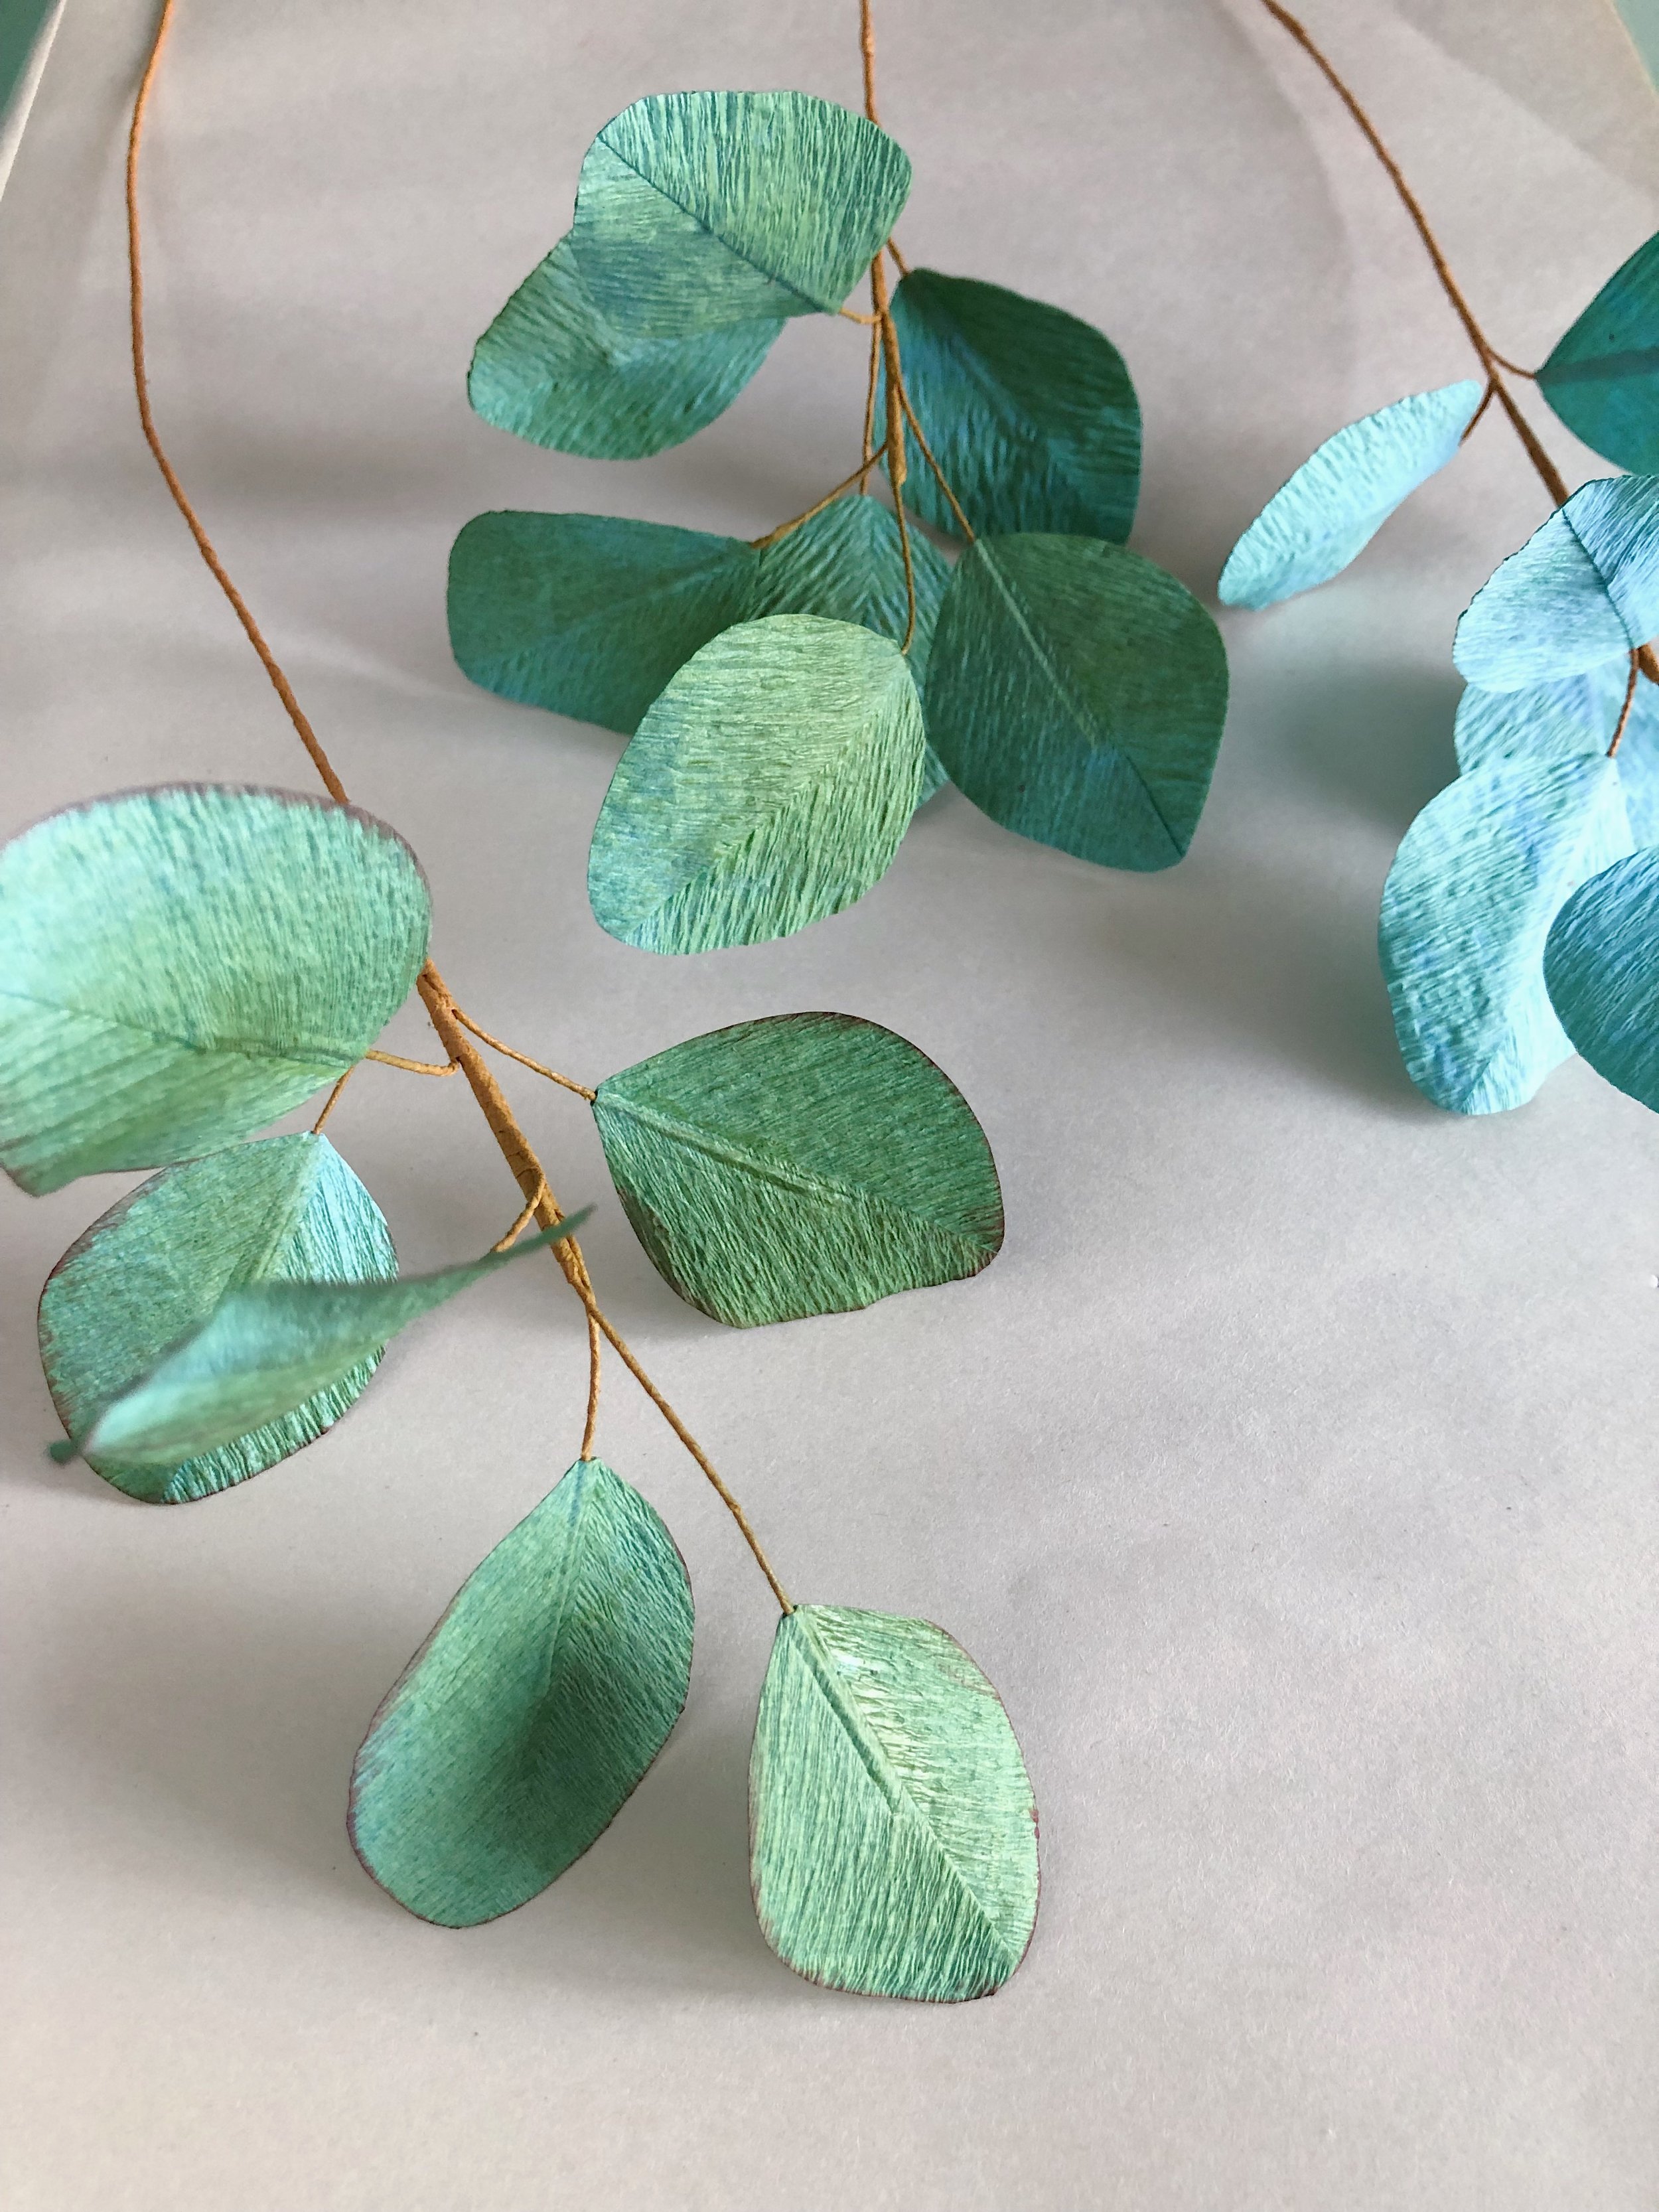
I first put together my eucalyptus leaves and then arranged them together to create a short branch. I used 180 g Italian crepe paper in Tiffany Green (#17E/A) for the leaves and Twig (#567) for the stems/branch.
STEP TWO
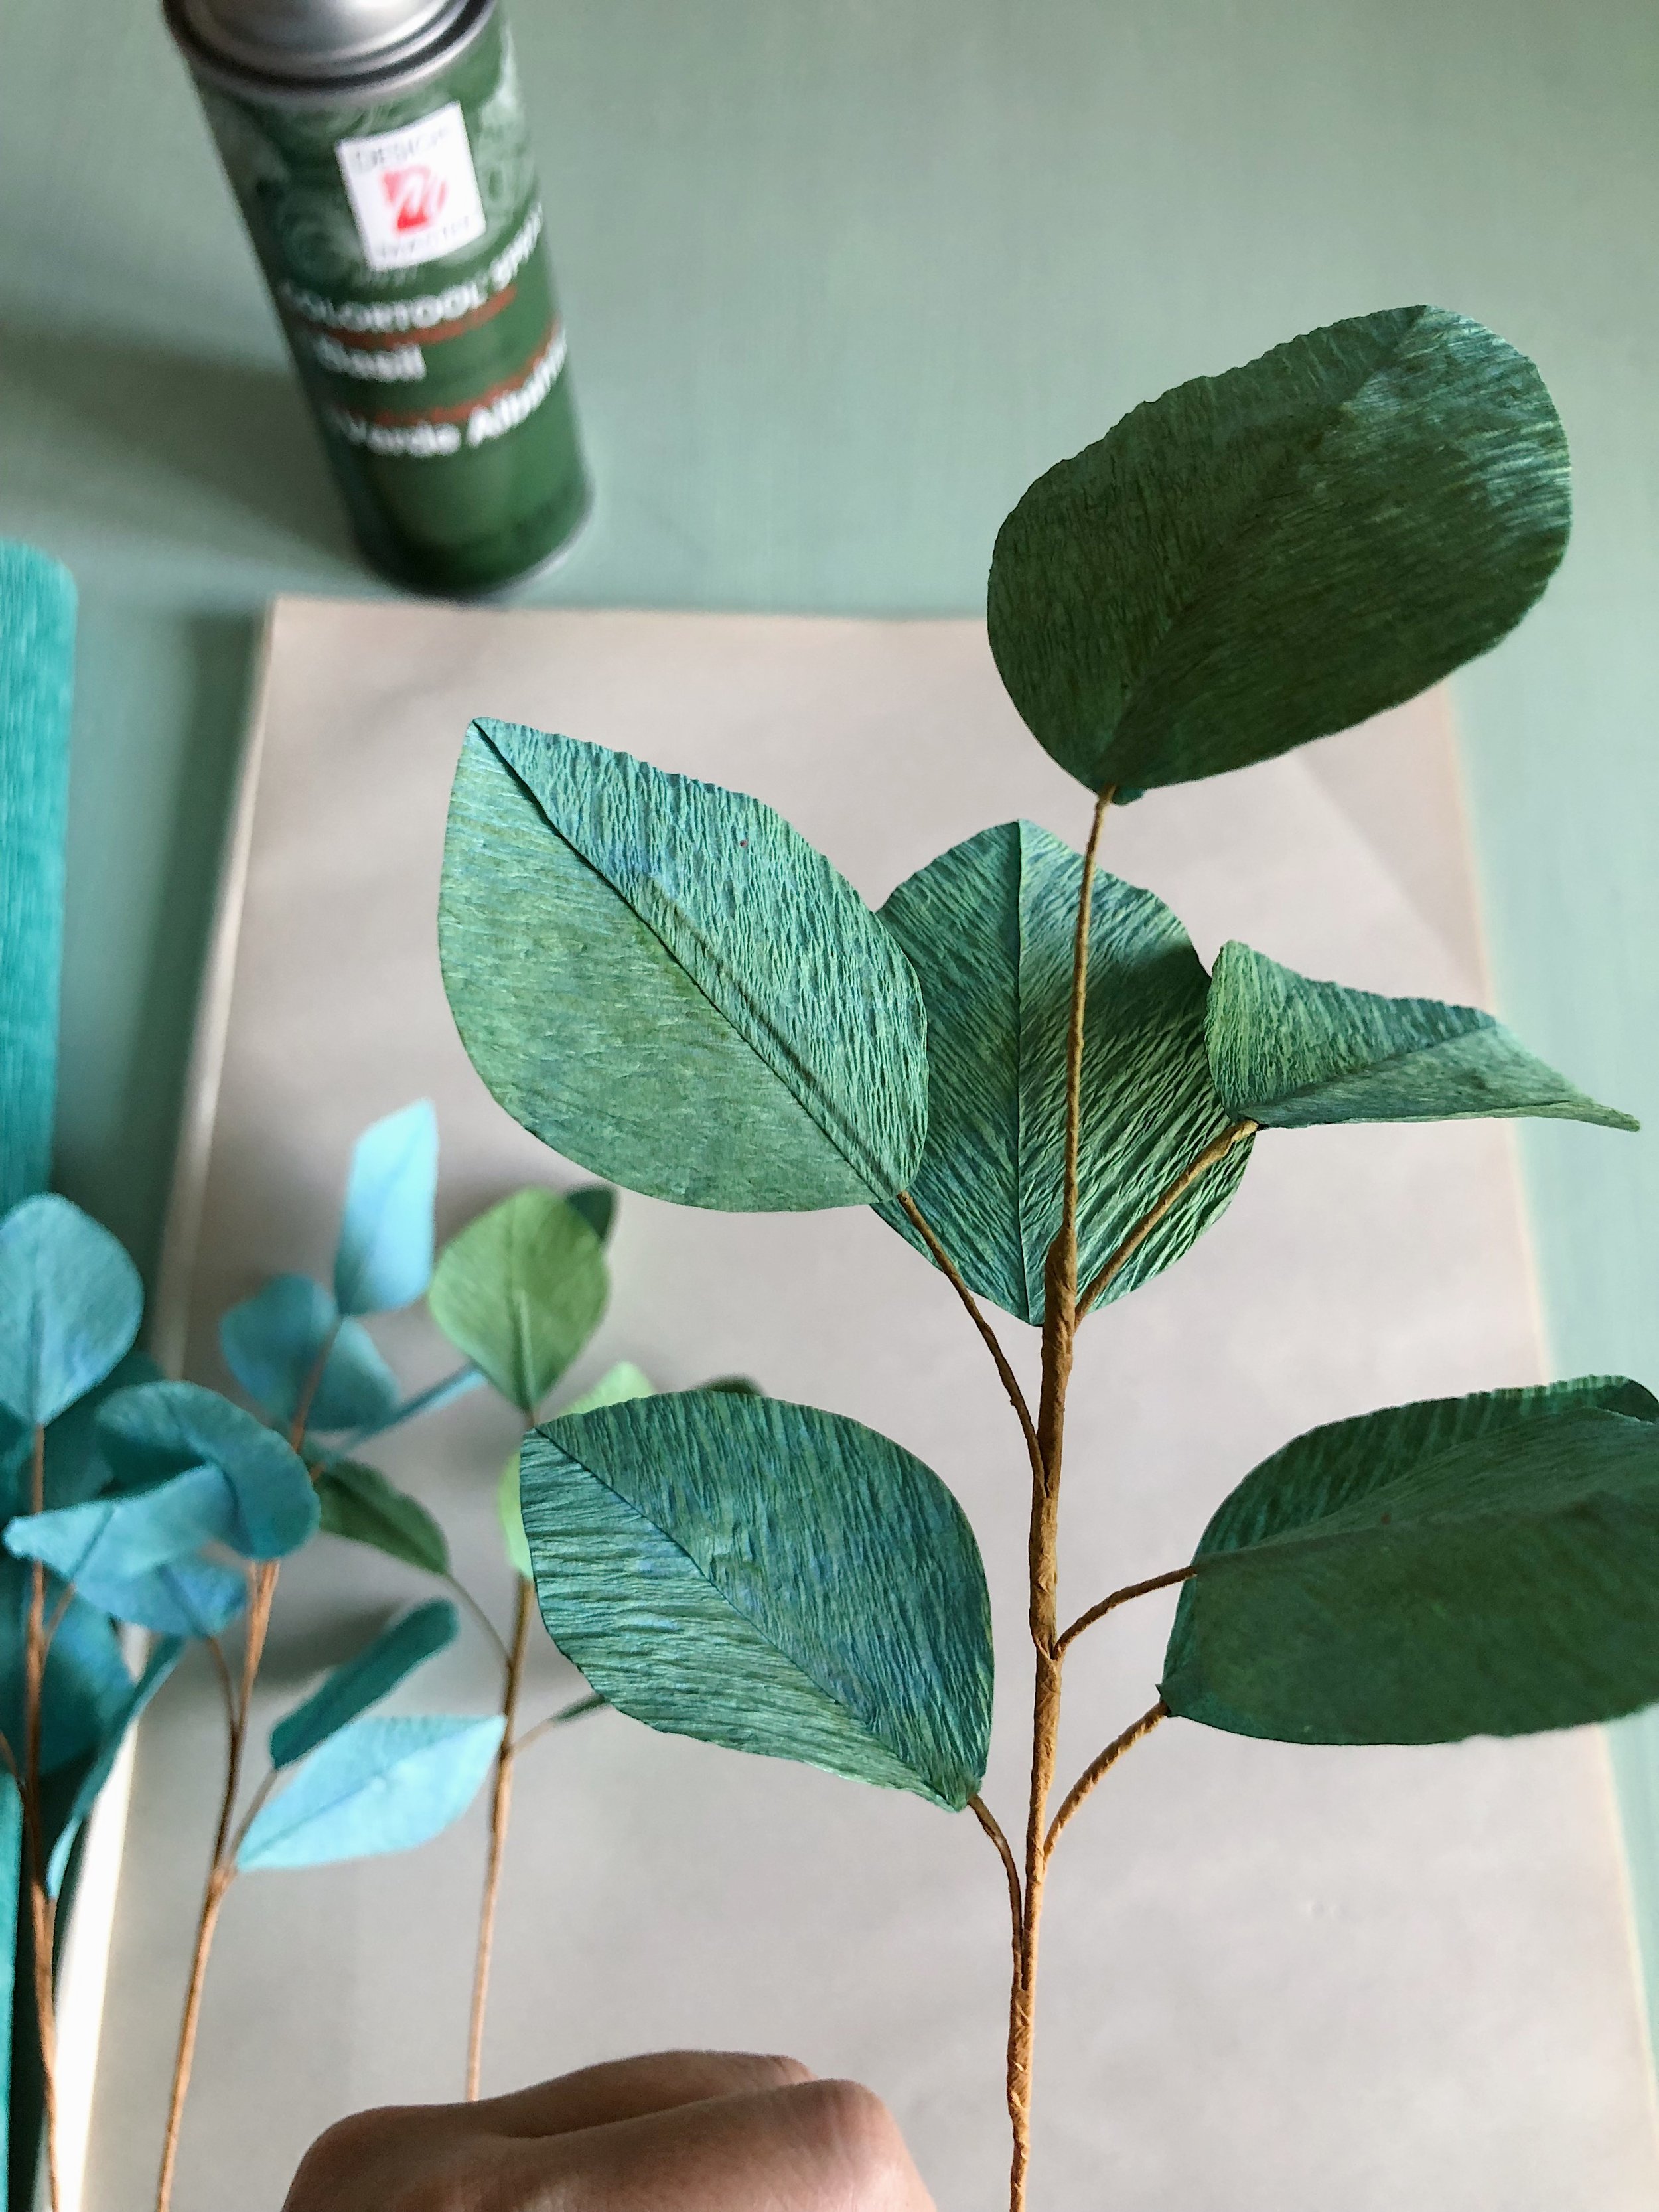
After assembly, I sprayed the leaves with Design Master Colortool in Basil. I tried to spray only the leaves by using short spurts of sprays as opposed to spraying continuously. I initially sprayed only the top side, but I found that the leaves still looked too blue so I sprayed both top and bottom sides. Next time I may try to spray the bottom side with a silver spray to mimic that gray/silver/ash colour on the underside of some of the eucalyptus leaves.
STEP THREE
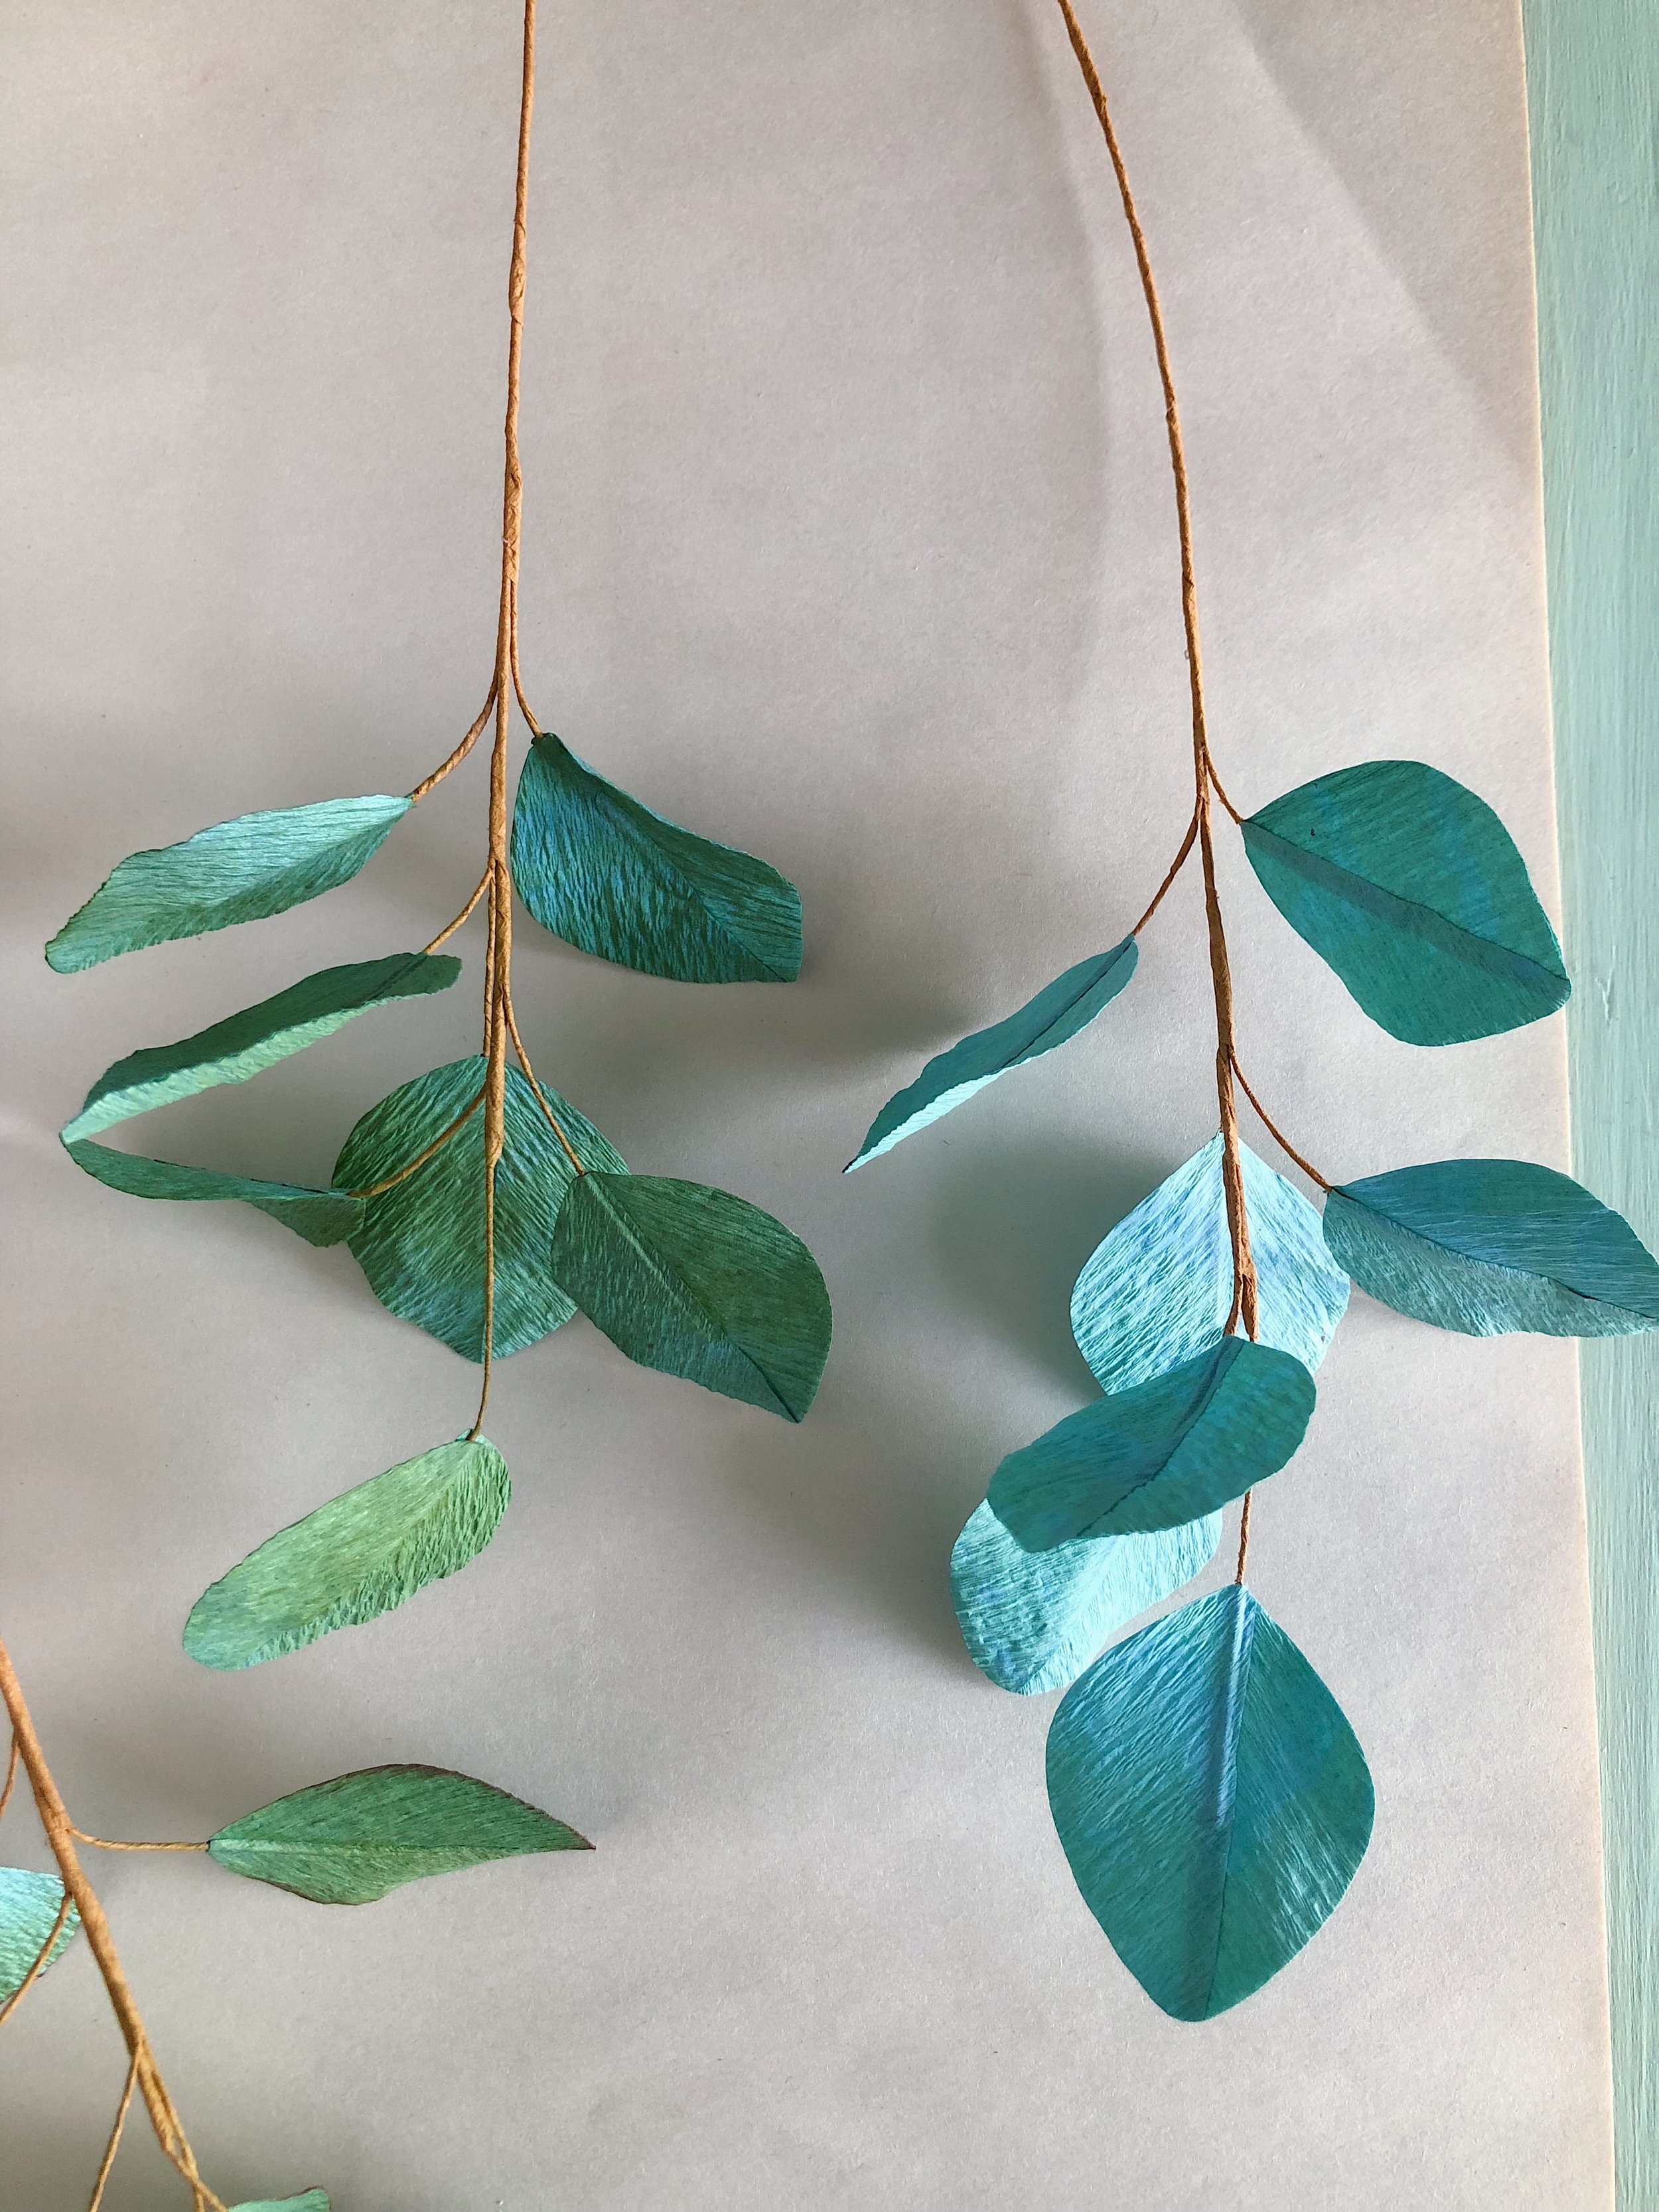
Here’s a comparison of the before and after. You can see that the Tiffany Green is quite blue. It’s a beautiful green-blue but a little too blue for my intention. However, I did not spray until the leaves were opaque with Basil. I left spots slightly lighter (but not obviously so) than other spots to let the Tiffany Green show through to create dimension and interest. I tried my best not to spray anything on the stems/branches as it would darken the Twig.
STEP FOUR
Once sprayed and dried, I added additional details to the edges of the leaves using Pan Pastel in Permanent Red Extra Dark (similar to a brown). It highlights the edges of each leaf so its silhouette appears more defined.
For any of you living in the GTA, you can purchase Design Master at any Michaels until they stop carrying it (sometime this year); I’ve found the line isn’t complete though. You can also purchase these sprays from floral wholesalers; I have a wholesale account with Sproule Florists Supply and they sell most of the line.
If you get a chance to try this, let me know how you like it. I think it’s a quick way to achieve the perfect blue-green colour without fuss. It would look great mixed with the technique for Eucalyptus leaves in my book, Paper Flower Art (GMC, 2019) (BUY IN HARDCOVER or IN PAPERBACK) or head to my education website, CRAFTED TO BLOOM, to find more in-depth learning.