Peaches and Cream Paper Flower Bouquet
It's been a while since I've posted on my blog, but I swear it's not because I haven't been busy (with Baby T amongst other things...)! Whenever I can, I try to fit in some paper flower-making during Baby T's naps or in the evening when my husband generously occupies Baby T's attention. It is shooting my work and/or tutorials that are the most challenging as I need a good hour or two to shoot and edit during the day and daylight escapes so quickly in December.
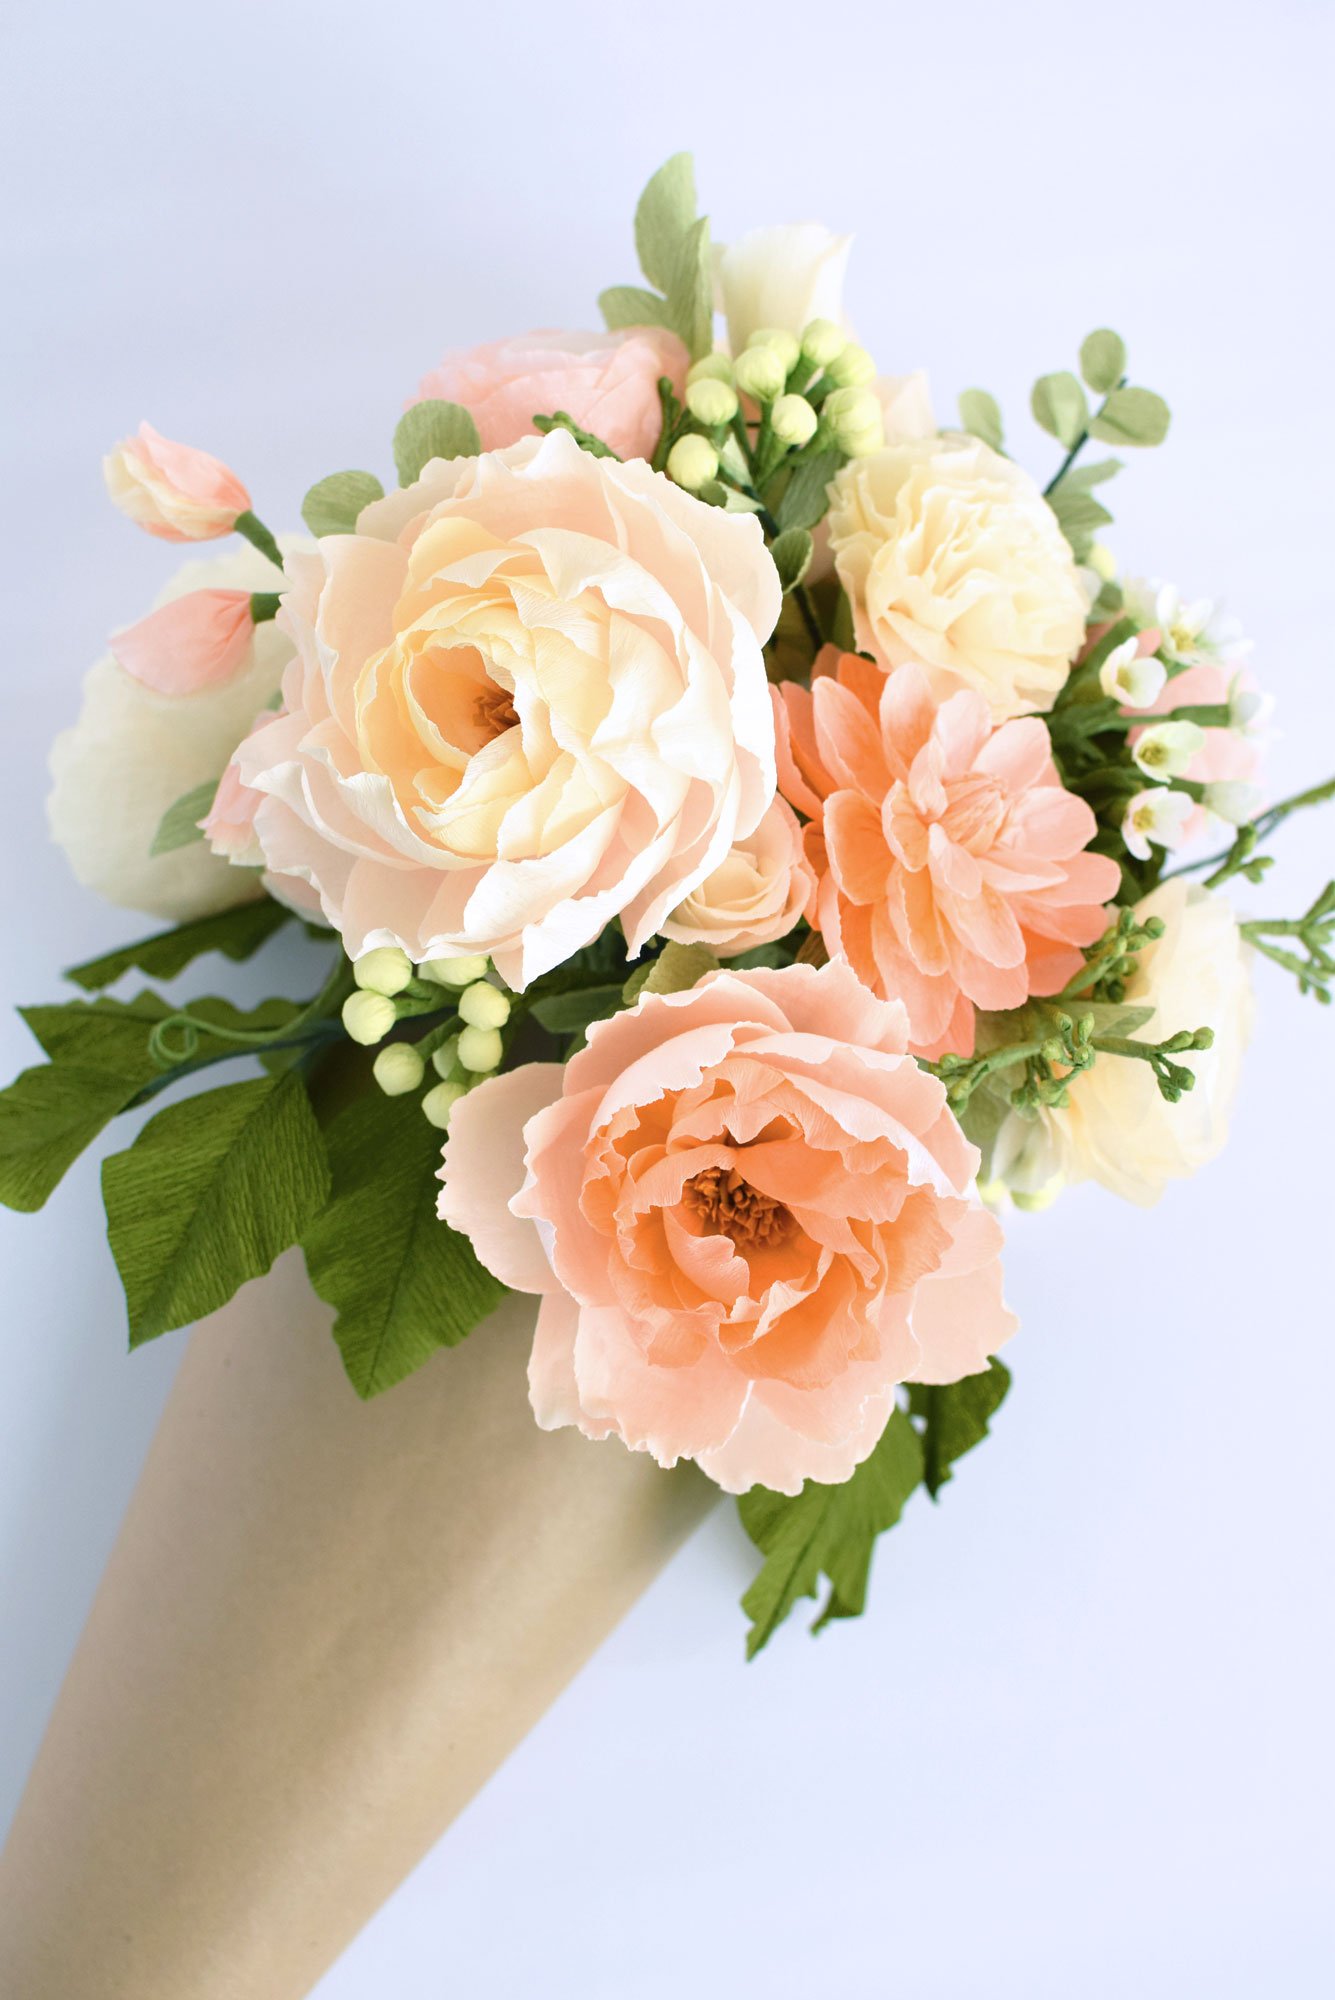
Anyhow, the purpose of this post was to explain generally how I plan my flowers for a bouquet or arrangement (like a centrepiece). Although I do not have any "real" flower arrangement experience, I have found the following formula helpful and successful.I find inspiration from colours, so the first step to any planning is deciding on the general colour of the arrangement. I usually stick to 1 to 2 or 3 focus colours, and then 1 or 2 variations of those focus colours (normally I stick to the colours next to the focus colours on the colour wheel), to maintain a cohesive piece. Then I choose the flowers for each colour. The objective is to draw the eye to different colours and shapes that would move your eye from flower to flower. For example, for this peaches and cream bouquet, I first chose peach and cream as focus colours, and then allowed for an orange (eg. the peach-orange dahlia) to compliment the peach and a white (eg. white wax flowers) to compliment the cream. A salmon pink ranunculus is used to add warmth. Various green-coloured foliage is used as a backdrop from which these colours would pop. Variation in the colour (and shape) of the foliage creates depth and keeps the eye moving.
One trick that works wonders and really ties the arrangement together is to have a flower that combines both focus colours (or better yet, all 3 focus colours if you are using 3 focus colours). In fact, you might have started with a flower that has more than one colour, like a 2-toned carnation, and use those 2 or more colours as jumping points to determine what the other flower colours should be.
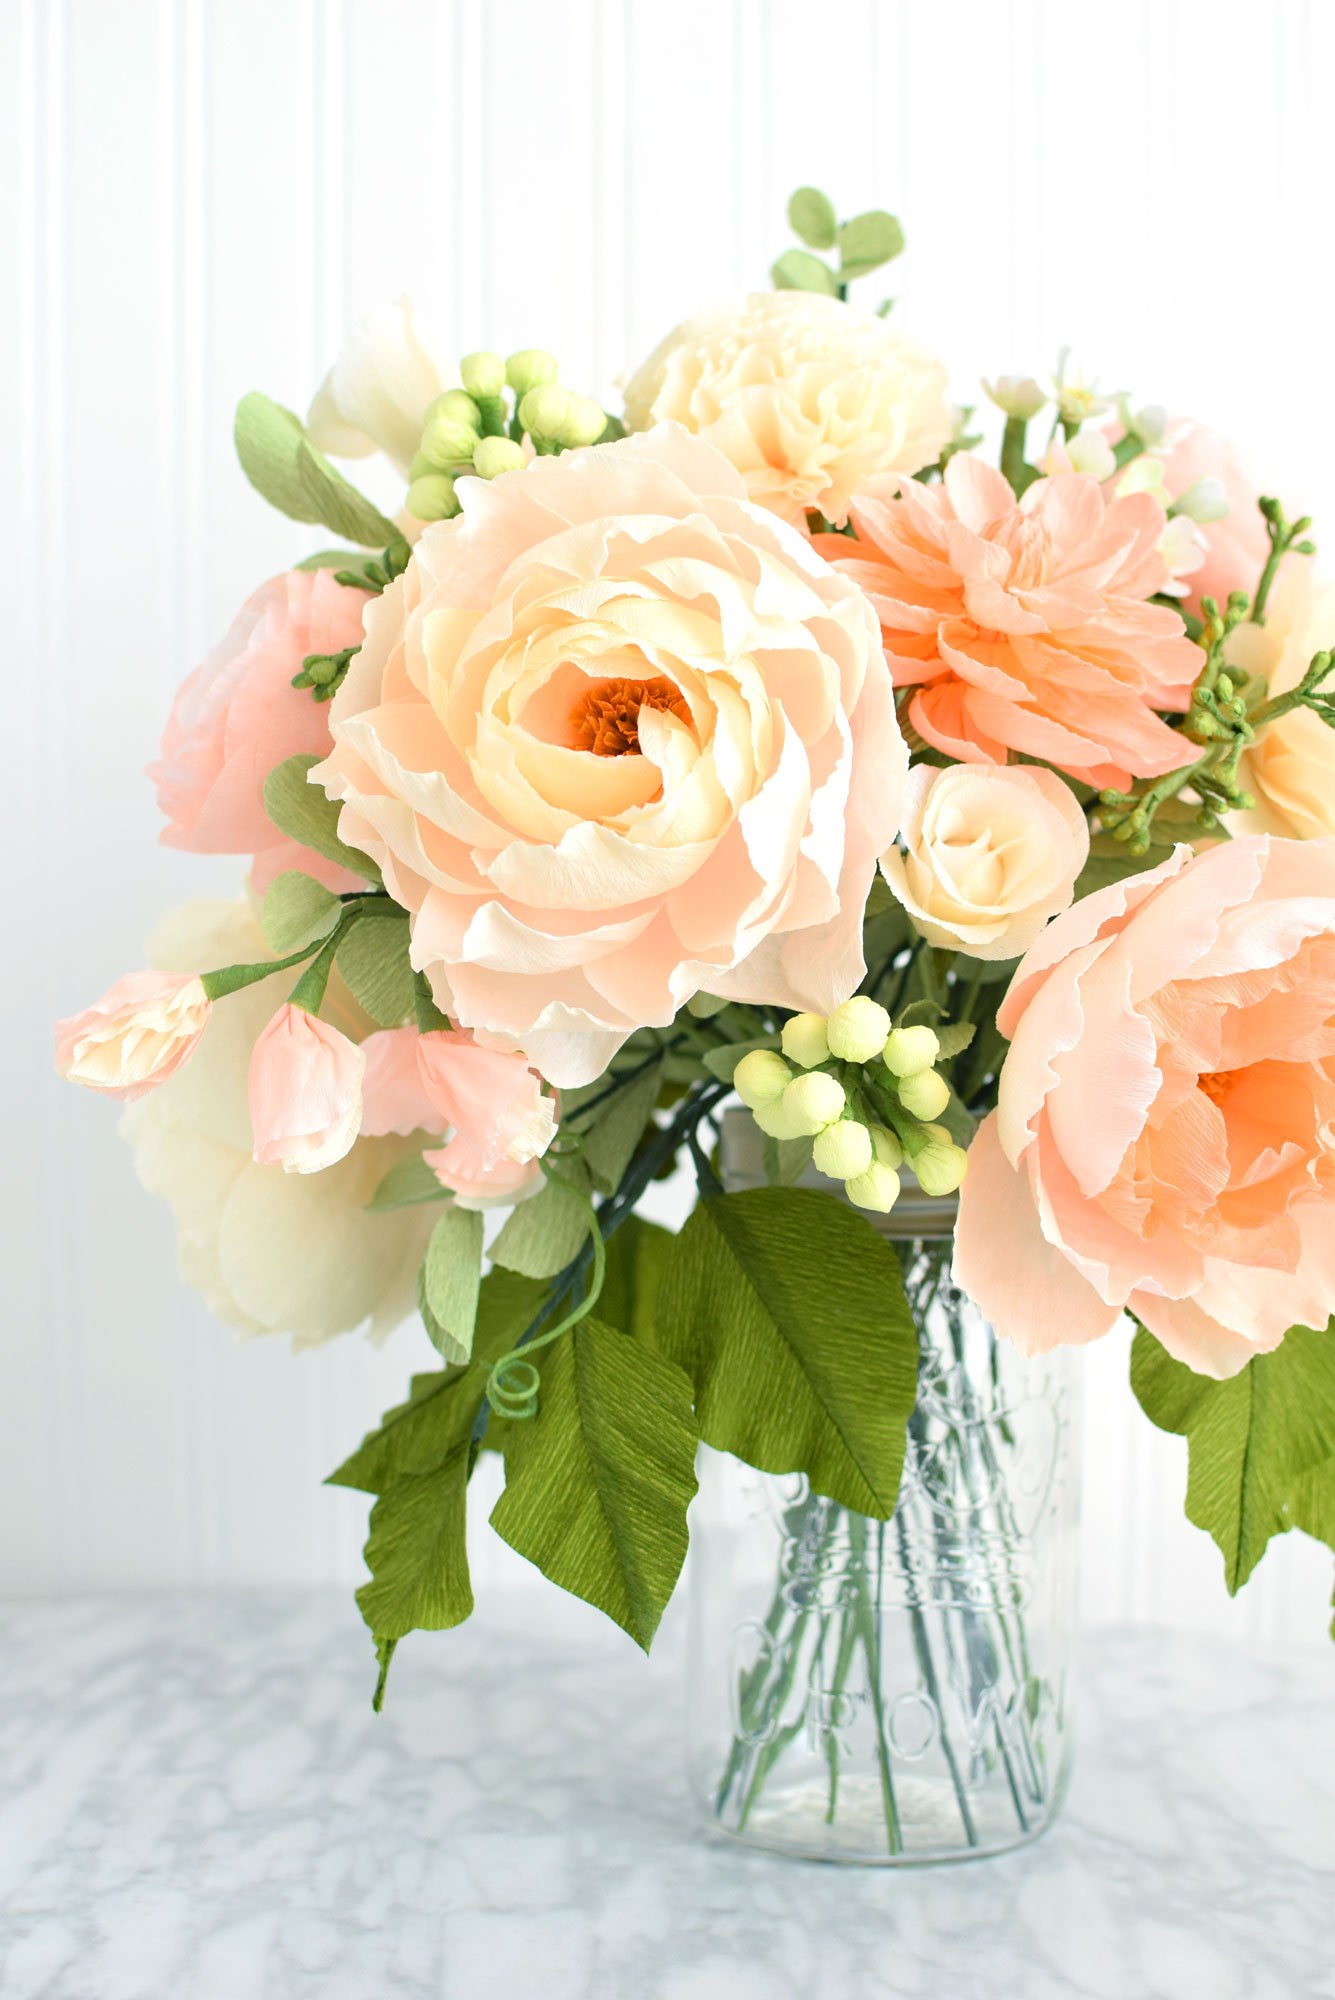
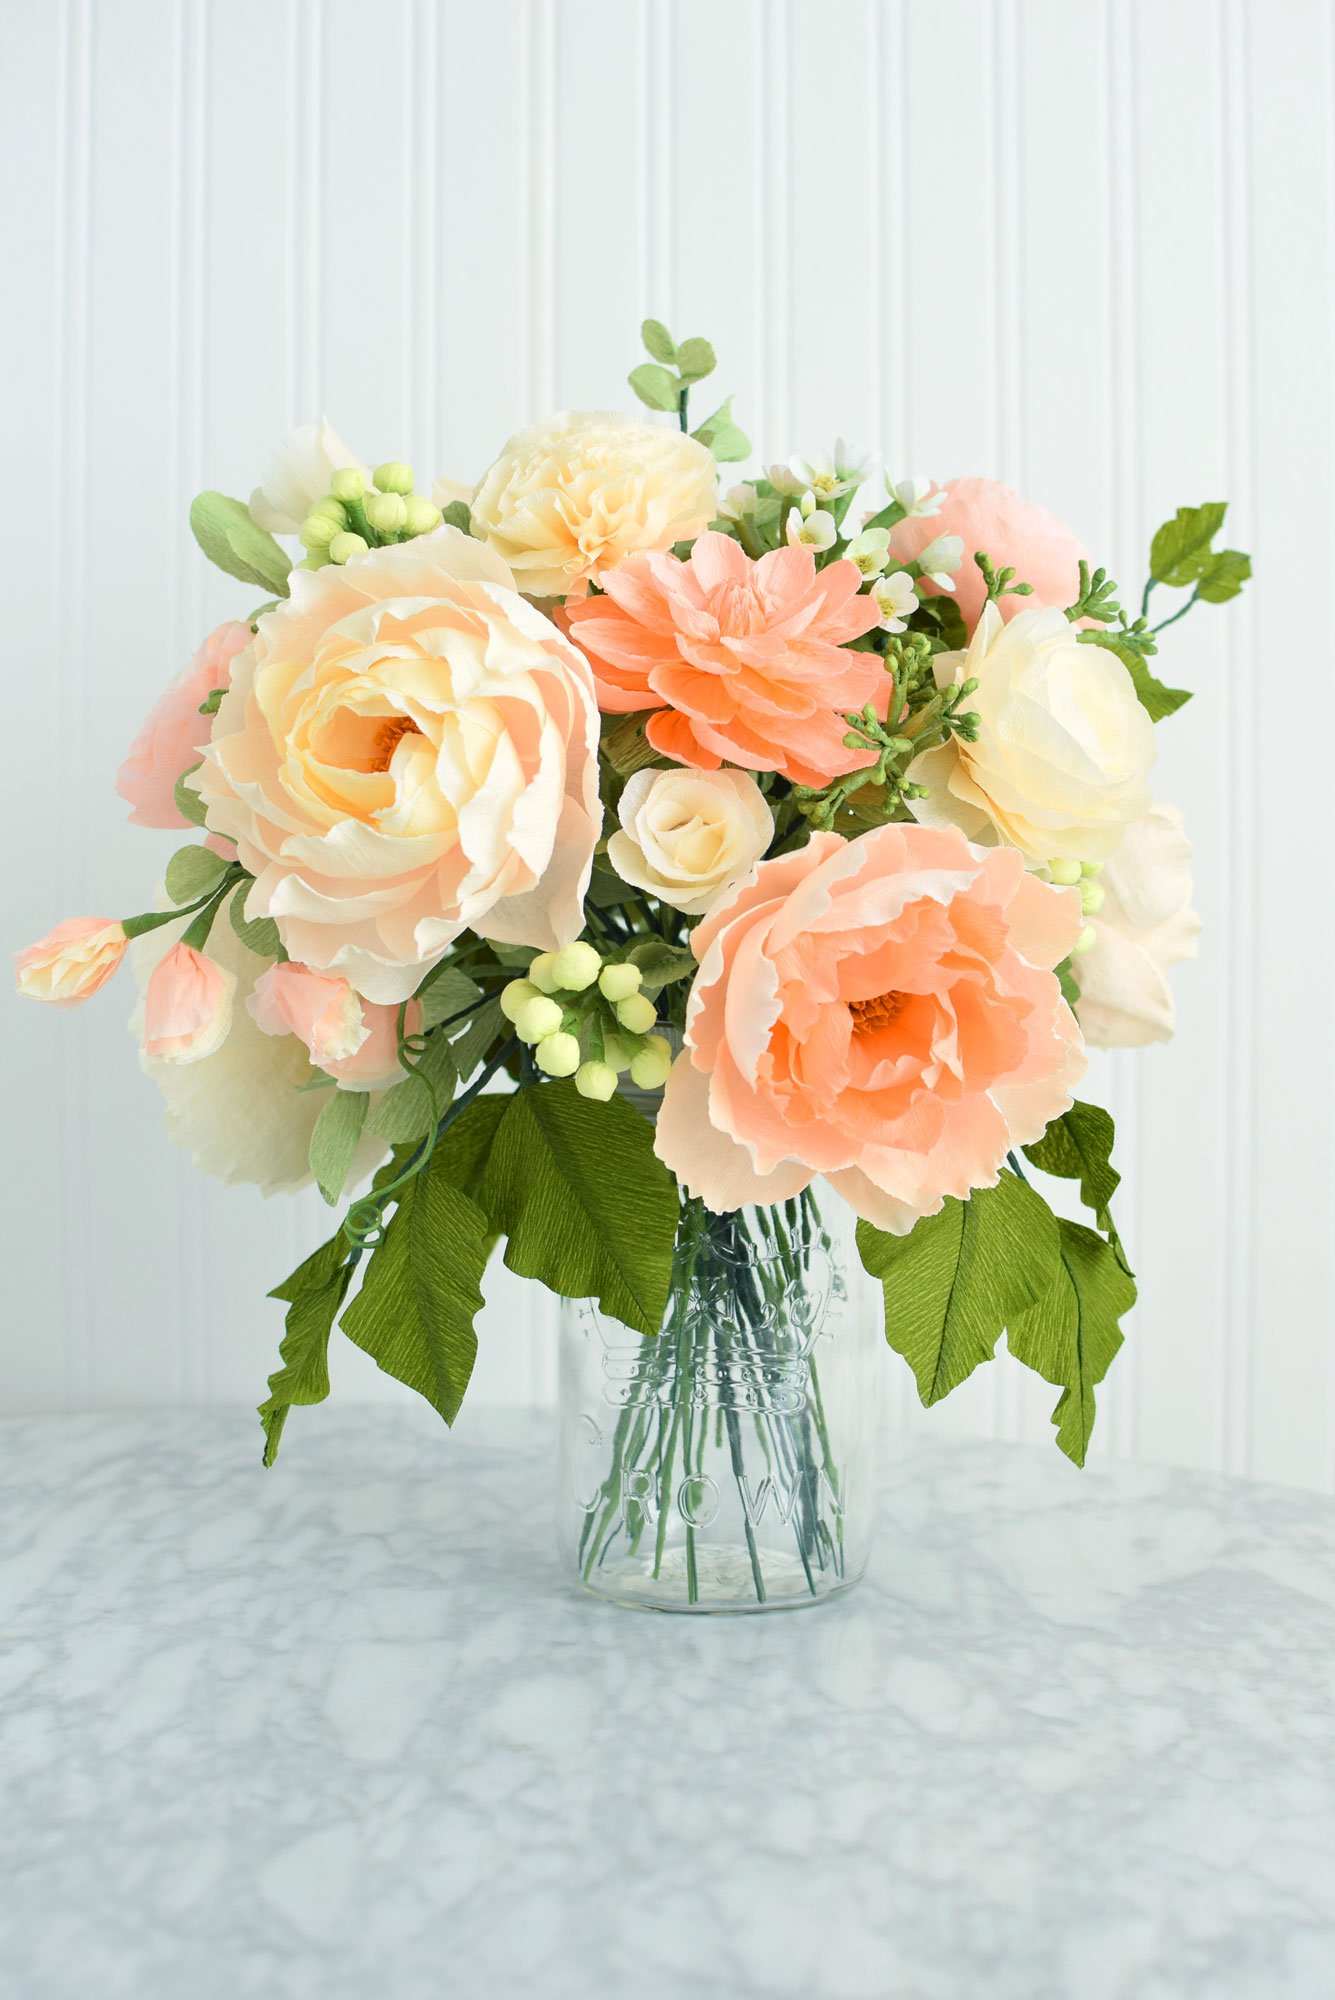
This formula can be used on almost every single arrangement, particularly for larger arrangements. I find that smaller arrangements of 2-4 flowers do not require as much colour harmony because the eye will not be overwhelmed by variety in colour, tone, or shape etc. It is in larger arrangements that this formula is very useful as it create cohesion to the eye.I also love to play with direction and that is for another post. This peaches and cream bouquet employs some of this technique, however, there are other arrangements that demonstrate this better. As I said...this is for a different post.When I put together a paper flower bouquet, I actually like to use a large mason jar to arrange all the flowers and foliage first, prior to gathering and then tying the stems all together (like in the photos above).
I also suggest using a lazy susan when you put your arrangement together so that you can easily see it from all angles. Sometimes looking at an arrangement for too long normalizes that perspective, so it can be helpful to look at it from a different angle using a mirror. Looking at the arrangement through a mirror may give you a different visual perspective of the arrangement, thereby highlighting bits and pieces that may look out of place and that need to be re-arranged.Remember, paper flower arrangement is not a science. Do what feels right to you and the results will reflect your style =).I've got another post up my sleeve (in fact, I've been working on it for a while now, but it's taken me forever to finish!!) which I'll post shortly. It's another update post that I hope will inspire you to make paper flowers.In the meantime, I hope that this particular post inspires you to create your own bouquet or arrangement.
Happy Tuesday!