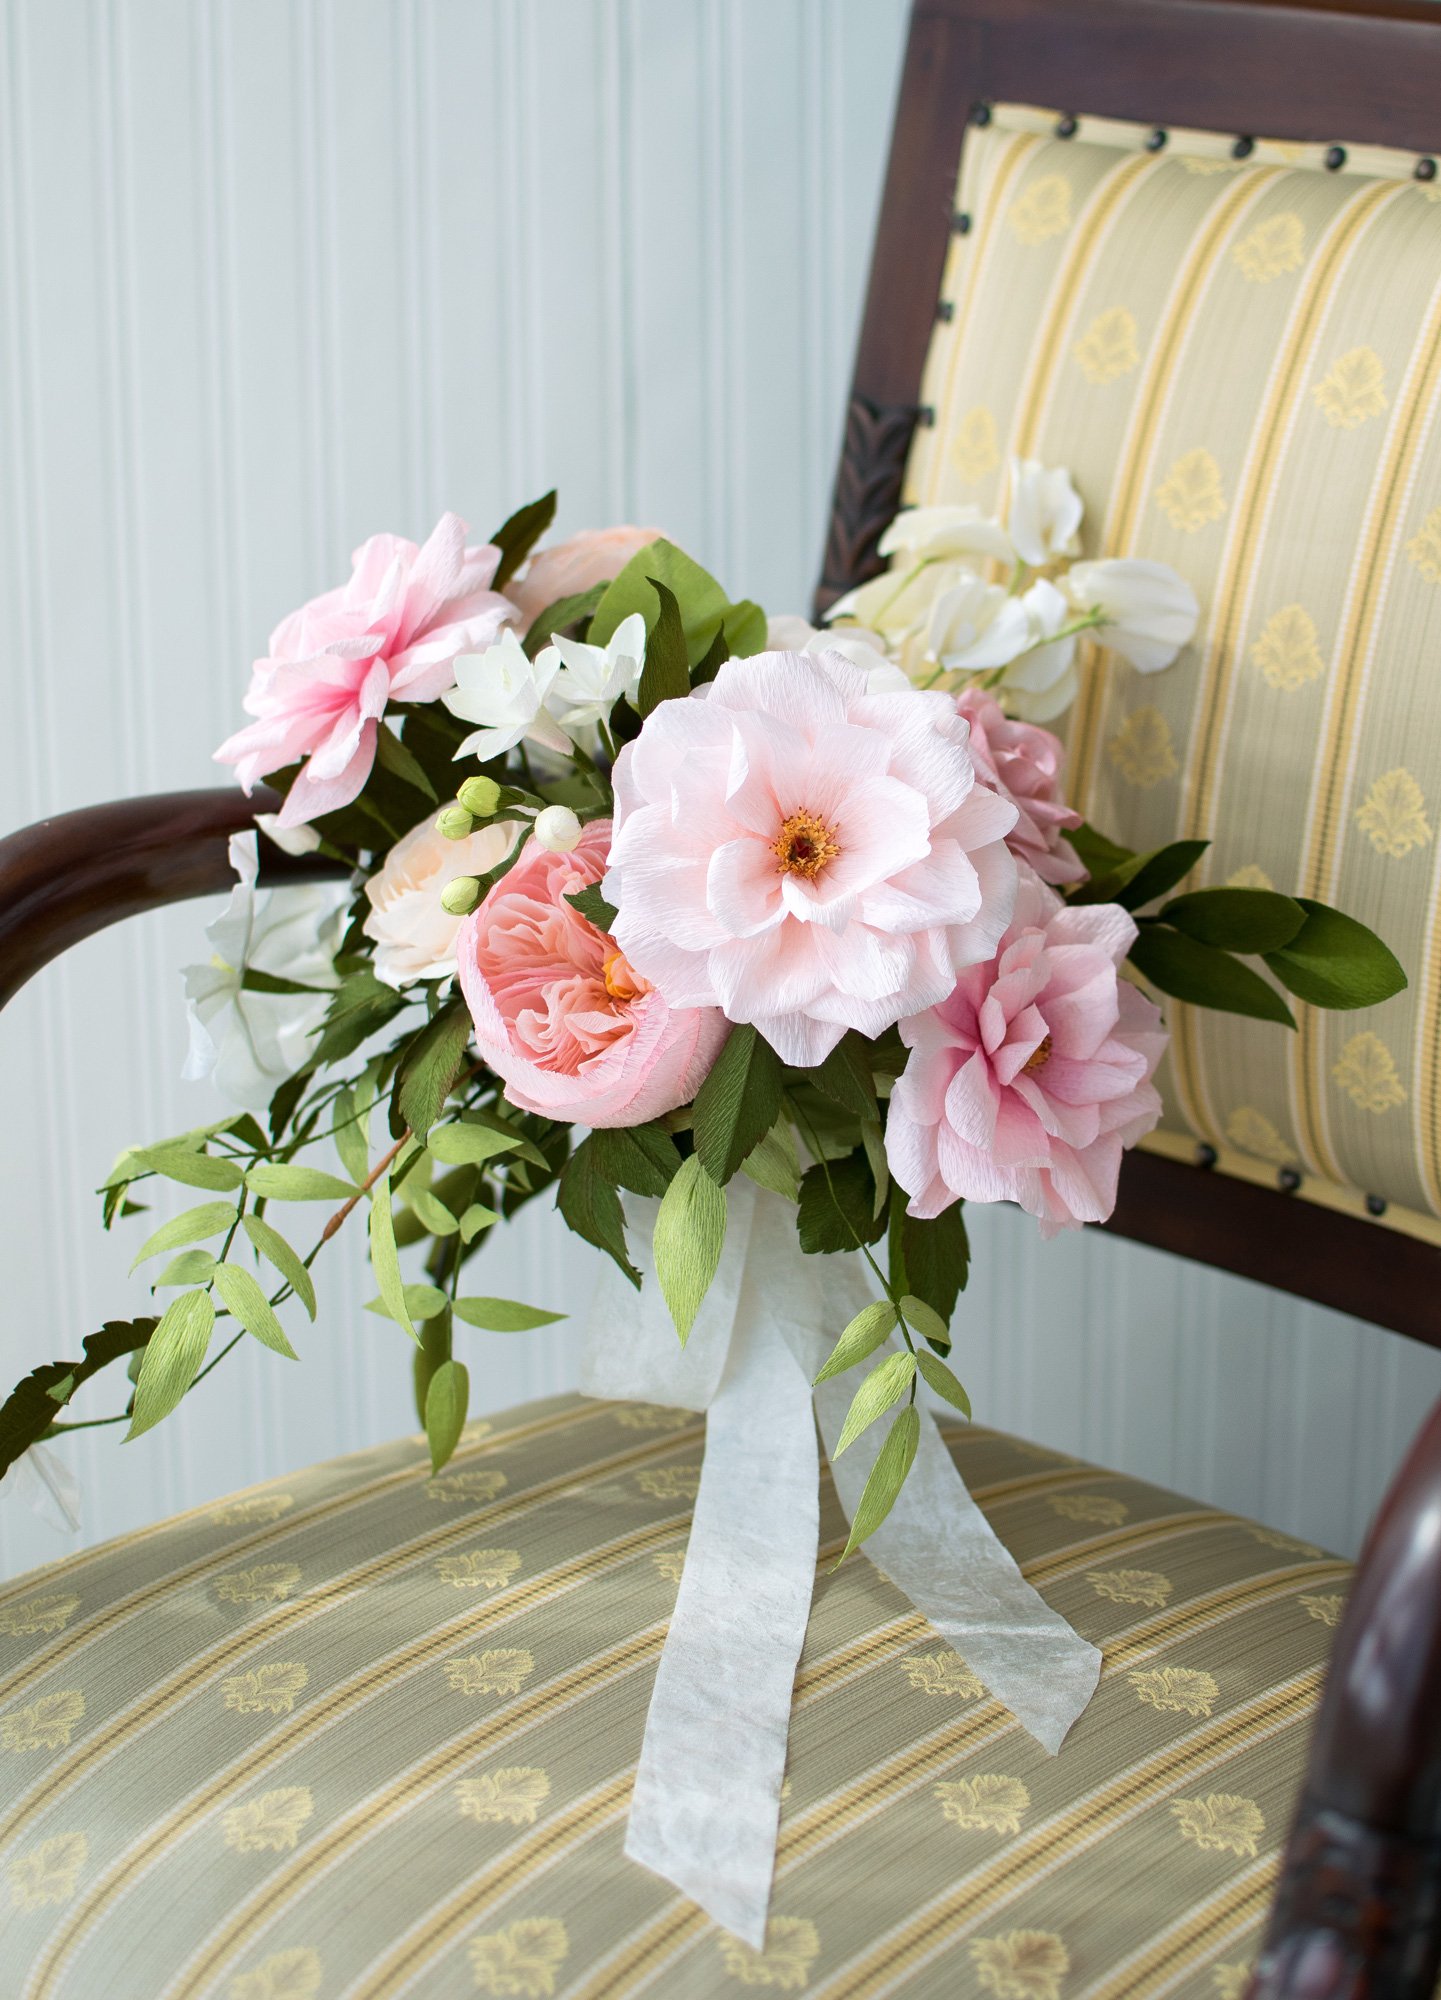
Pink Blush Crepe Paper Bouquet
It's been a week since I packed and shipped this pink blush crepe paper bouquet out to Marilyn.When Marilyn first approached me about the possibility of me making her a crepe paper bouquet for her wedding vow renewals in August, my availability had just opened up. Originally, I had been in discussions to make bouquets for a friend for her wedding in August, but shortly before I left for New York, she had changed her mind and decided not to proceed with what we had discussed. I was a bit disappointed as I had been excited to make the bouquet we had talked about, but at the same time, relieved that she told me before I put anymore effort into it. In hindsight, what at the time was a disappointment was in a way a blessing in disguise. If I had ended up making my friend's bouquets, I would have had to turn Marilyn's request down. Funny how life works out.
Today, I could not imagine myself having not made Marilyn's pink blush crepe paper bouquet. The process has taught me so many things.I have come to realize that Marilyn is my ideal client. She loves my work and style and therefore, fully trusts me to make her a bouquet that she will love. She appreciates the art of paper flowers so I know that she will cherish her bouquet forever. She herself makes paper flowers so she understands the labour-intensiveness of the art and how that is reflected in the cost. And most importantly, she is a generous and kind soul.
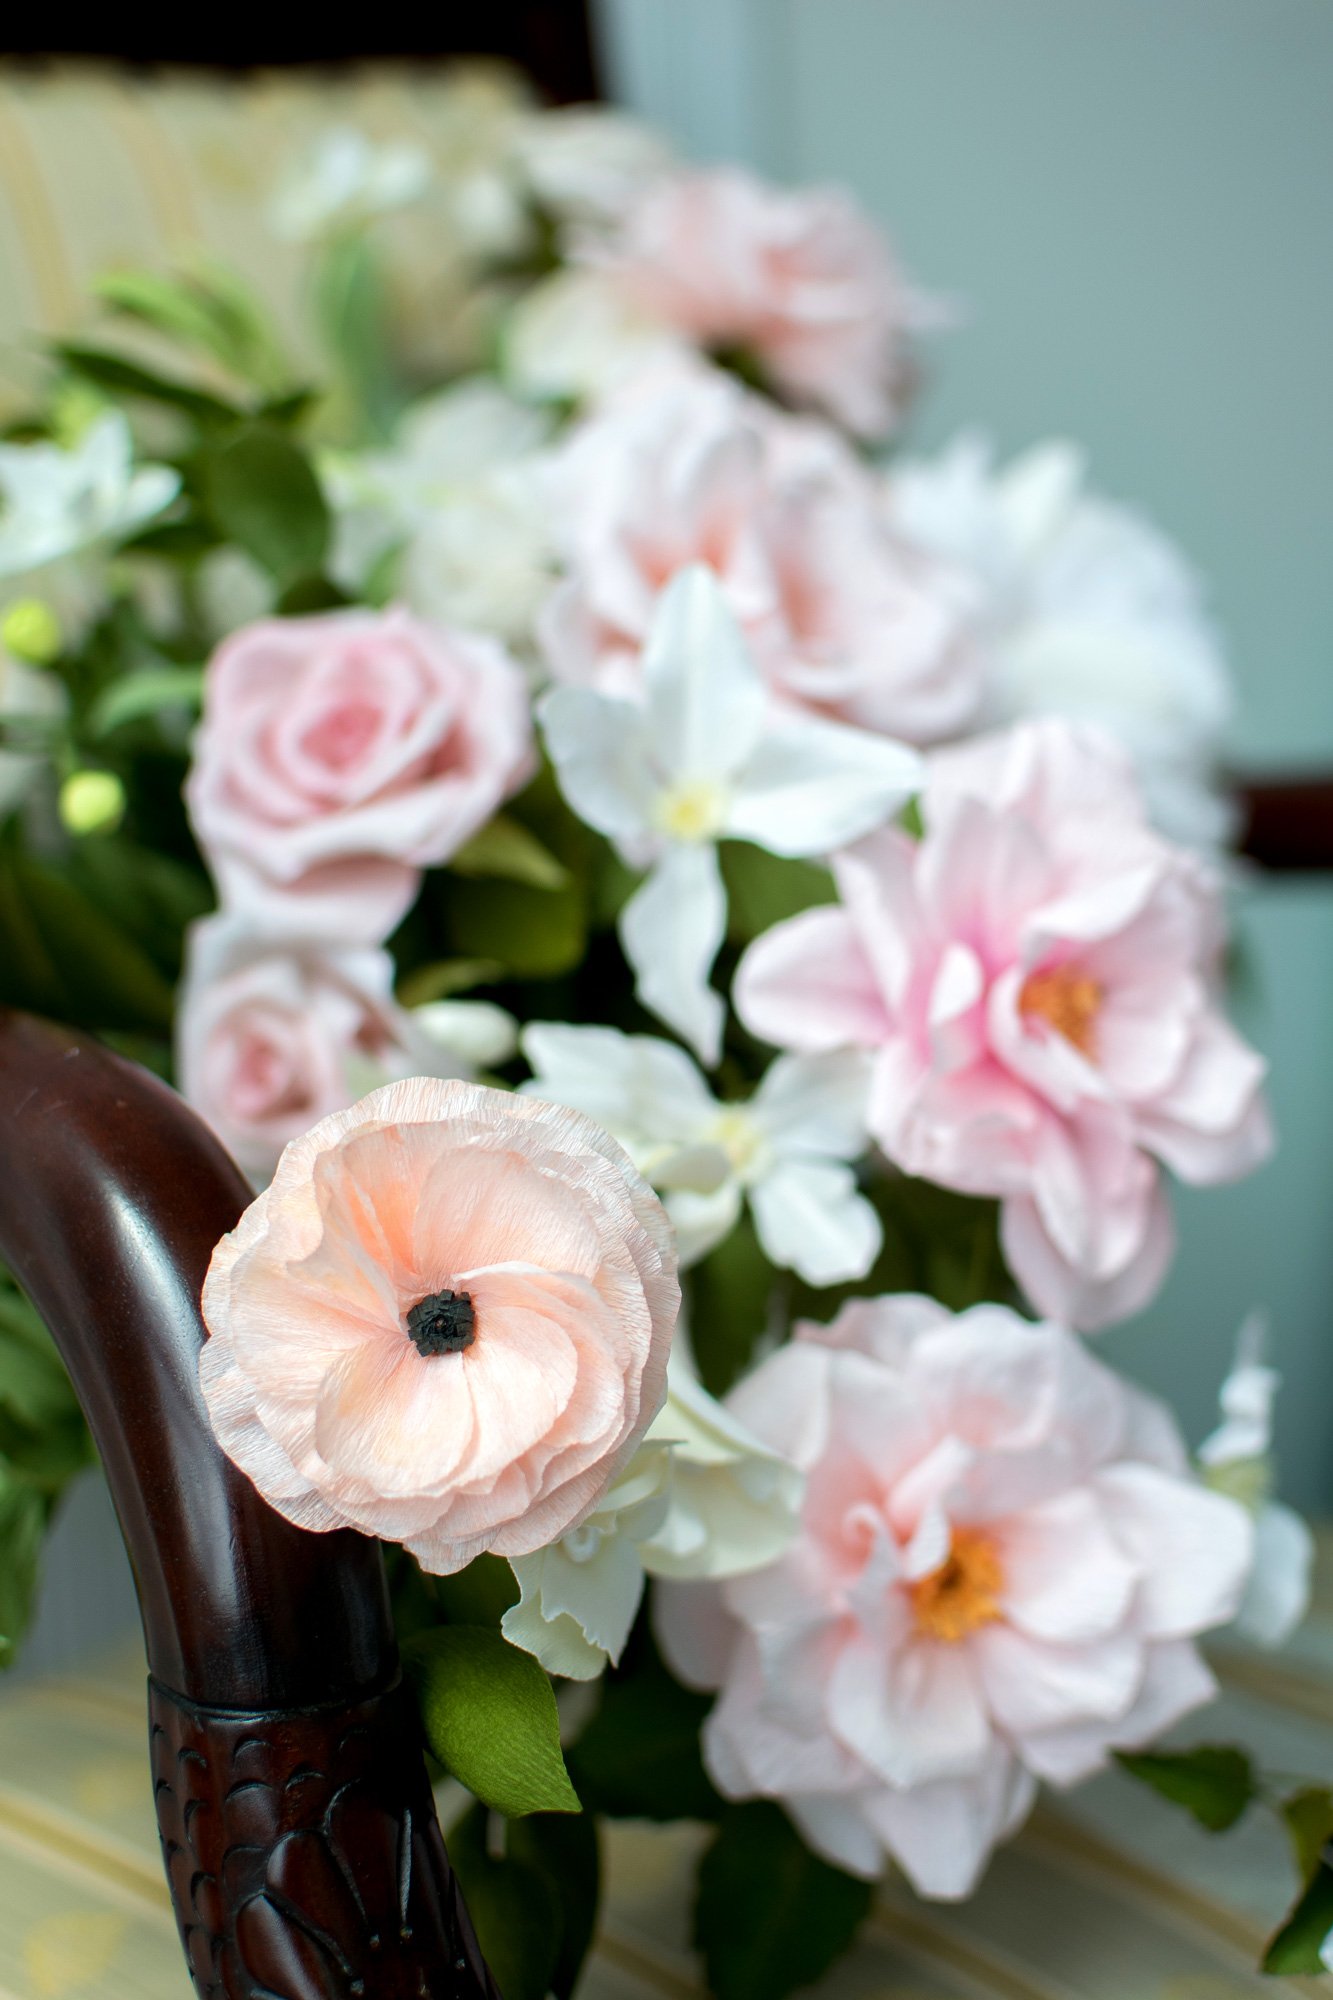
Also through the process, I've been able to push myself to work with forms that I had previously admired from afar. I made paper flowers that I had not made before, for example, the wild roses, or with paper flowers that I have since improved upon, like the sweet peas and spray roses. I used colours that I hadn't used before, like the english rose fine crepe which has a dusty tone to it.There were a few times during the process that I doubted myself and thought that the colours would never work. I made a bunch of cafe au lait dahlias thinking I would use at least one or two as focus flowers, and then decided they didn't fit. I even made ferns which didn't make it to the final cut. I pushed on and slowly, everything came together as I had envisioned it.
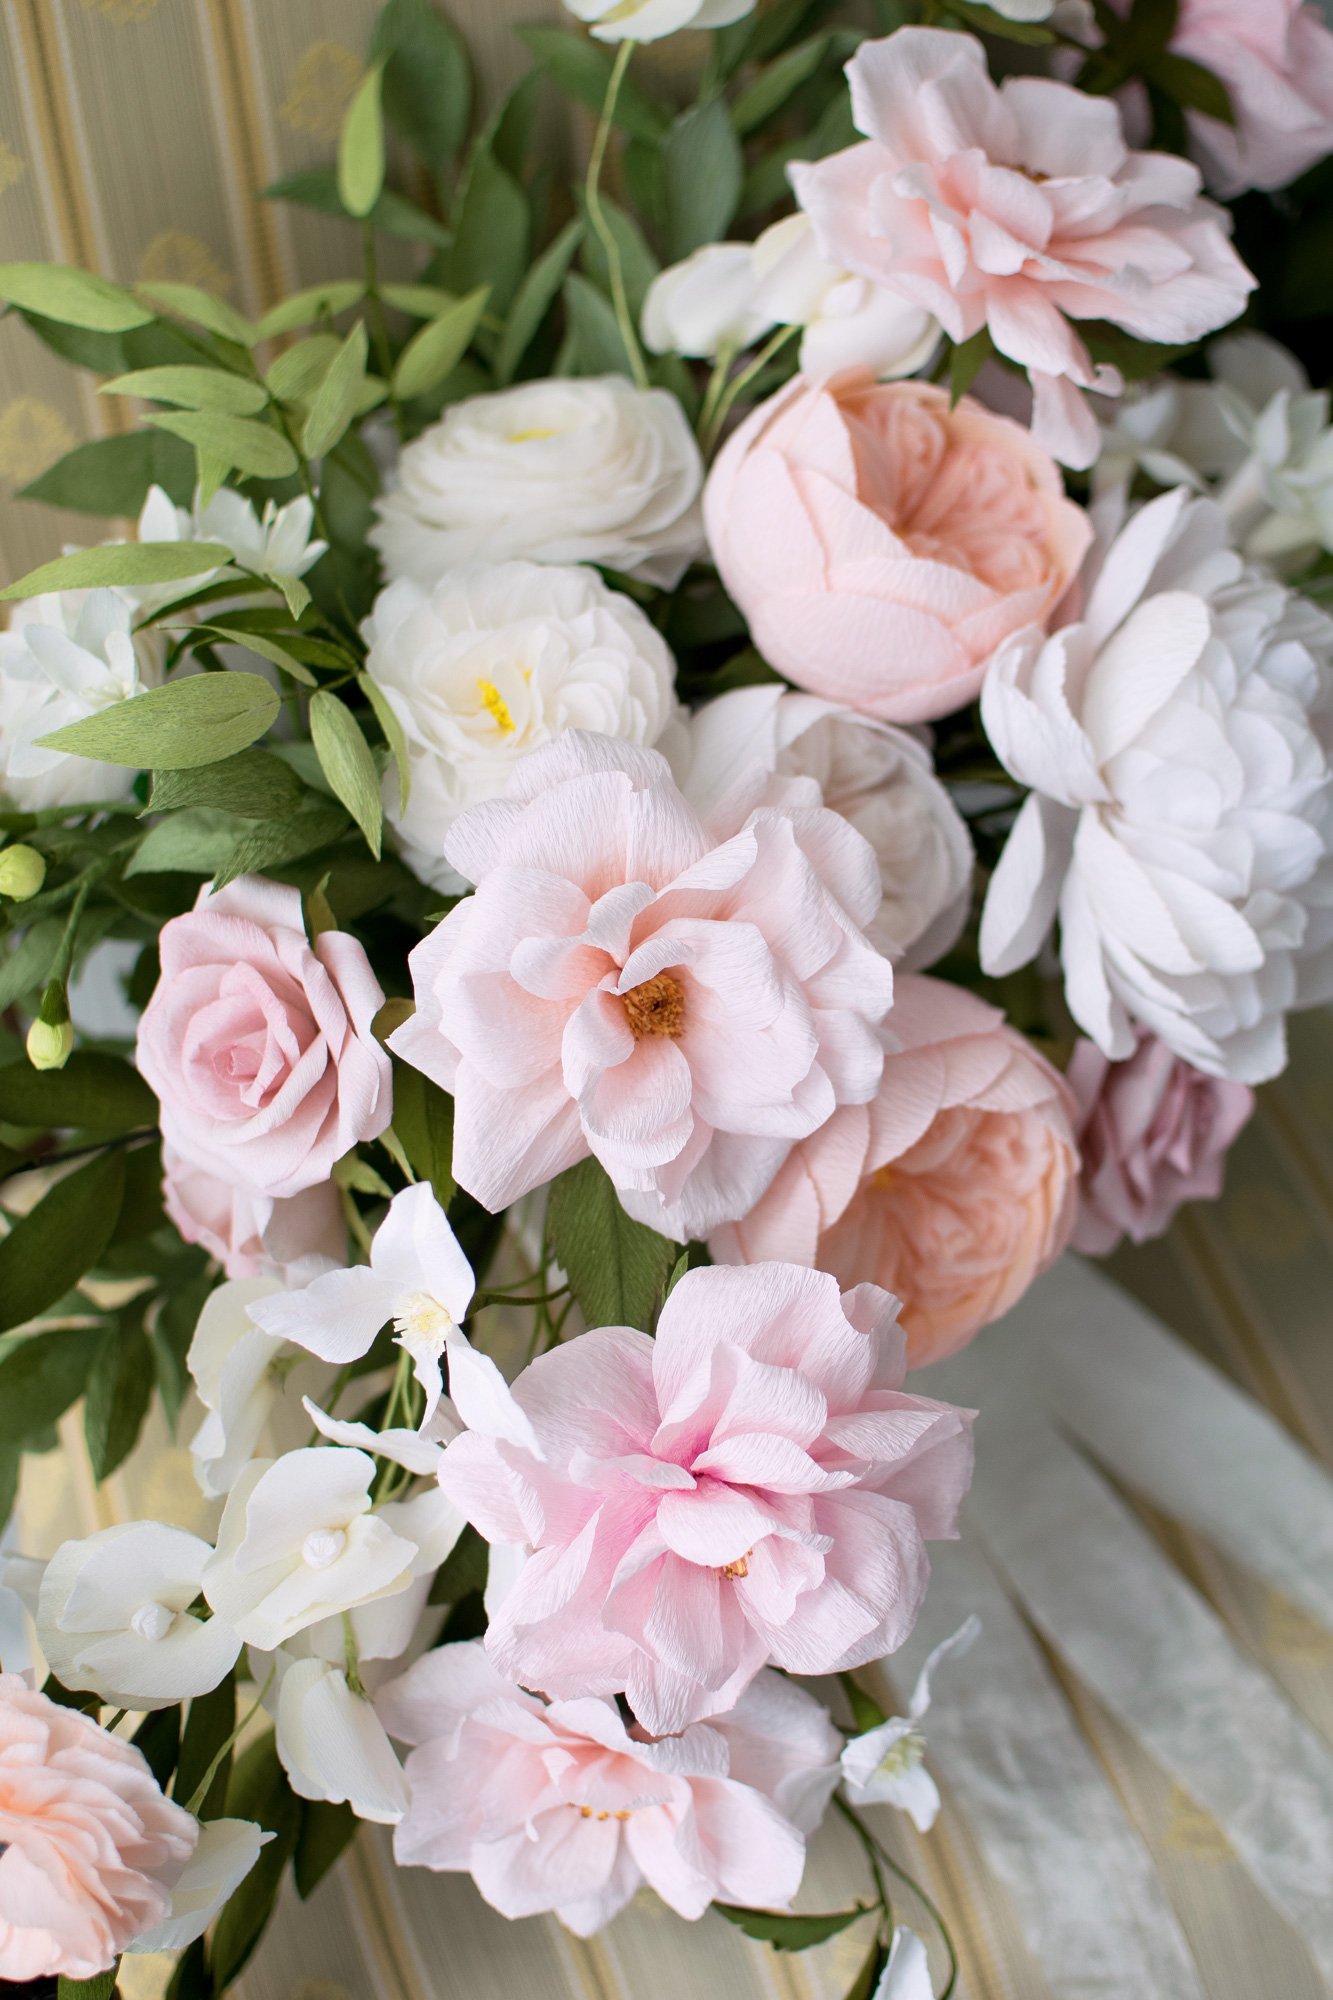
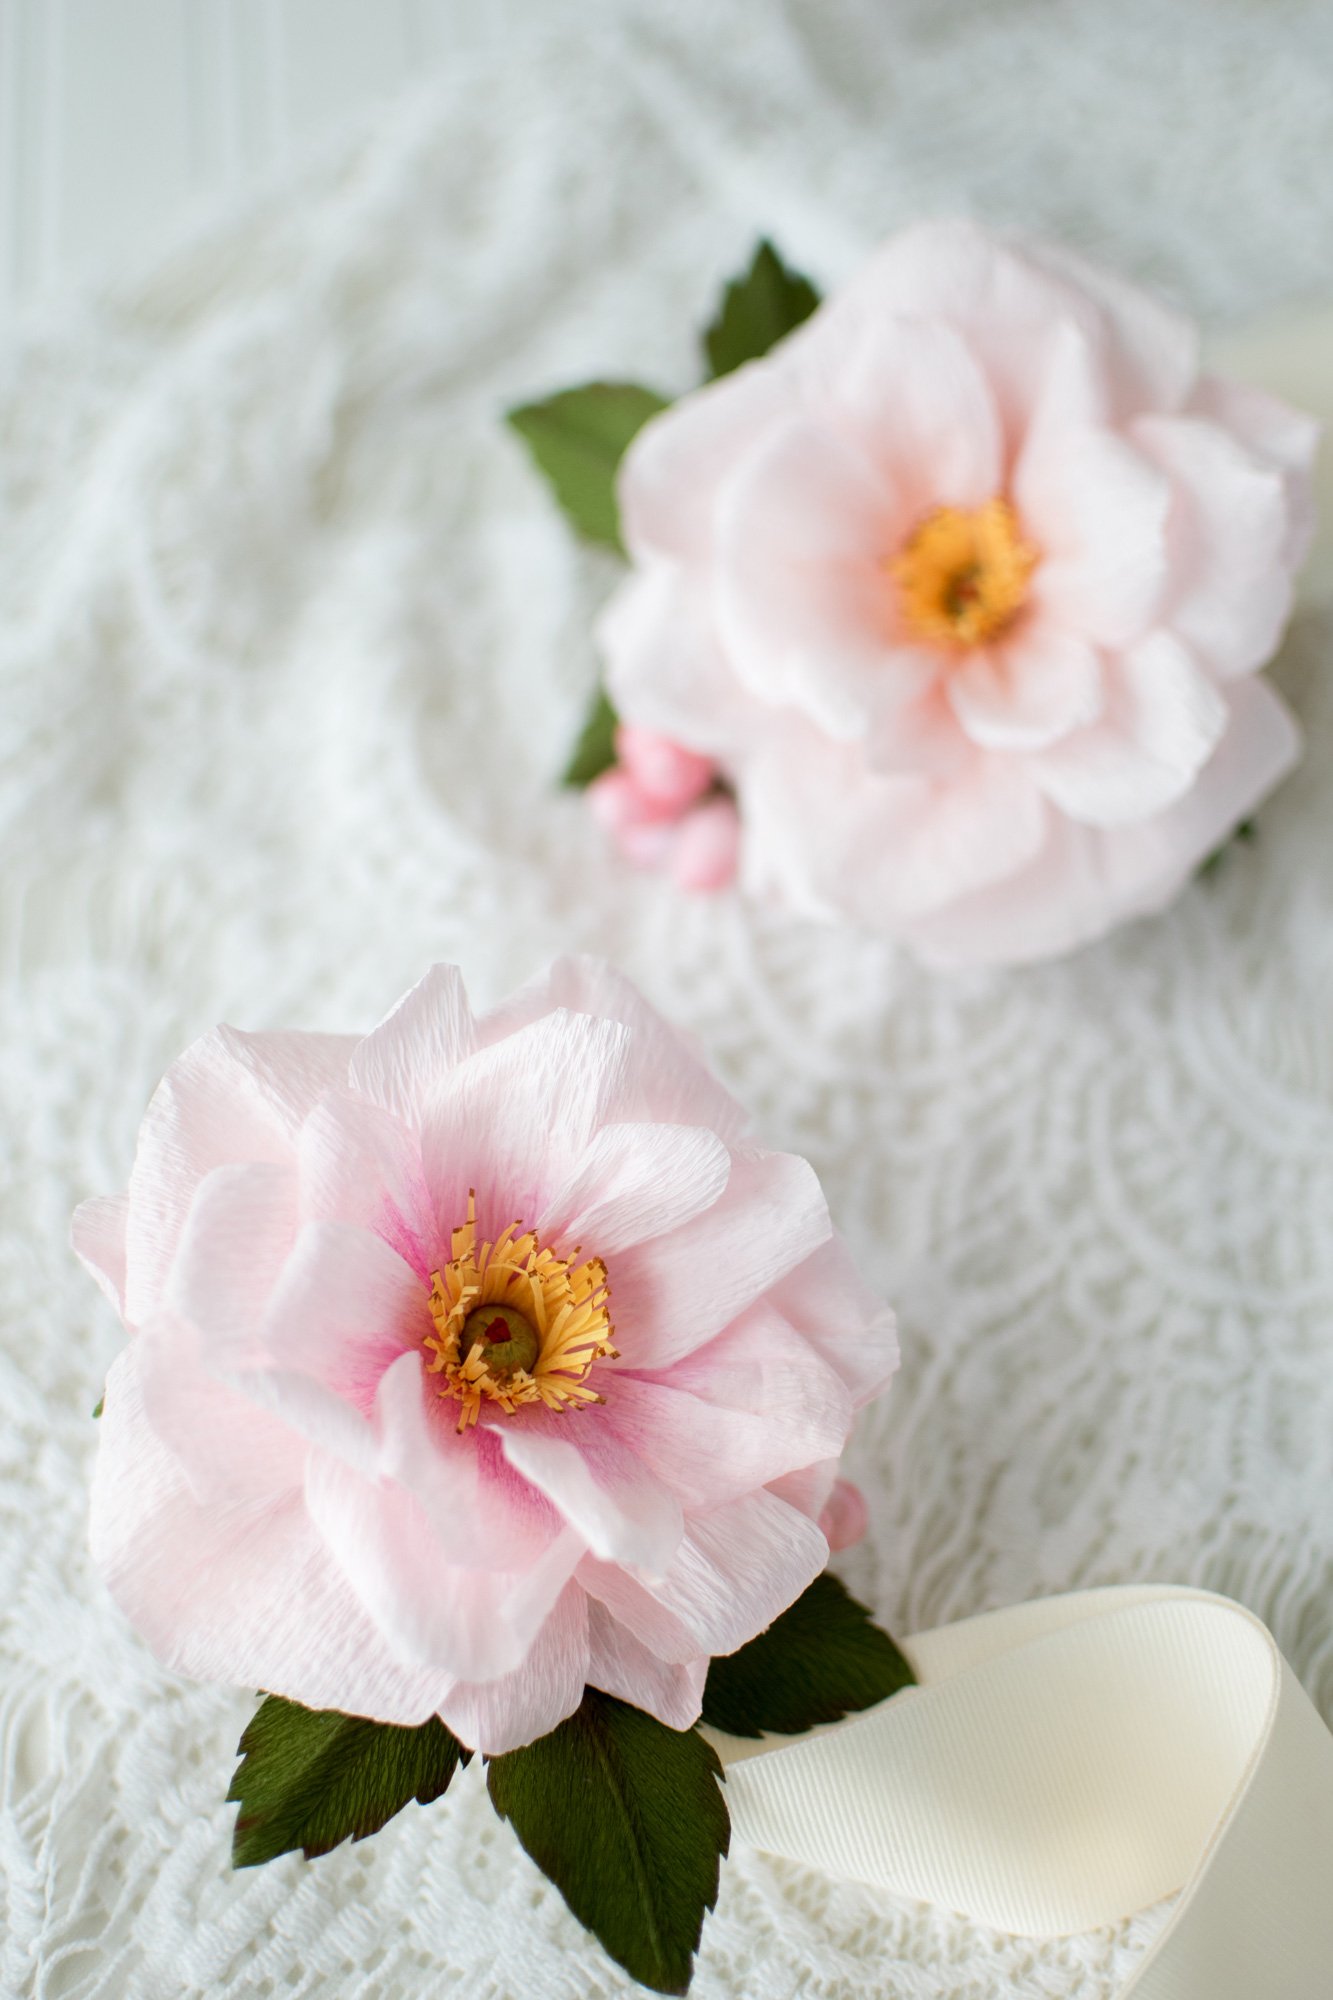
Some of you have asked me about my process for this pink blush crepe paper bouquet. I started with a vague idea of the colour scheme being blush and pink. The actual colours within the scheme is always determined by the colours of my crepe paper, and none of my crepe paper came in blush or in the various pinks that I wanted, so I had to be creative.I used white and off-white crepe paper and paint on the light pinks to get a light pink glow in the blush peonies. I did something similar for the blush garden roses, except I used petals cut from white crepe partially dyed with pink food colouring, and alternated those petals with white and off-white coloured petals. To ensure the peony kept its shape, I used both 60 grams and fine crepe for the centre petals, and relied on the 180 grams crepe paper for the outer petals.
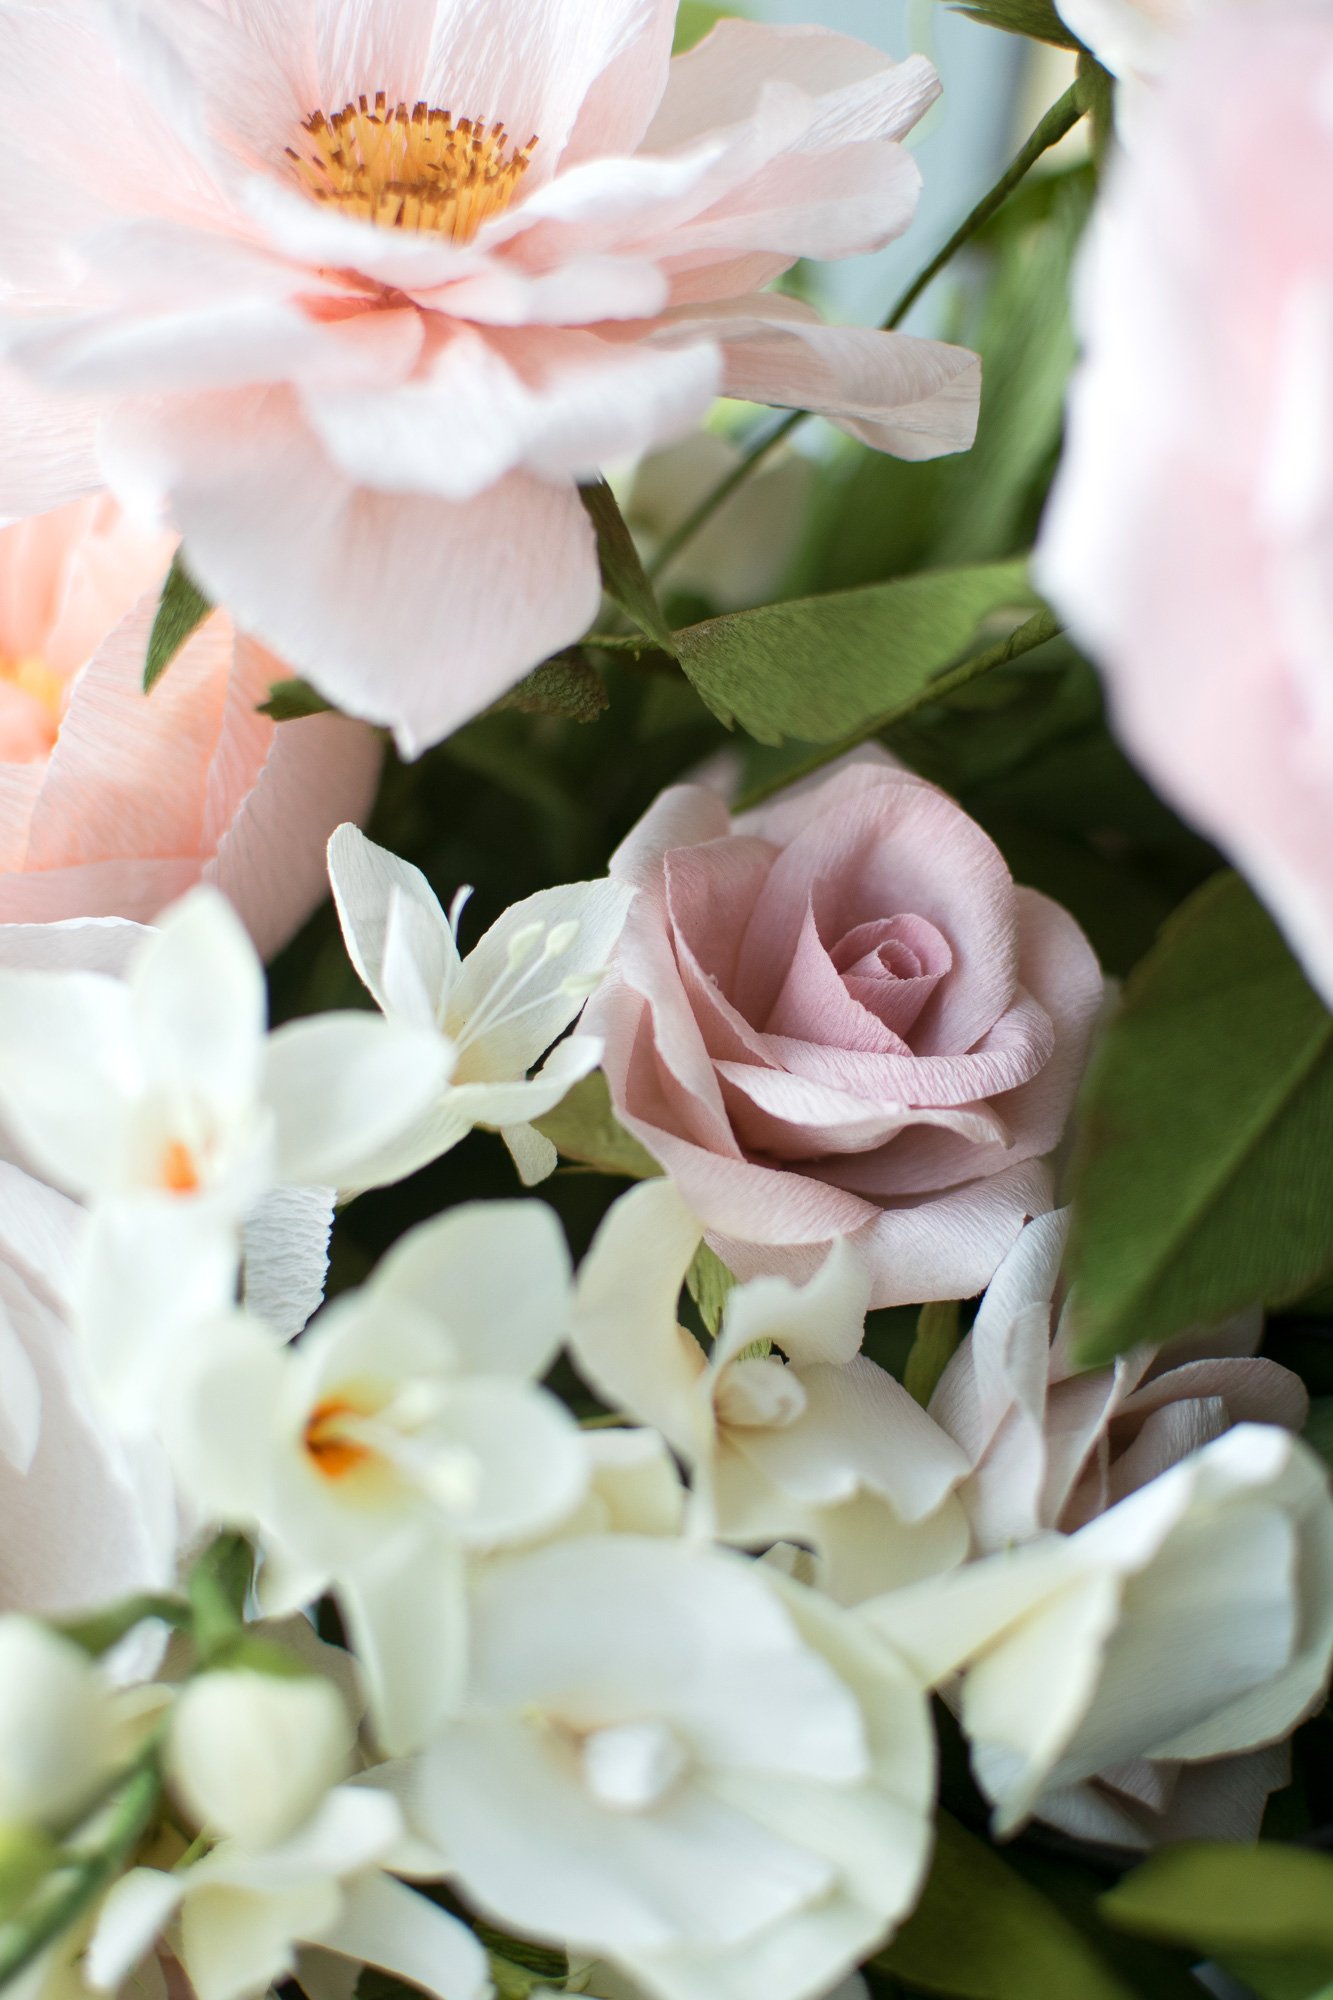

For the pink Juliet Roses, I didn't have a peach coloured crepe in 180 grams (I had to use the 180 grams to create the rigid cup around the centre petals; I could not achieve a deep enough cup with the double-sided peach/white crepe), so I used the Orange Tint Pan Pastel to paint the inside of the cupped petals to achieve that peach glow. For the centre petals, I mixed different fine crepe pinks to obtain the illusion of a peach coloured centre.With the spray roses, I bleached the english rose fine crepe and used different sections of the paper for different petals to give the spray roses colour texture. I finished the petal edges with a brush of Pearlescent Red Pan Pastel to create dimension.
I attached leaves to every flower stem, not necessarily because I wanted to finish each flower with leaves, but because it adds greenery directly beside the flower, creating a base of green and hiding the stems. It also creates depth behind the flowers. Each leaf was brushed with Permanent Red Extra Dark Pan Pastel for detailing.
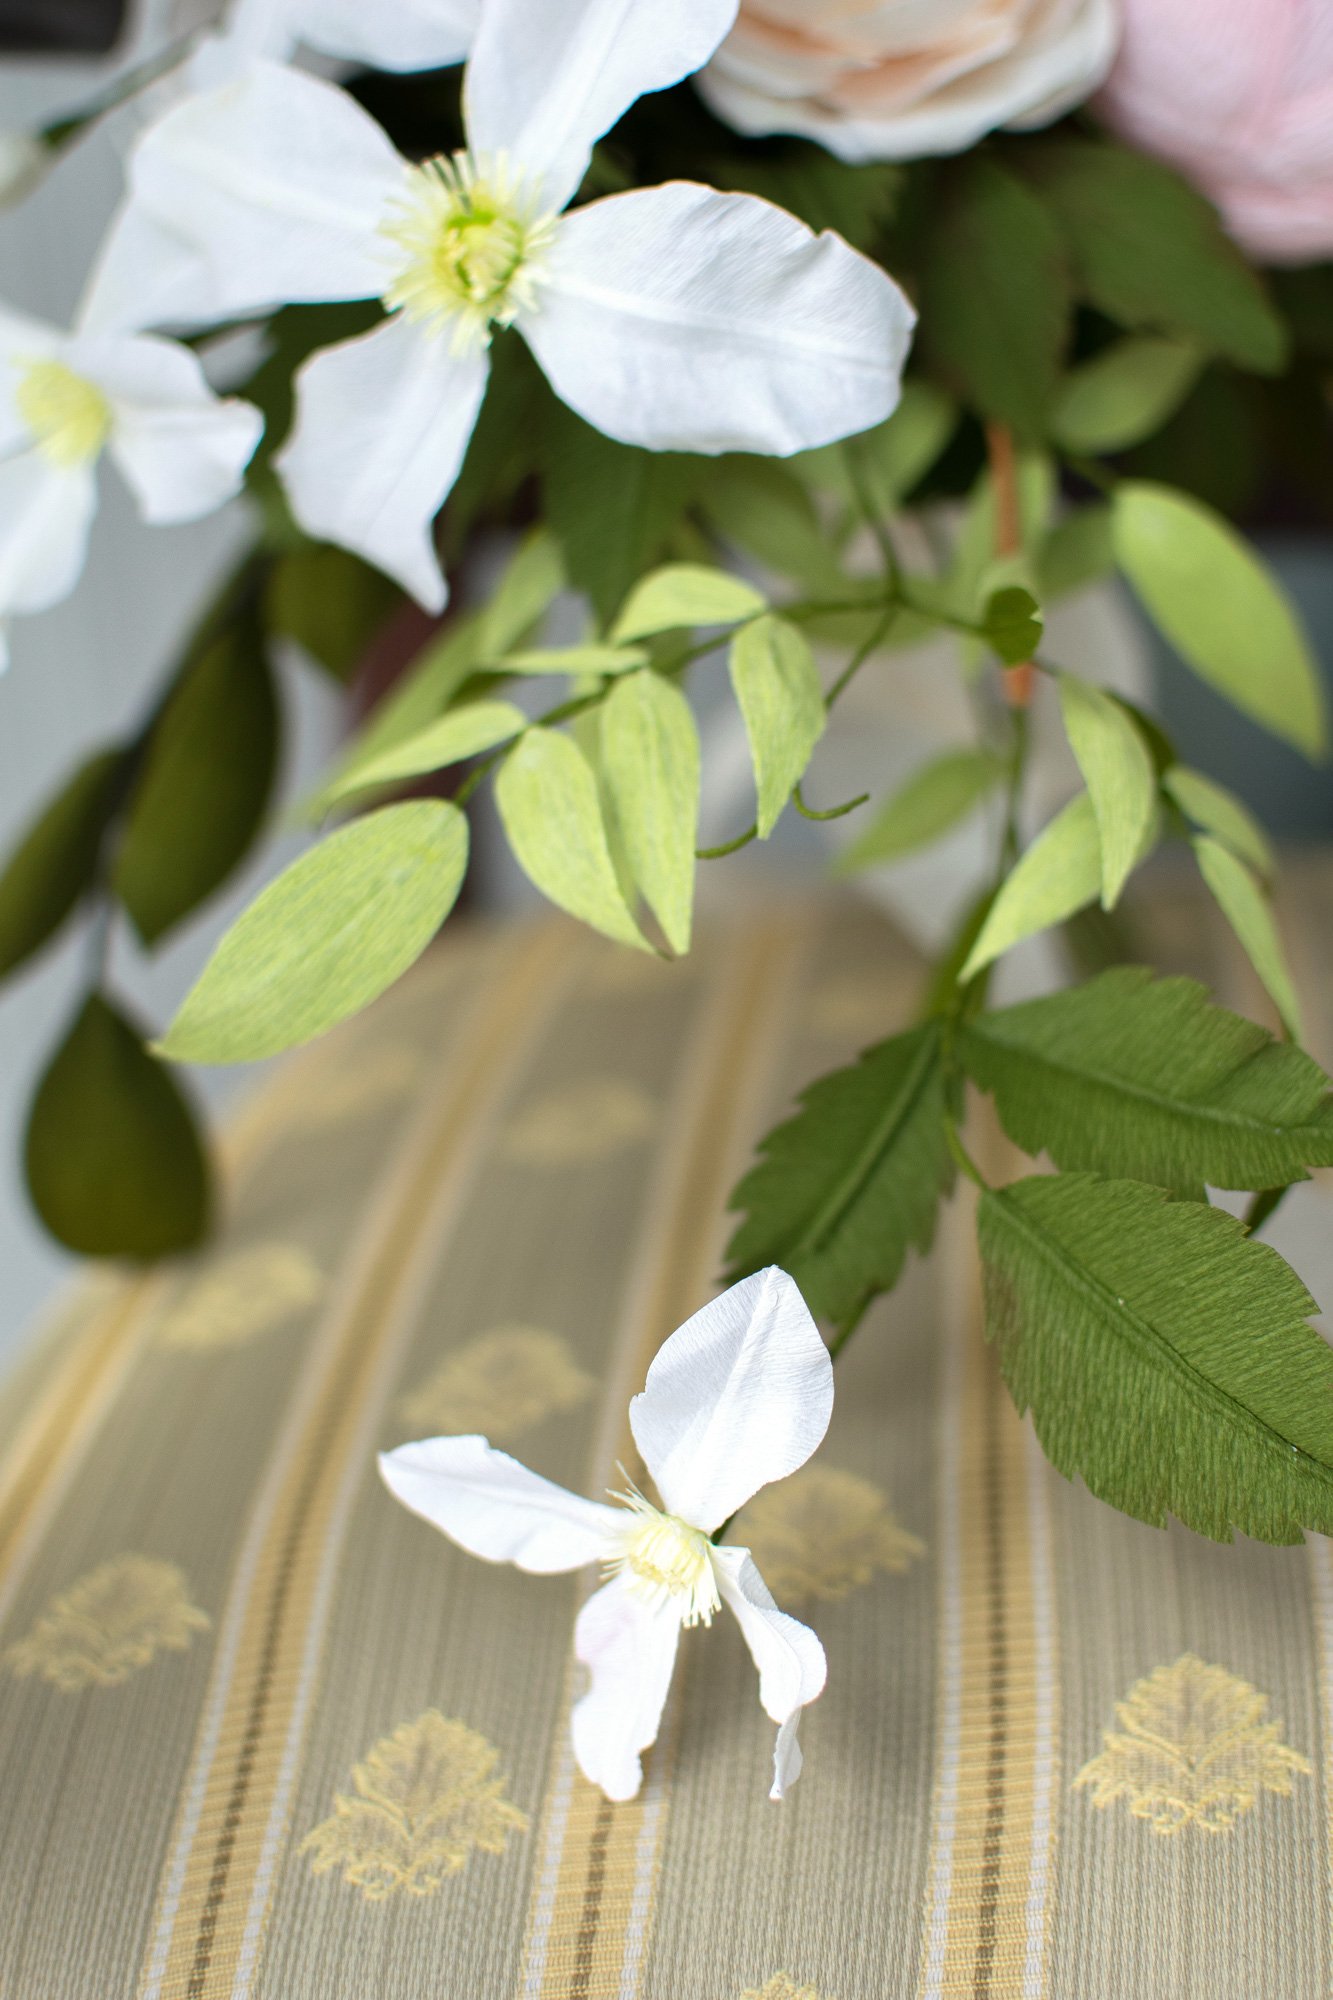
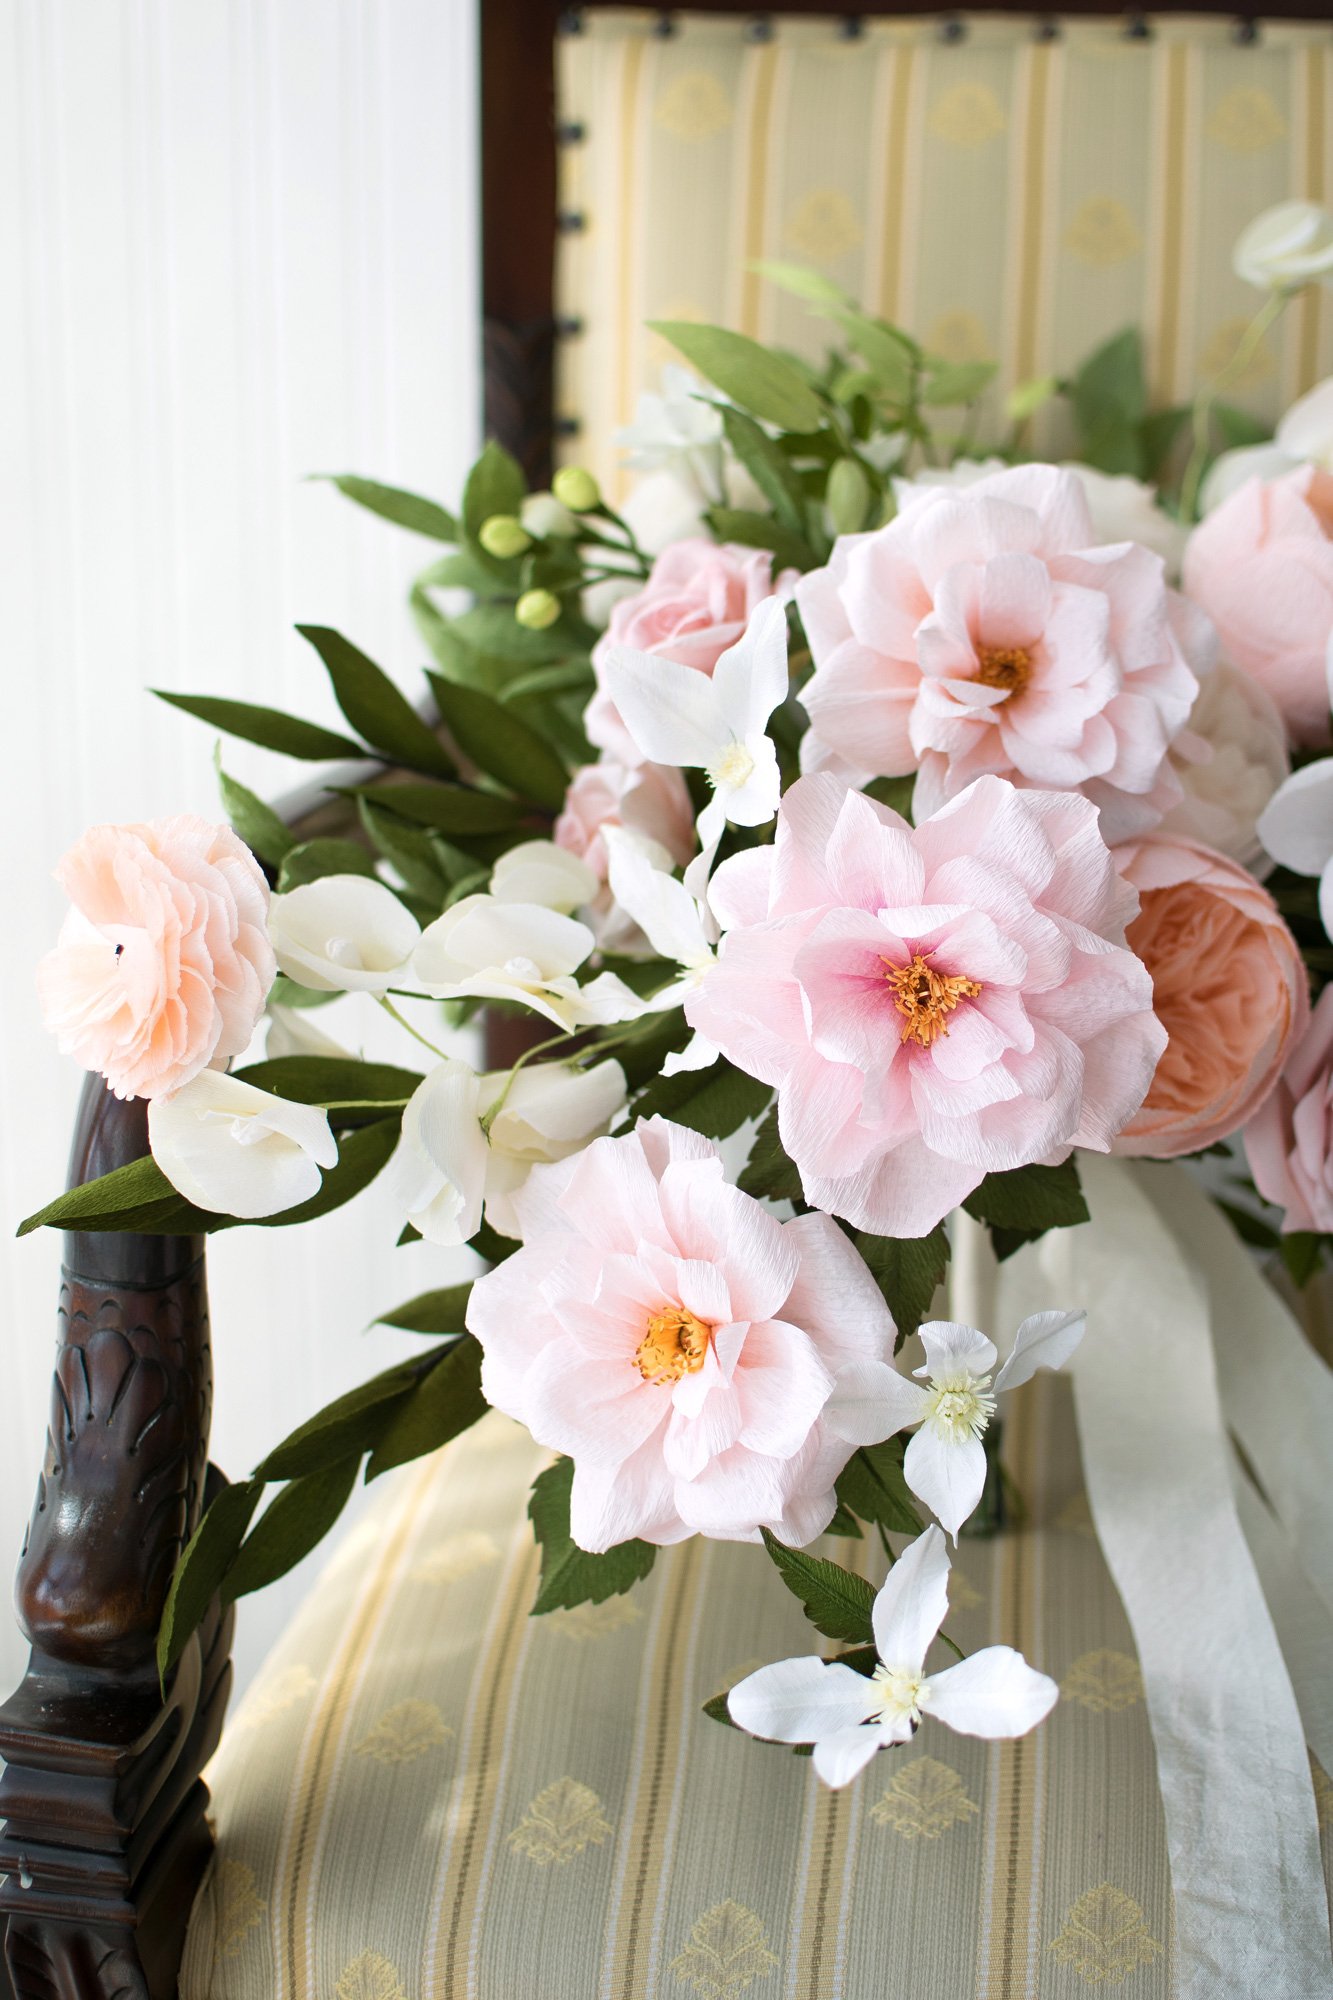
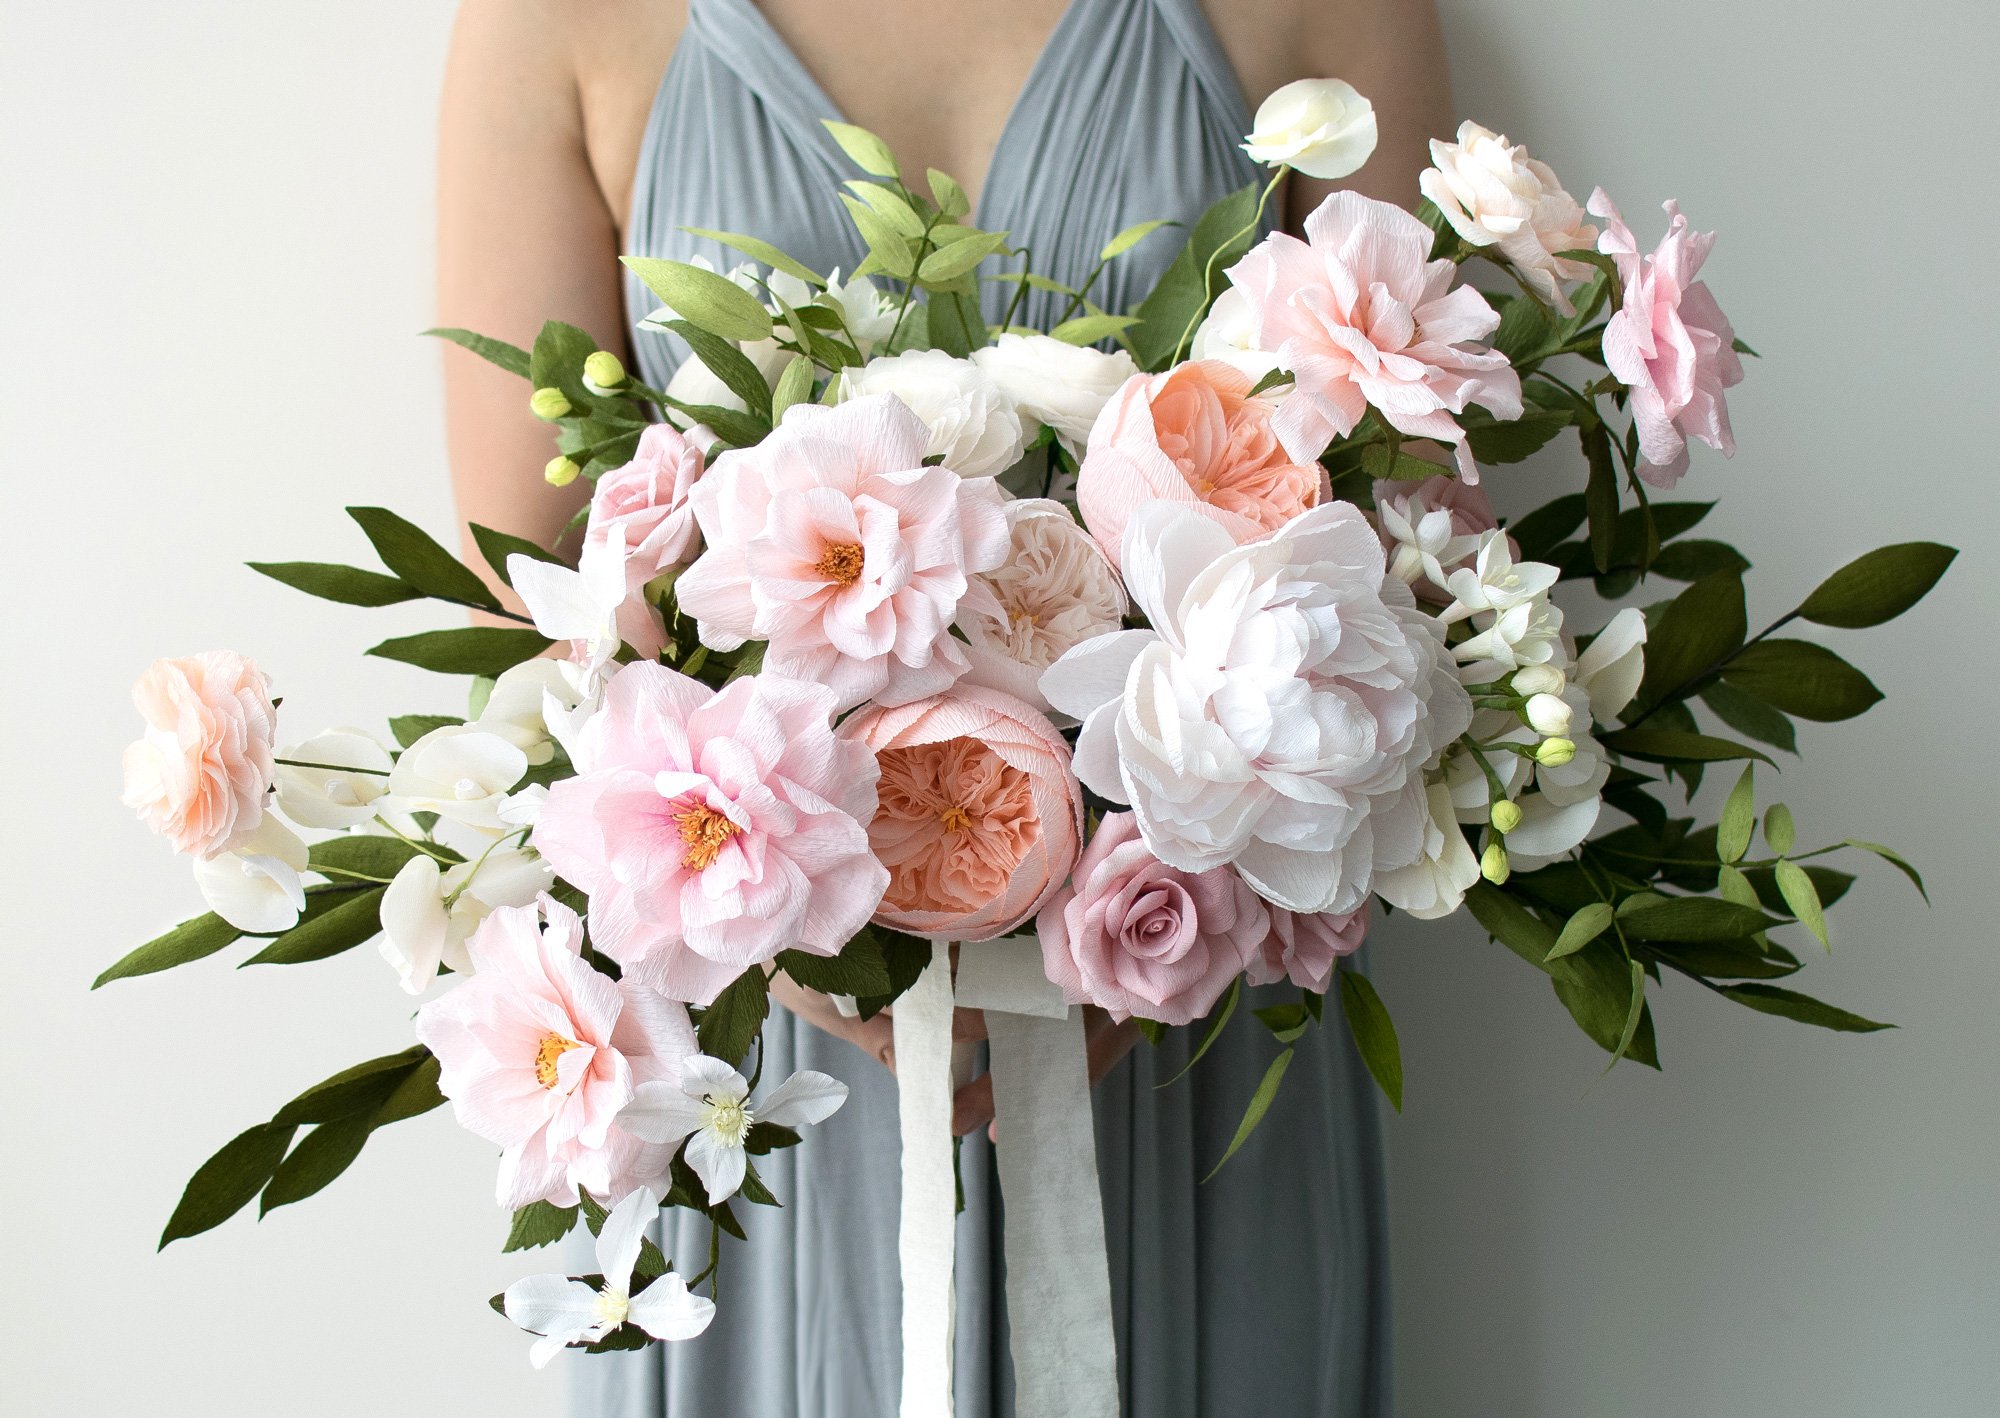
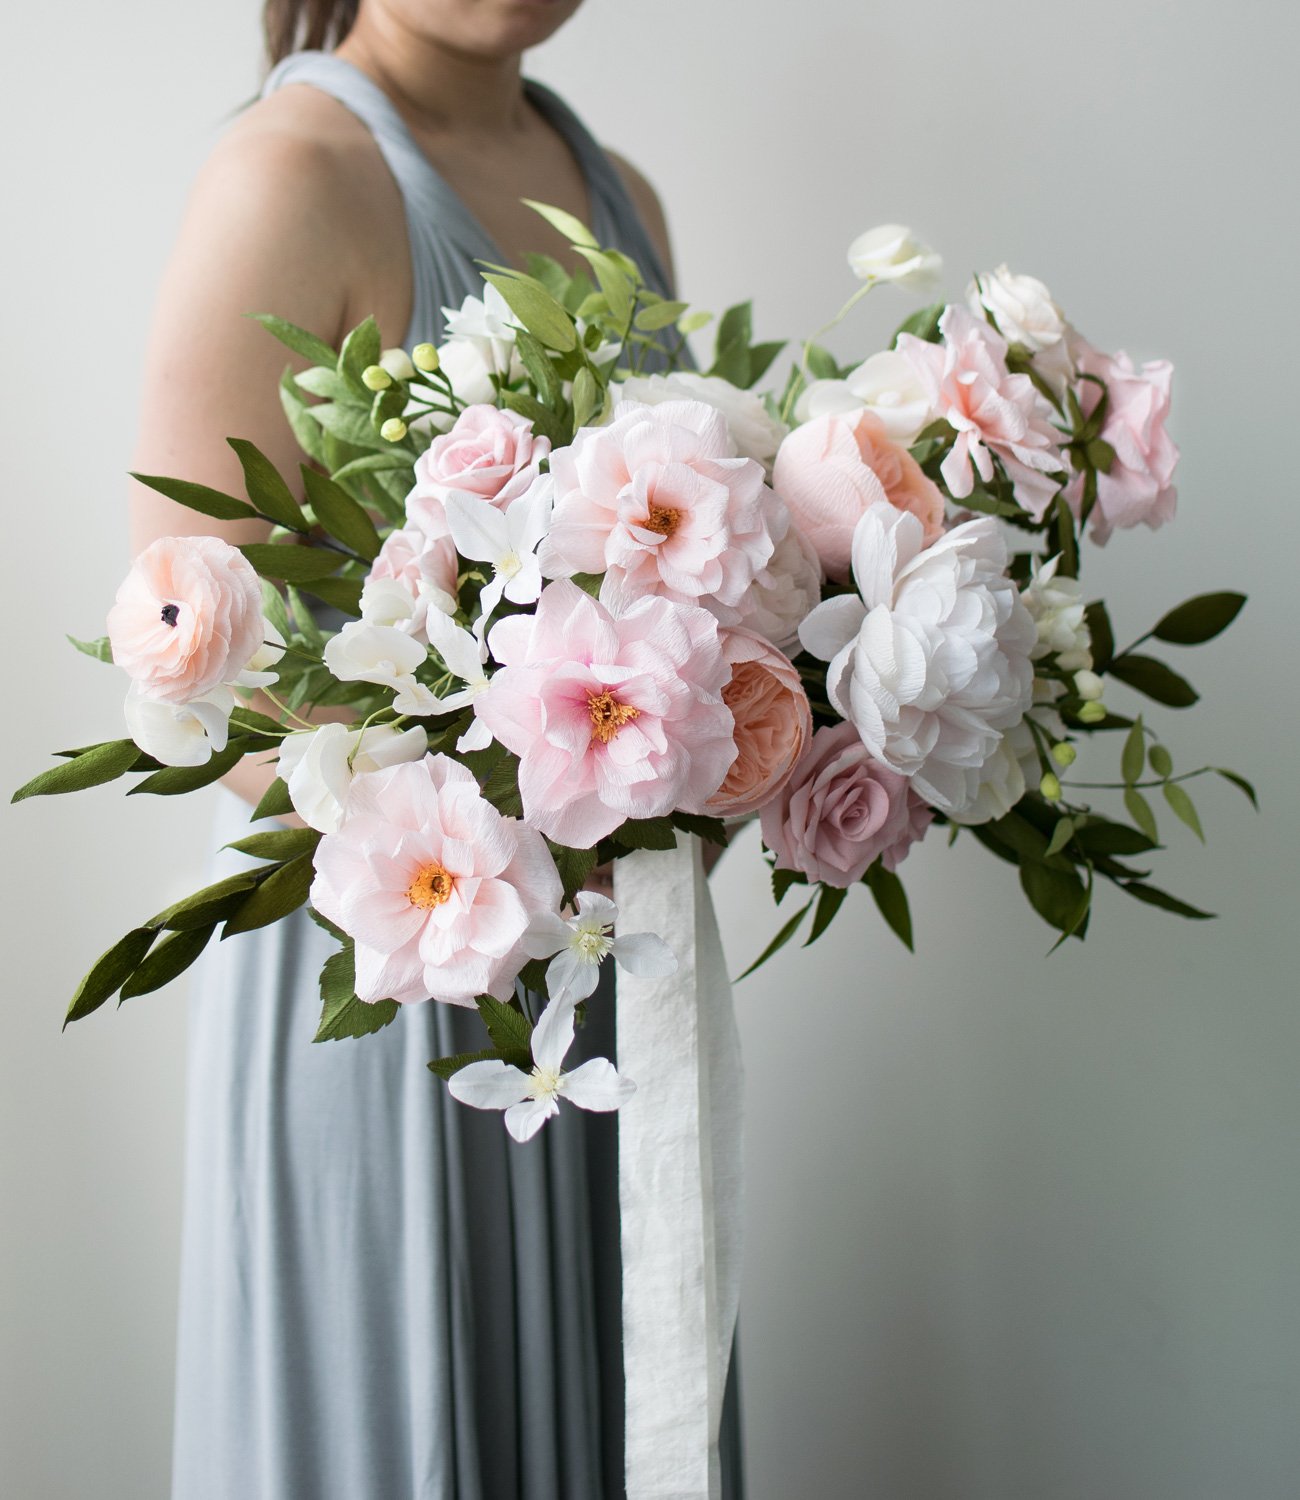
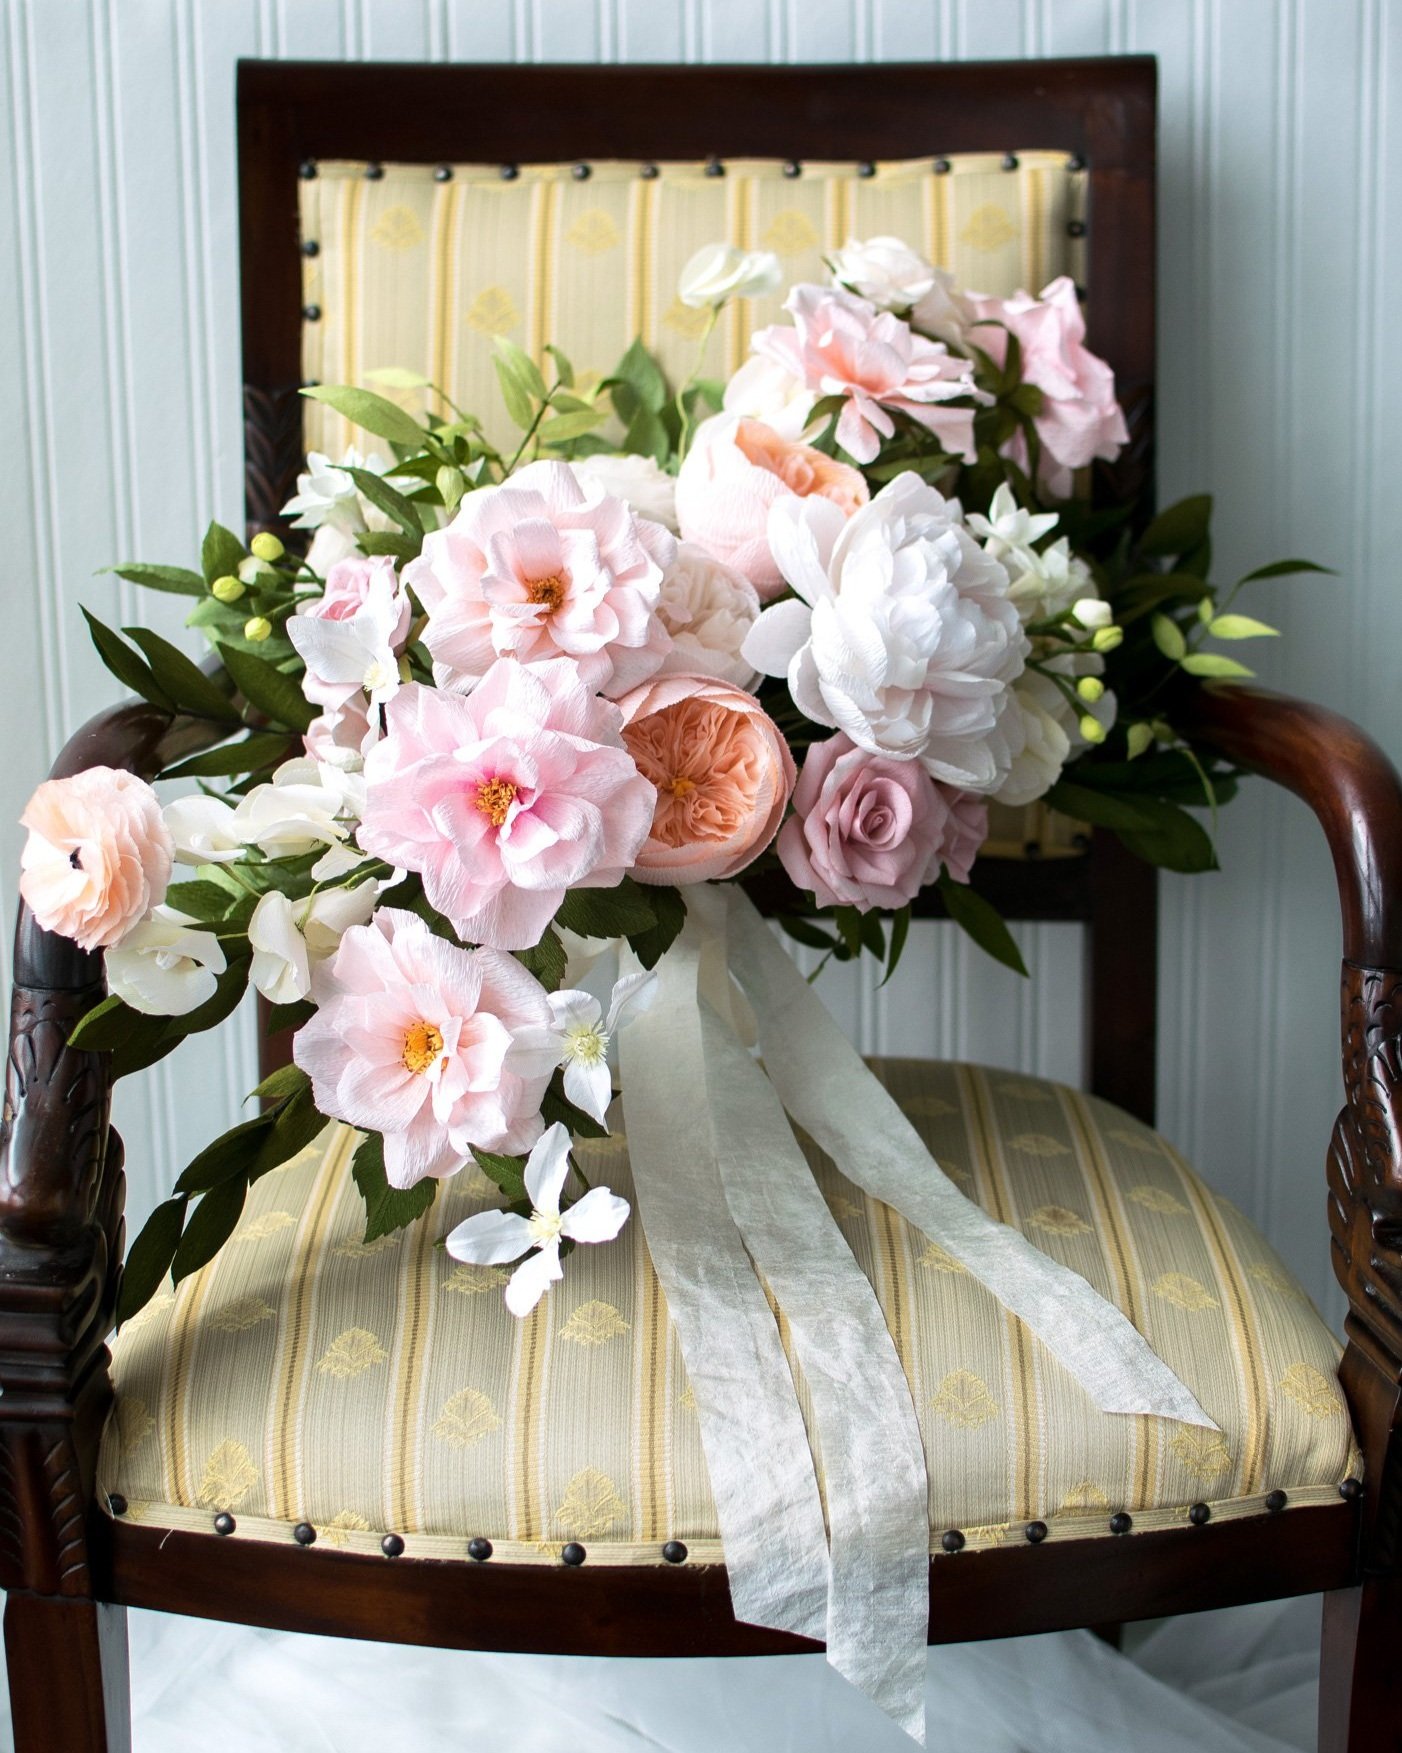
I've found that my arrangements work best with dark greenery because it creates shadows and darkness - depth - where it may not exist. I only use light greenery for highlights or to create lightness.This bouquet is wider at the front and narrower at the sides, so it has a back and a front. The front has all the beautiful flowers. The back has less flowers and only flowers that can hold their shape if the bouquet was laid on top of it. I love this form for how it looks, but I also love this form 2 reasons: one, because I can devote all my time on making one side beautiful and perfect, and two, there's no point of having my customer pay for my time and effort to make a back that no one will see but the bride.The tricky thing about this particular bouquet was its size. It only has 55-60 stems, yet it just looked bigger and bigger because I kept on placing so many beautiful flowers in the front! I really couldn't put many flowers in the back because it would have made the bouquet too bulky, and Marilyn would have had to hold the bouquet out and away from her body. This type of bouquet is meant to be held close to the body. I ended up placing peonies facing upwards rather than towards her to suggest there are flowers in the back.

In a bouquet this wide, there is a tendency for the flower stems to want to shift around and move back and forth while carried, thereby losing the shape and arrangement I had carefully curated. My solution is to use foliage to function as structural support, placing them directly behind the flower stems that have long stems and/or prone to moving. I slip the leaves and shorter foliage between/around blooms to create further stability. I find foliage in the 180 grams works better than any other weight of crepe paper because it is stiff enough to hold its shape and support other stems. So that is why you'll see that I have a TON of foliage behind my bouquets - it's not just for fullness or interest; It's a crucial structural element for a bouquet this size and shape.I am also mindful that the bouquet has to look good from all angles. I can't control the angle in which photos of the bride and bouquet will be taken, but I try, to the best of my ability, to ensure there is sufficient visual interest on all sides. So I make sure to put flowers on both sides of the bouquet and the top/back. I don't put too many flowers in the back because I want the bride to hold the bouquet close to her body. If I put too many flowers, it would be too large for her to carry comfortably and it would look too big. The bouquet should be an extension of the bride's body and therefore should not overwhelm or overshadow her.
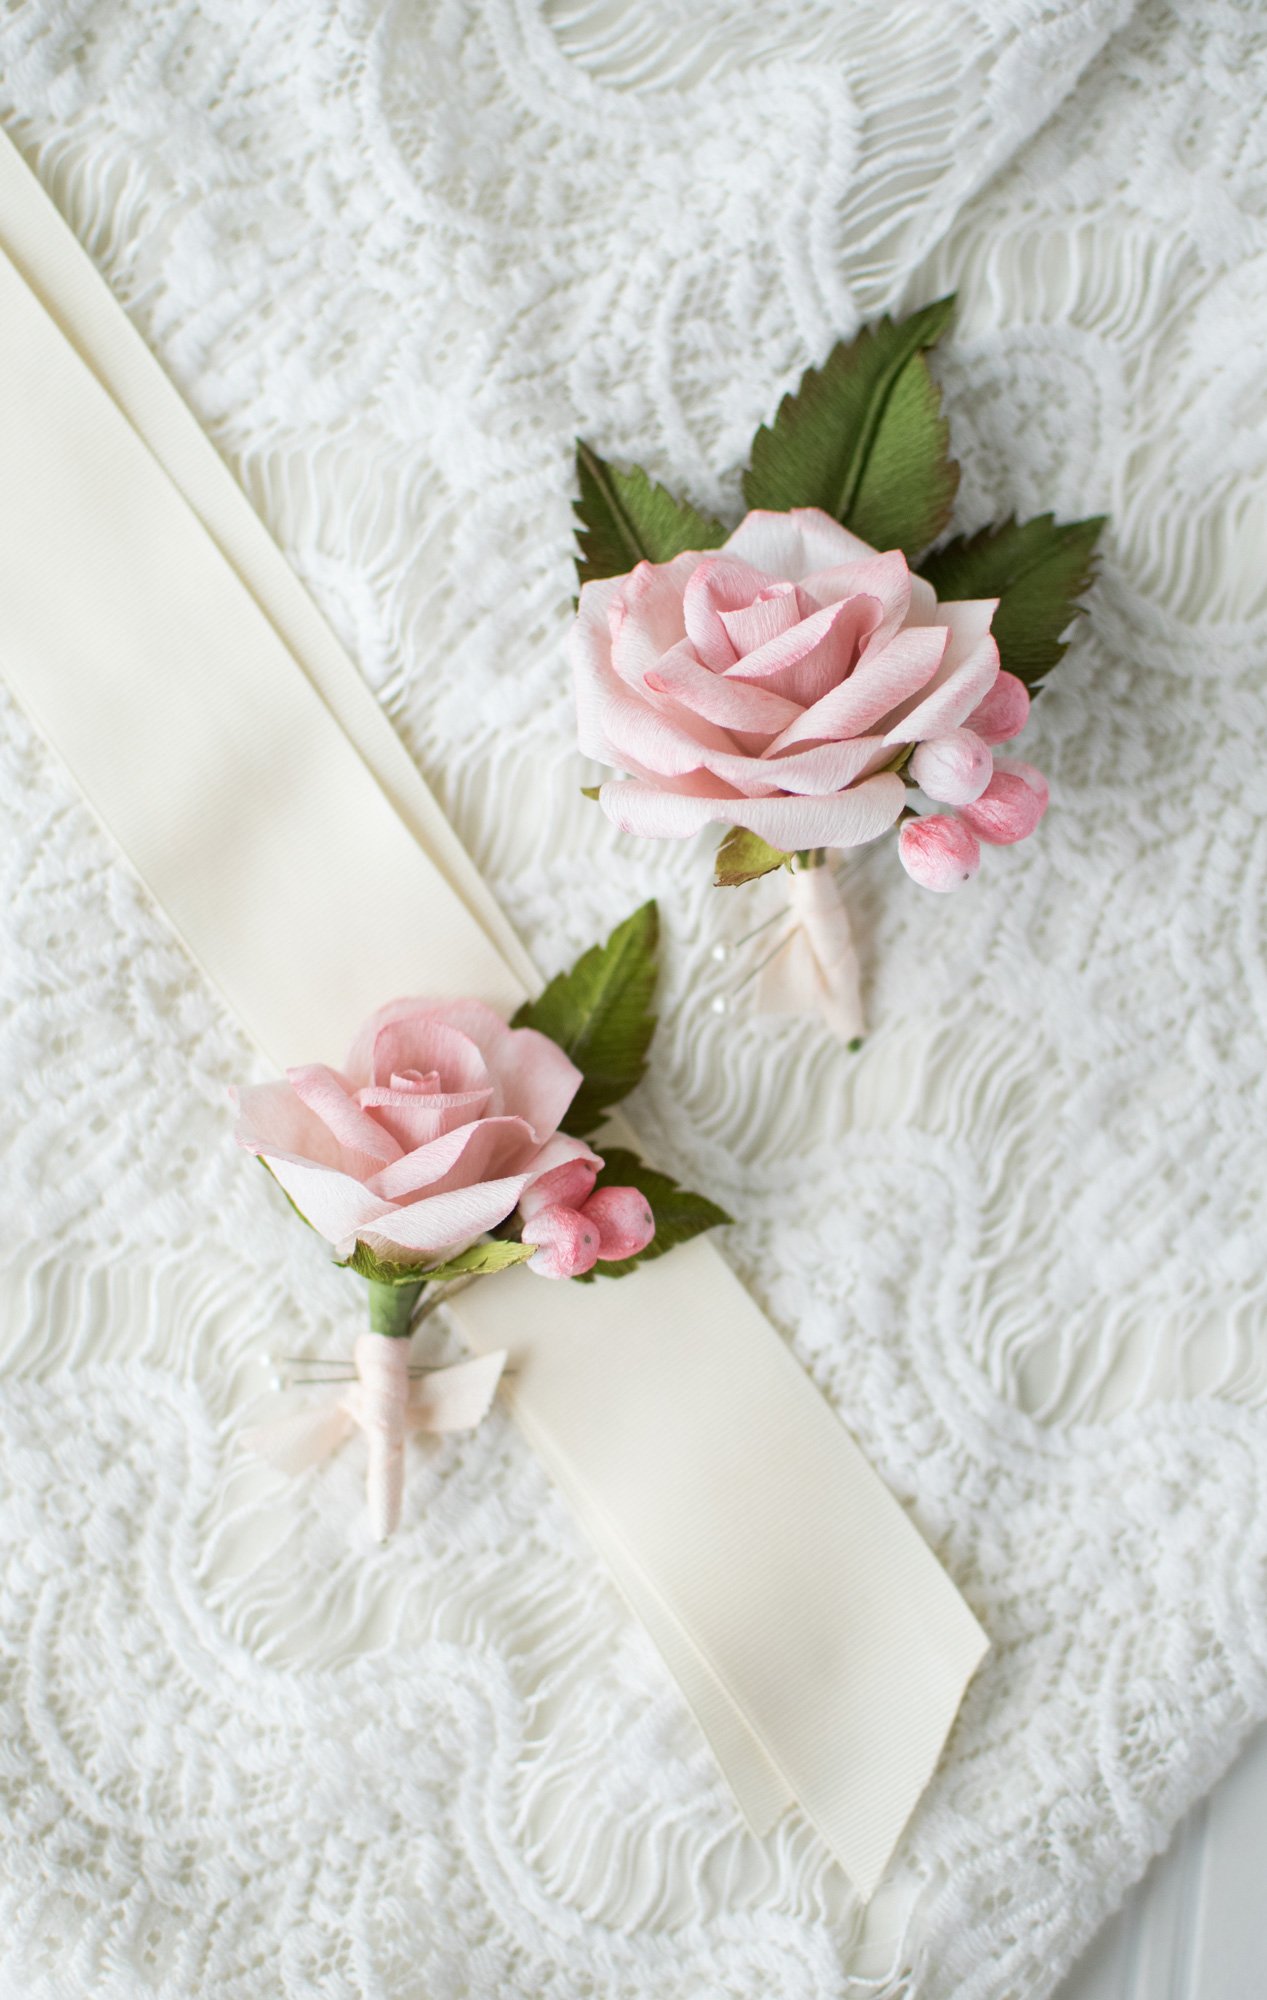
I also used similar flowers from the pink blush crepe paper bouquet for the mothers' corsages and the groom and groomsmen boutonnieres. Those were really fun to make as once I made one, I knew how to make the other ones.
If you got through all of that - YOU'RE AMAZING!! I hope it helps you with your own process or at least help you think about your own process.Until the next bouquet,