Basic Paper Flower Supplies Explained

Today, my friend Quynh Nguyen of Pink and Posey and The Posey Box is guest posting on my blog! As a fellow paper florist, she knows a TON about paper flowers and the supplies you need to make your paper flowers shine. So she’s going to explain a little bit about the basics of paper flower supplies.
Also, just to let you know, there are affiliate links in this post. This means that every time you buy something using the links below, Quynh (or me, depending on the link) will receive a small commission at no cost to you! Read on to learn about supplies!

Stepping into the paper flower world can feel a little overwhelming. What’s the difference between German and Italian crepe? What in the world is wire gauge? How do you choose the right materials for the project?
With a little know-how, you can navigate paper flower supplies with confidence. Recently, we discussed basic paper flower techniques with Jessie on The Posey Box blog, which you can read here.
This time around, we’ll be talking about the different supplies that any aspiring paper florists should use and own. To make paper flowers, the bare minimum that you need is some crepe paper for the petals, floral wires for the stem, a good pair of scissors to cut all the leaves and petals, and some glue to adhere them all together!
Crepe Paper
Crepe paper is easily one of the most important things we paper florists use—you can’t make paper flowers without the paper!
It may seem daunting at first to choose what kind of crepe to use because there are so many options. Two of the most popular are German and Italian, which we’ll talk about here. To read more about other kinds, check out this post about choosing the right crepe.
To keep things nice and simple, every type of crepe paper comes in different weights, and it’s usually measured in grams (gsm). The higher the number, the heavier the weight.
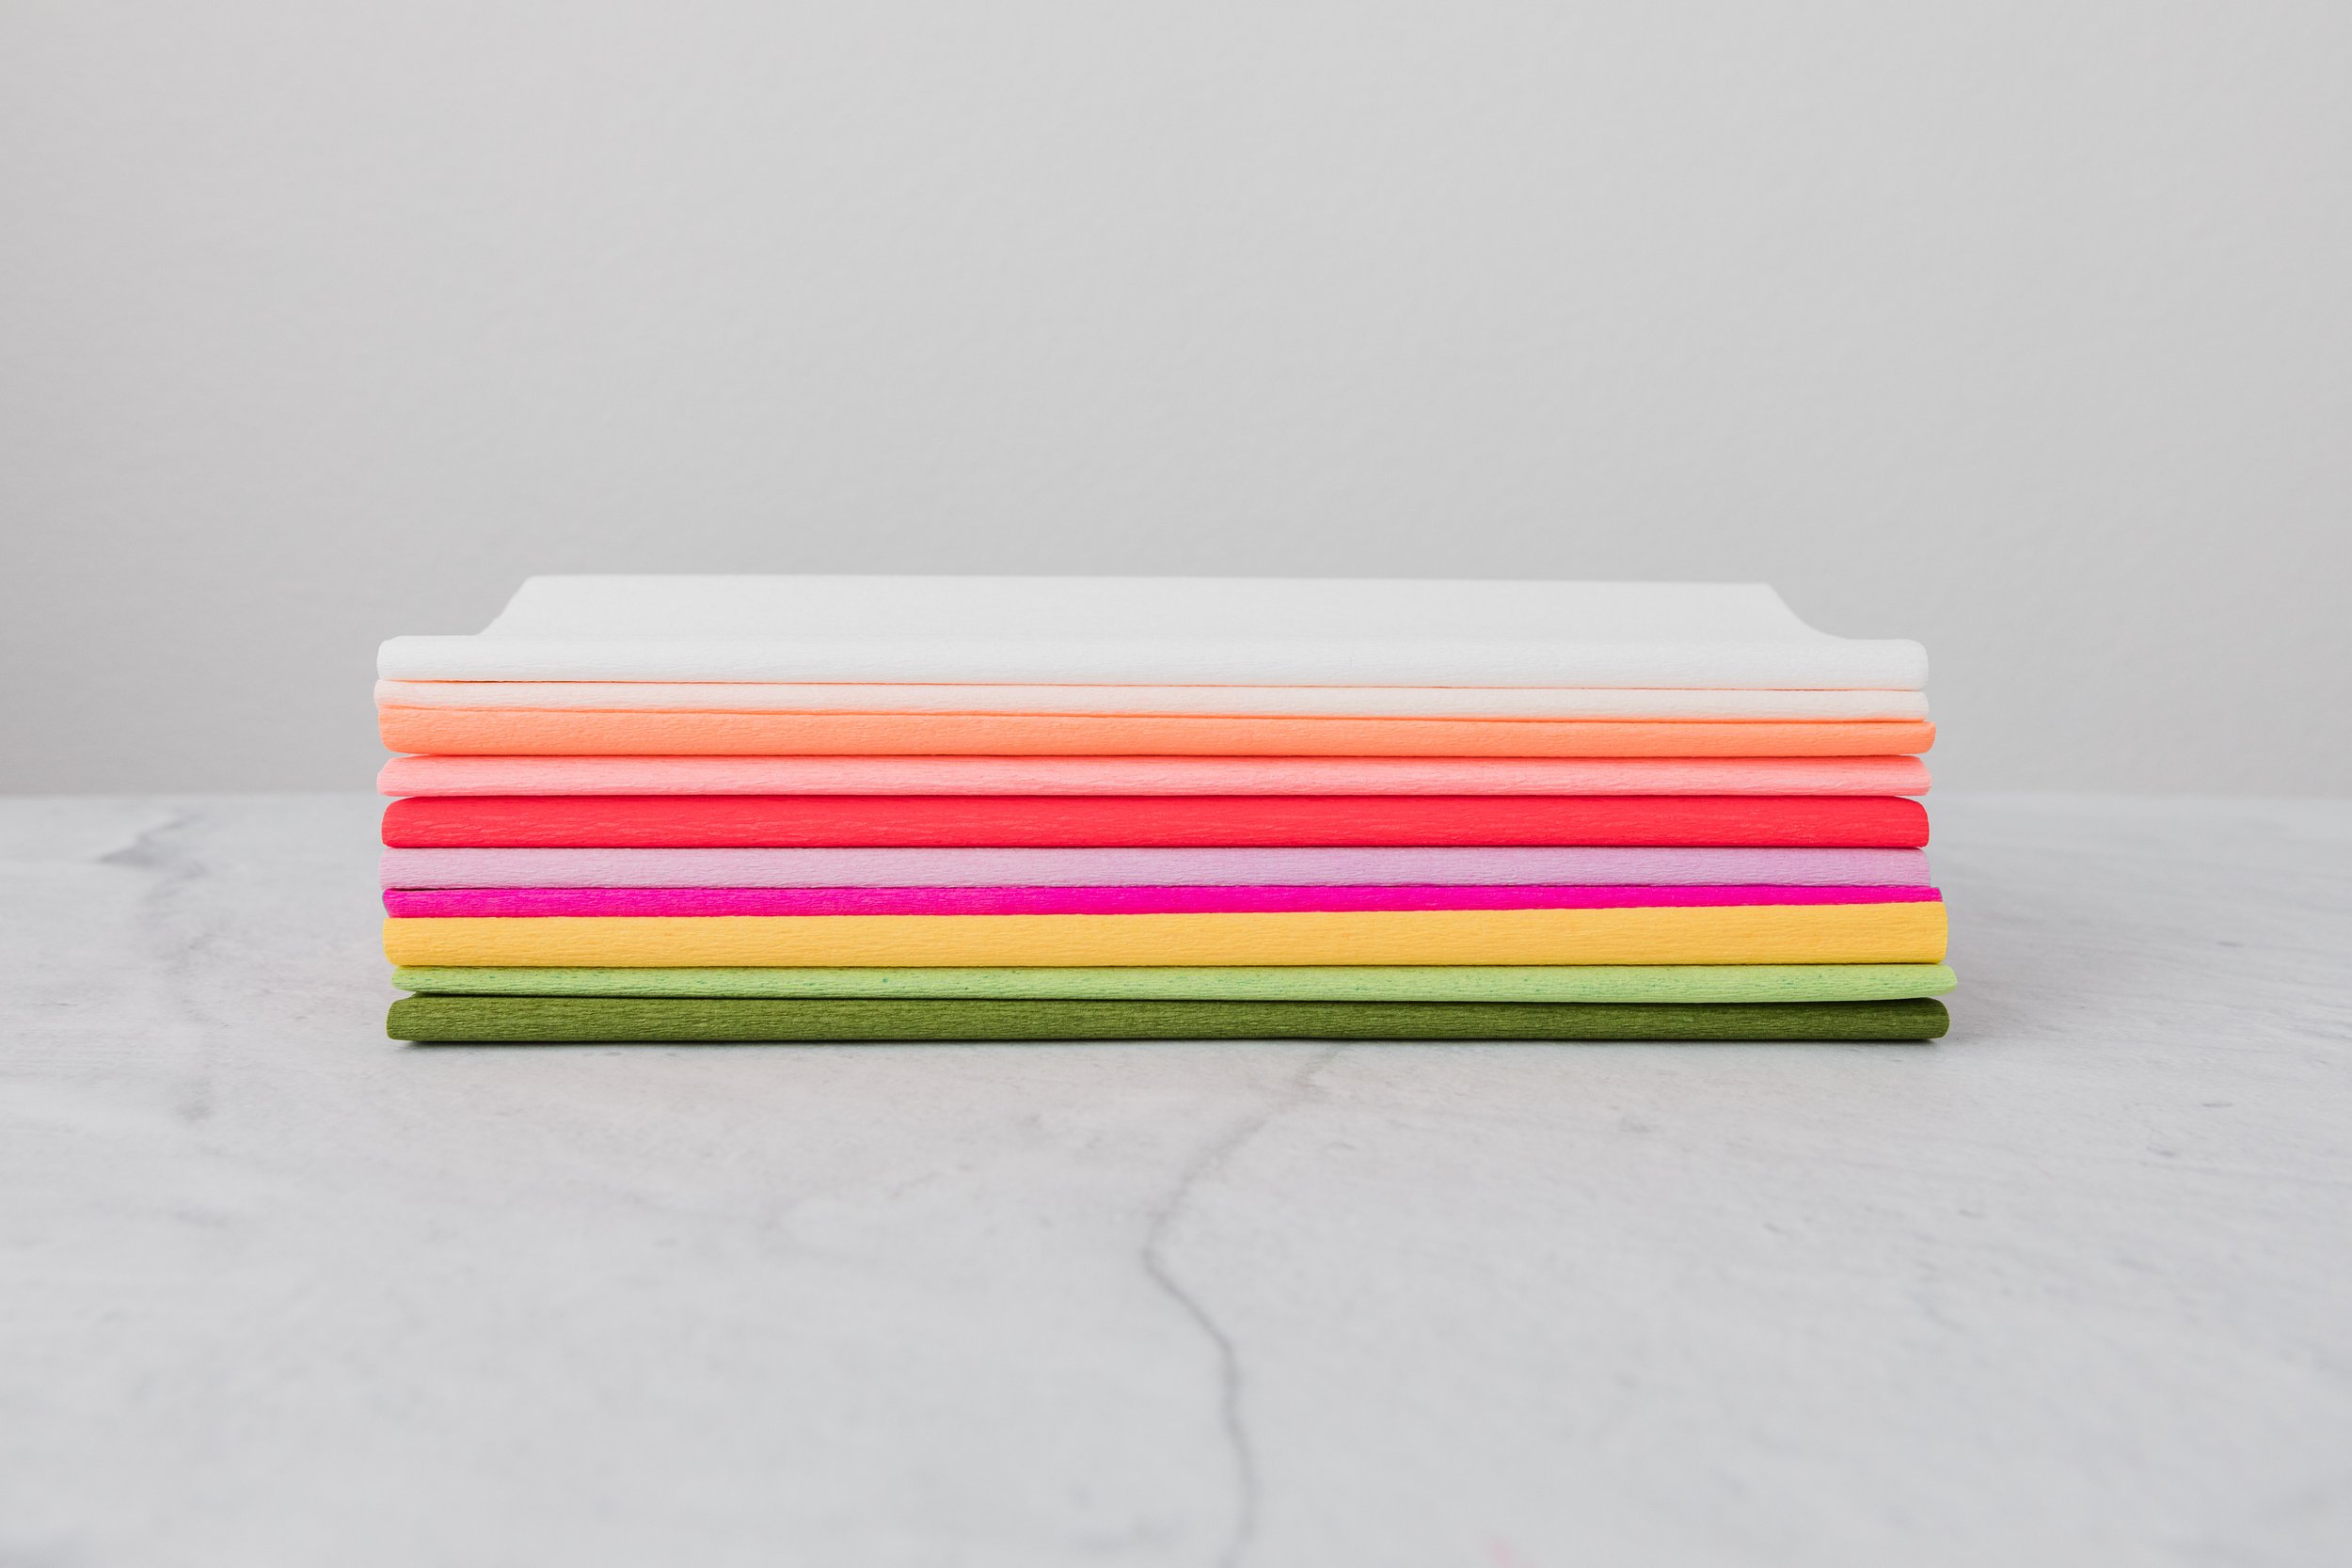
Doublette or double-sided crepe paper by Werola
German Crepe Paper
German Crepe paper is considered high quality. It comes in a wide variety of colors. The manufacturer, Werola, produces the paper in an environmentally friendly manner, which is a huge plus!
Some features to consider for paper flower use: the 160 gsm is heavy, a bit stiffer than Italian 180 gsm. The 60 gsm is extra fine and is also sometimes known as Lia Griffith Crepe Paper.
You can purchase from rosemille.com and from Lia Griffith’s shop feltpaperscissors.com.
Italian Crepe Paper
Italian Crepe paper is also high quality and is a popular choice for many paper florists. It is very durable and features a smooth texture.
Here’s what you need to know: 180 gsm is heavy weight and hard to tear. 140 gsm is water resistant, so it won’t bleed colors if it gets wet. 60 and 40 gsm are delicate and better suited for details.
The best place to purchase Italian crepe in the USA is cartefini.com. If you’re in the UK, you can purchase it at arloarts.co.uk. For others in Europe, you can purchase Italian crepe paper at cartotecnicarossi.it.
Floral wires can come bare or covered with paper or cloth in different colours.
Floral Wire
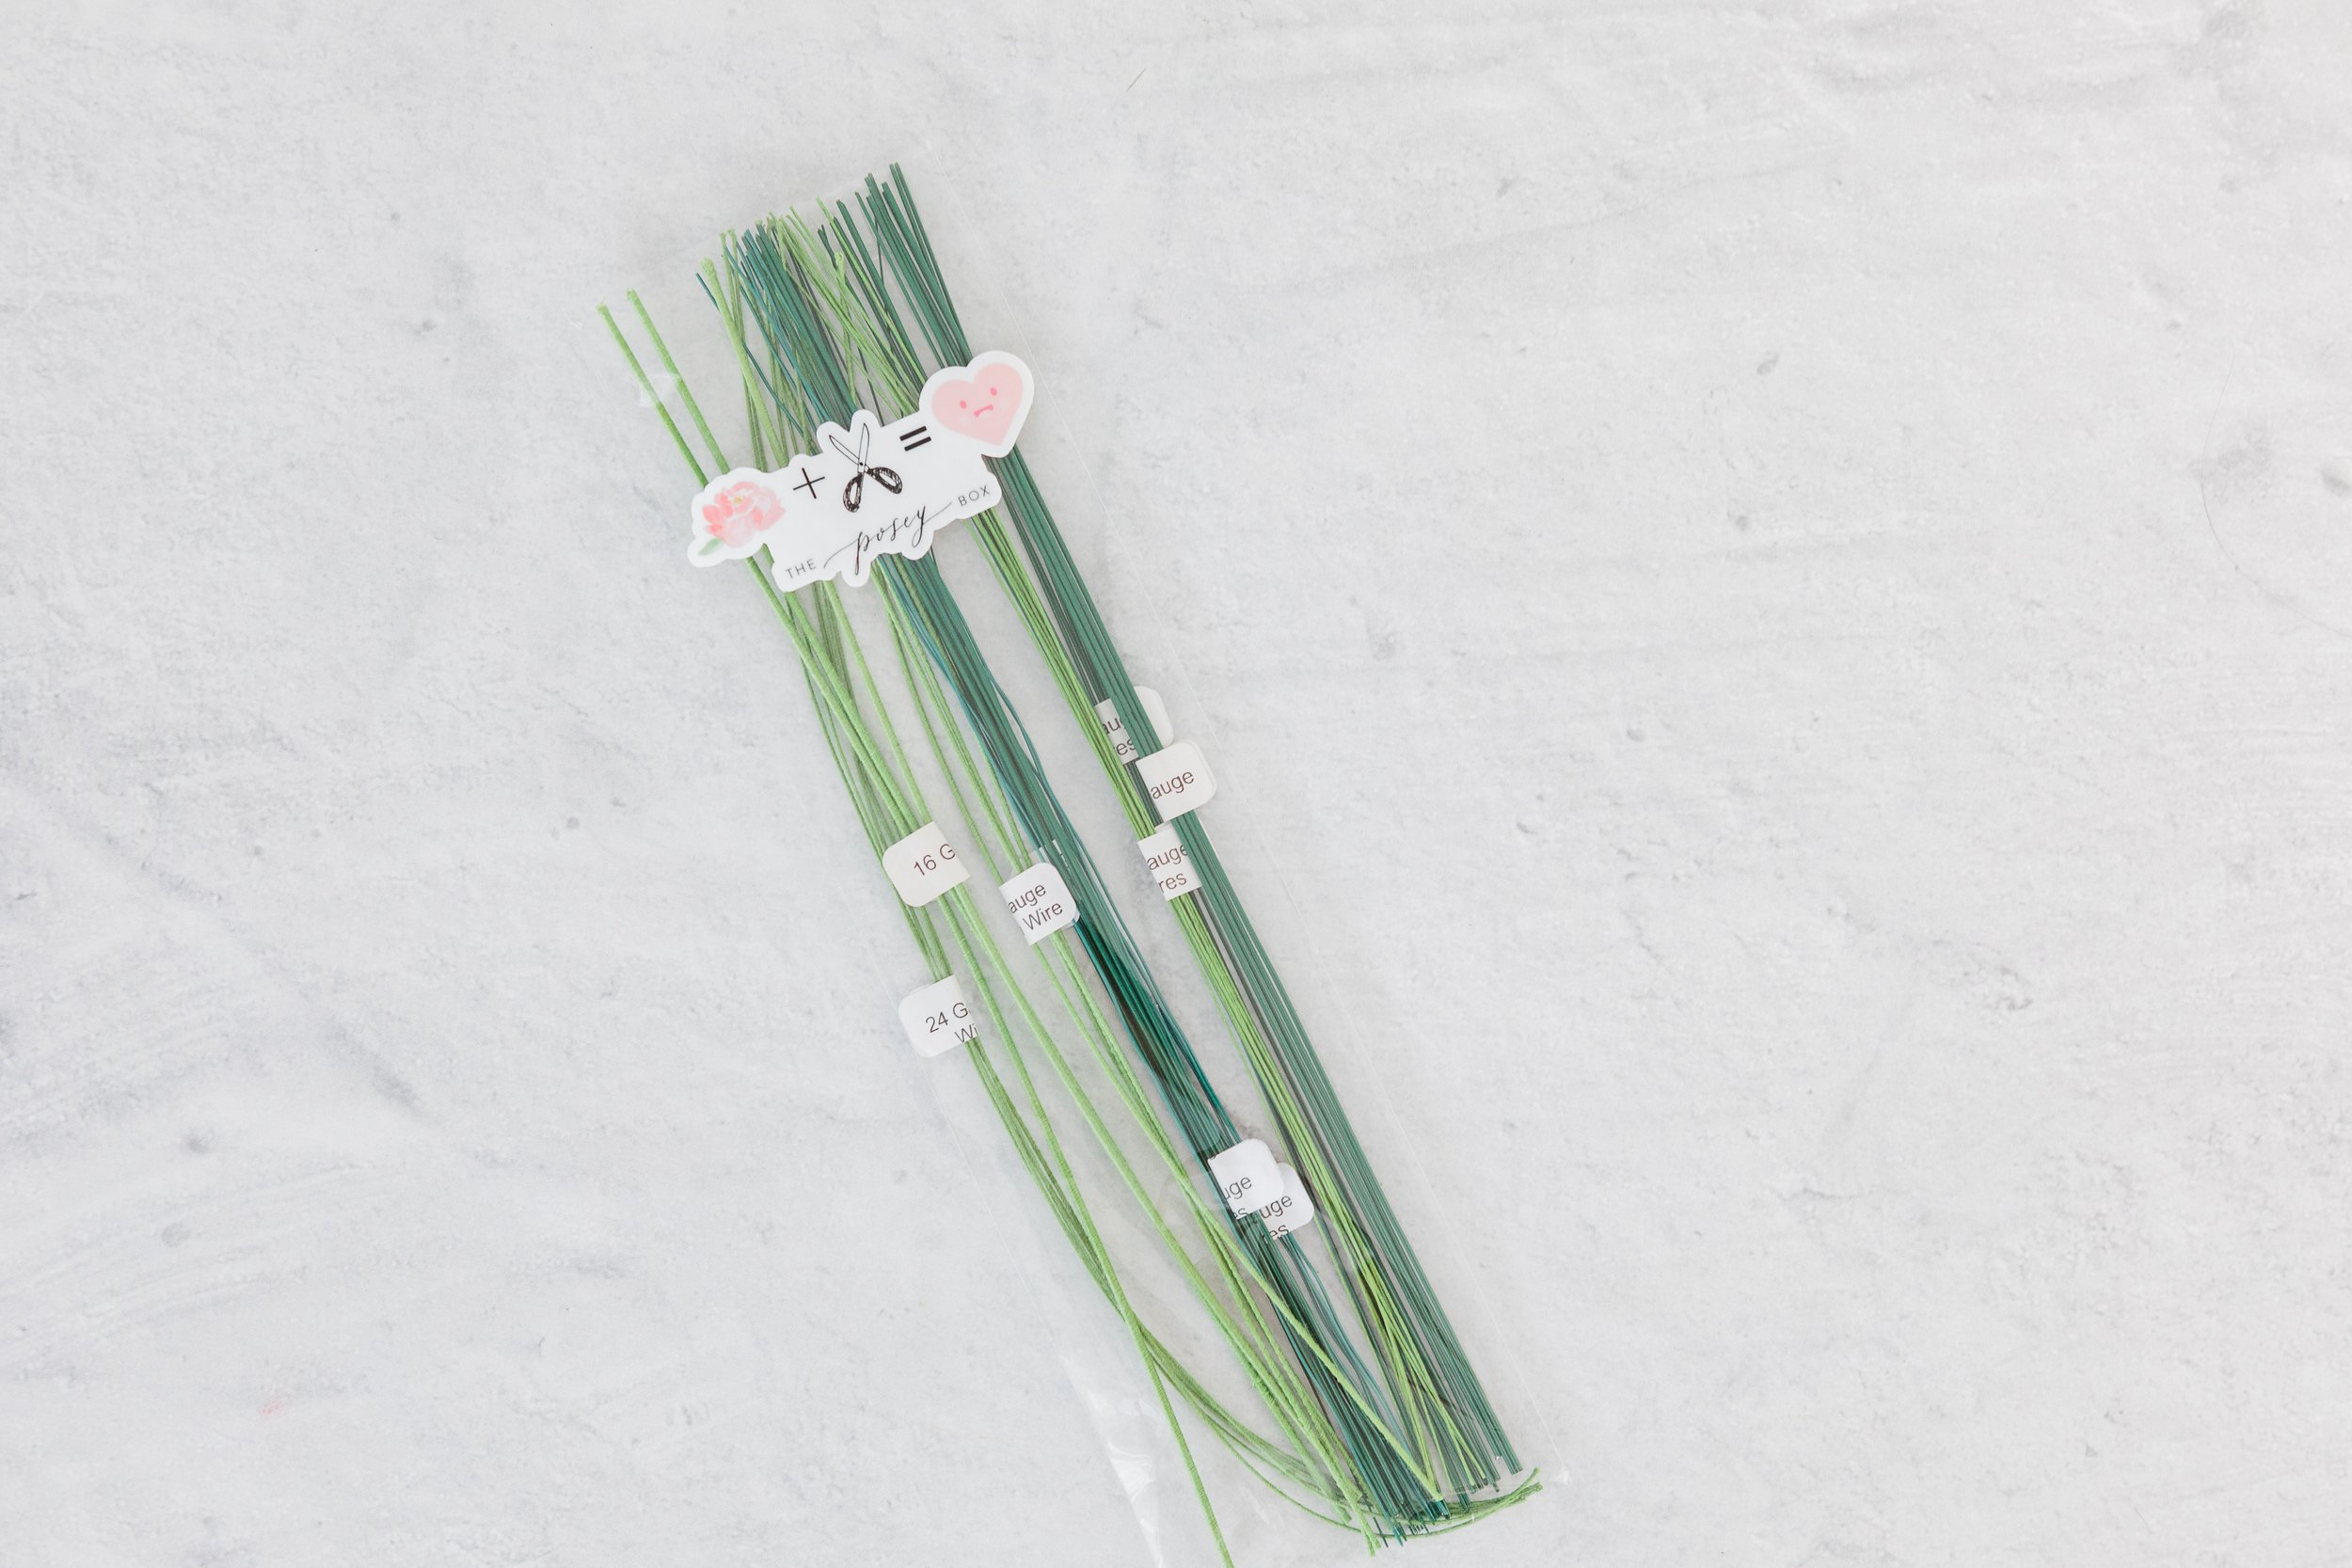
Floral wires can come bare or covered with paper or cloth in different colours.
There are many options when it comes to wire: what it’s made from, what it’s covered in, the color, etc. You can read Quynh’s blog on The Posey Box to get all the details.
Here, we’ll cover one of the most important aspects of choosing your wire: the gauge or thickness.
Floral wires come in 8, 16, 18, 20, 21, 22, 24, 26, 28, 30, 32, and 36 gauge. The lower the number, the thicker wire is. That means 8 will be the thickest and 36 will be the thinnest. The thickness can change what you will utilize the wire for. So for example, gauges 8 up to 22 are generally used for stems or heavier branches because they are thicker. And gauges 20 up to 36 are generally used for wiring buds, petals, and leaves, since they are much easier to manipulate. As a general rule of thumb: the thinner the wire, the easier it is to manipulate and fold the wire.
If you need to thicken up the stem, you can attach a water tube after you finish the flower head but before you attach the sepal (this will hide the water tube from view). For example, for a ranunculus, you can use a ¾ inch water tube.
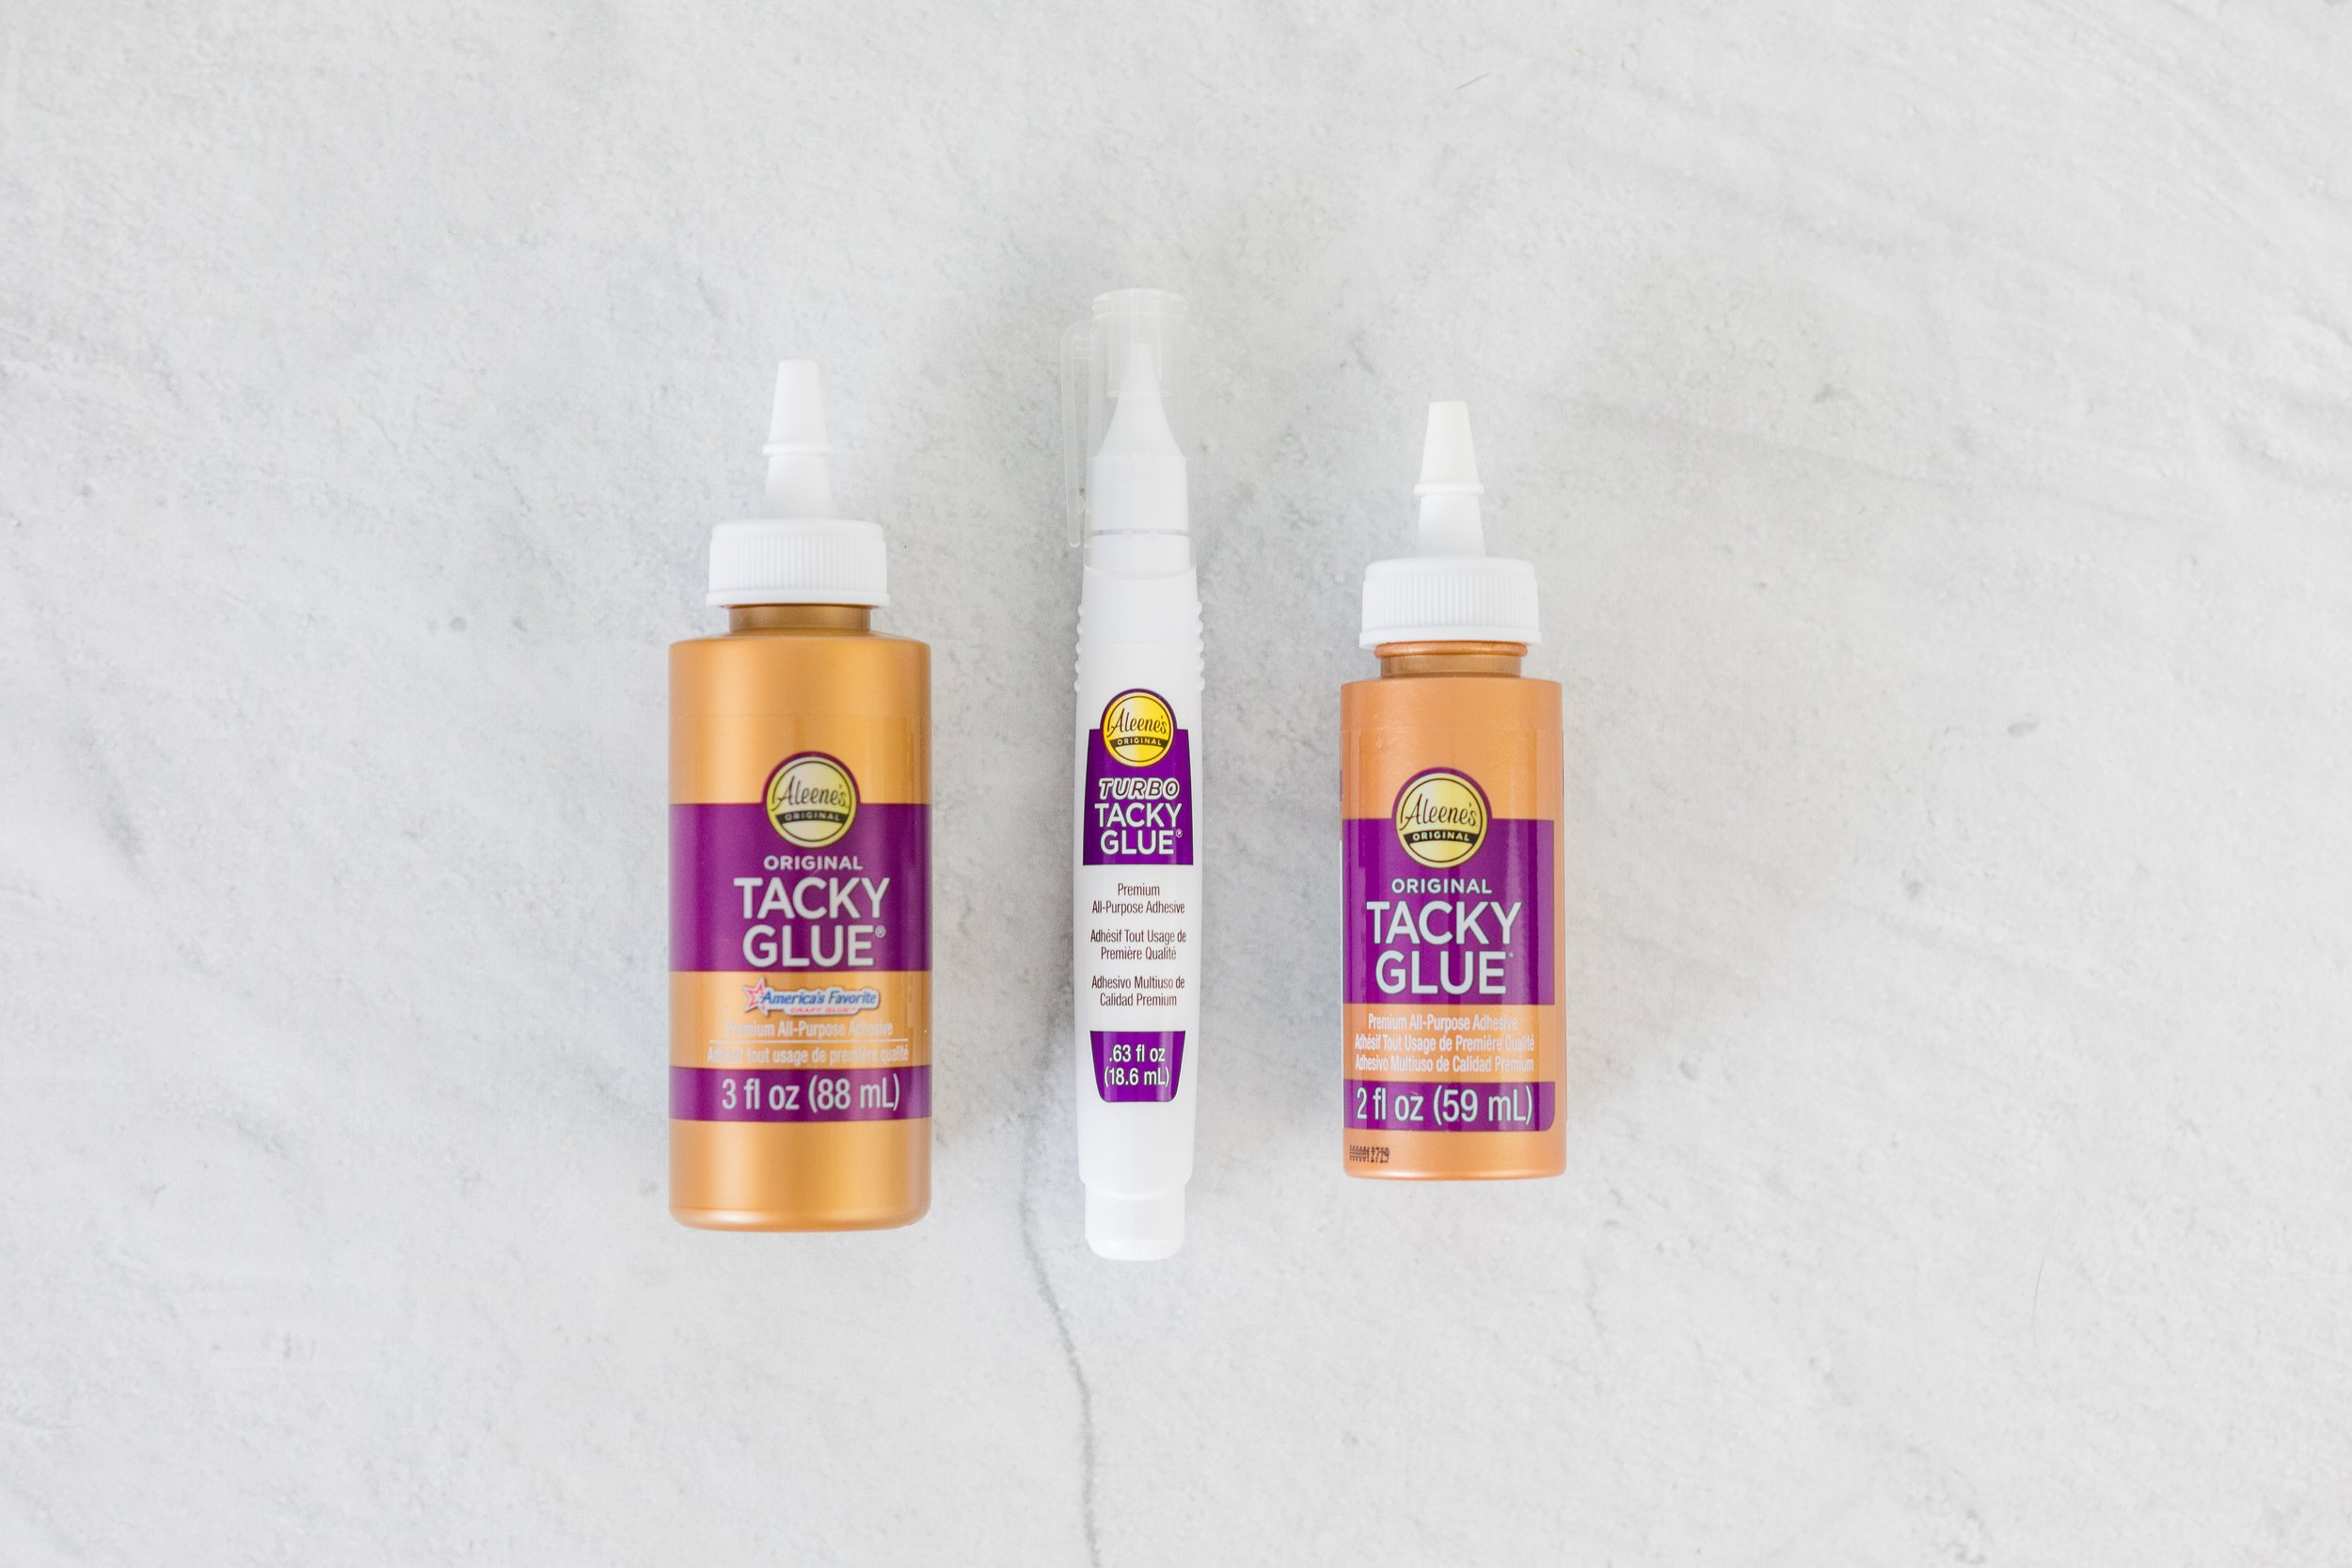
Aleene’s Tacky glue is the glue of choice for most paper florists
Glue
To get all that paper to stay together, you need glue.
There are many different options out there. Unfortunately, you can’t use any old adhesive, like Elmer’s white glue. It’s too watery and doesn’t dry fast enough. That’s a huge problem when you are trying to glue fifty petals to make a dahlia.
Quynh’s glue of choice is Aleene’s Tacky Glue, especially when using double-sided German crepe paper or anything lighter, like extra fine crepe. If you are using the heavy German or Italian crepe paper, consider using a hot glue gun or something more powerful like Aleene’s Turbo Tacky Glue.
Here are some simple tips when using whatever glue you choose:
Close it up
This seems like an obvious one, but when working on a project, it’s really easy to get side tracked. When the tip is closed up between uses, you can use your glue for much longer, but if your glue is too thick don't be afraid to add a little bit of water to get it to the consistency you want to use the glue.
Give it time to dry
To decrease the drying time, put aside a quarter-sized amount of glue in a small bowl. This will allow for the glue to slowly air dry, which will increase the tackiness of the glue. One tip is to add glue to the left side of the bowl, and then the right side will remain tackier than the freshly poured glue.
Scissors
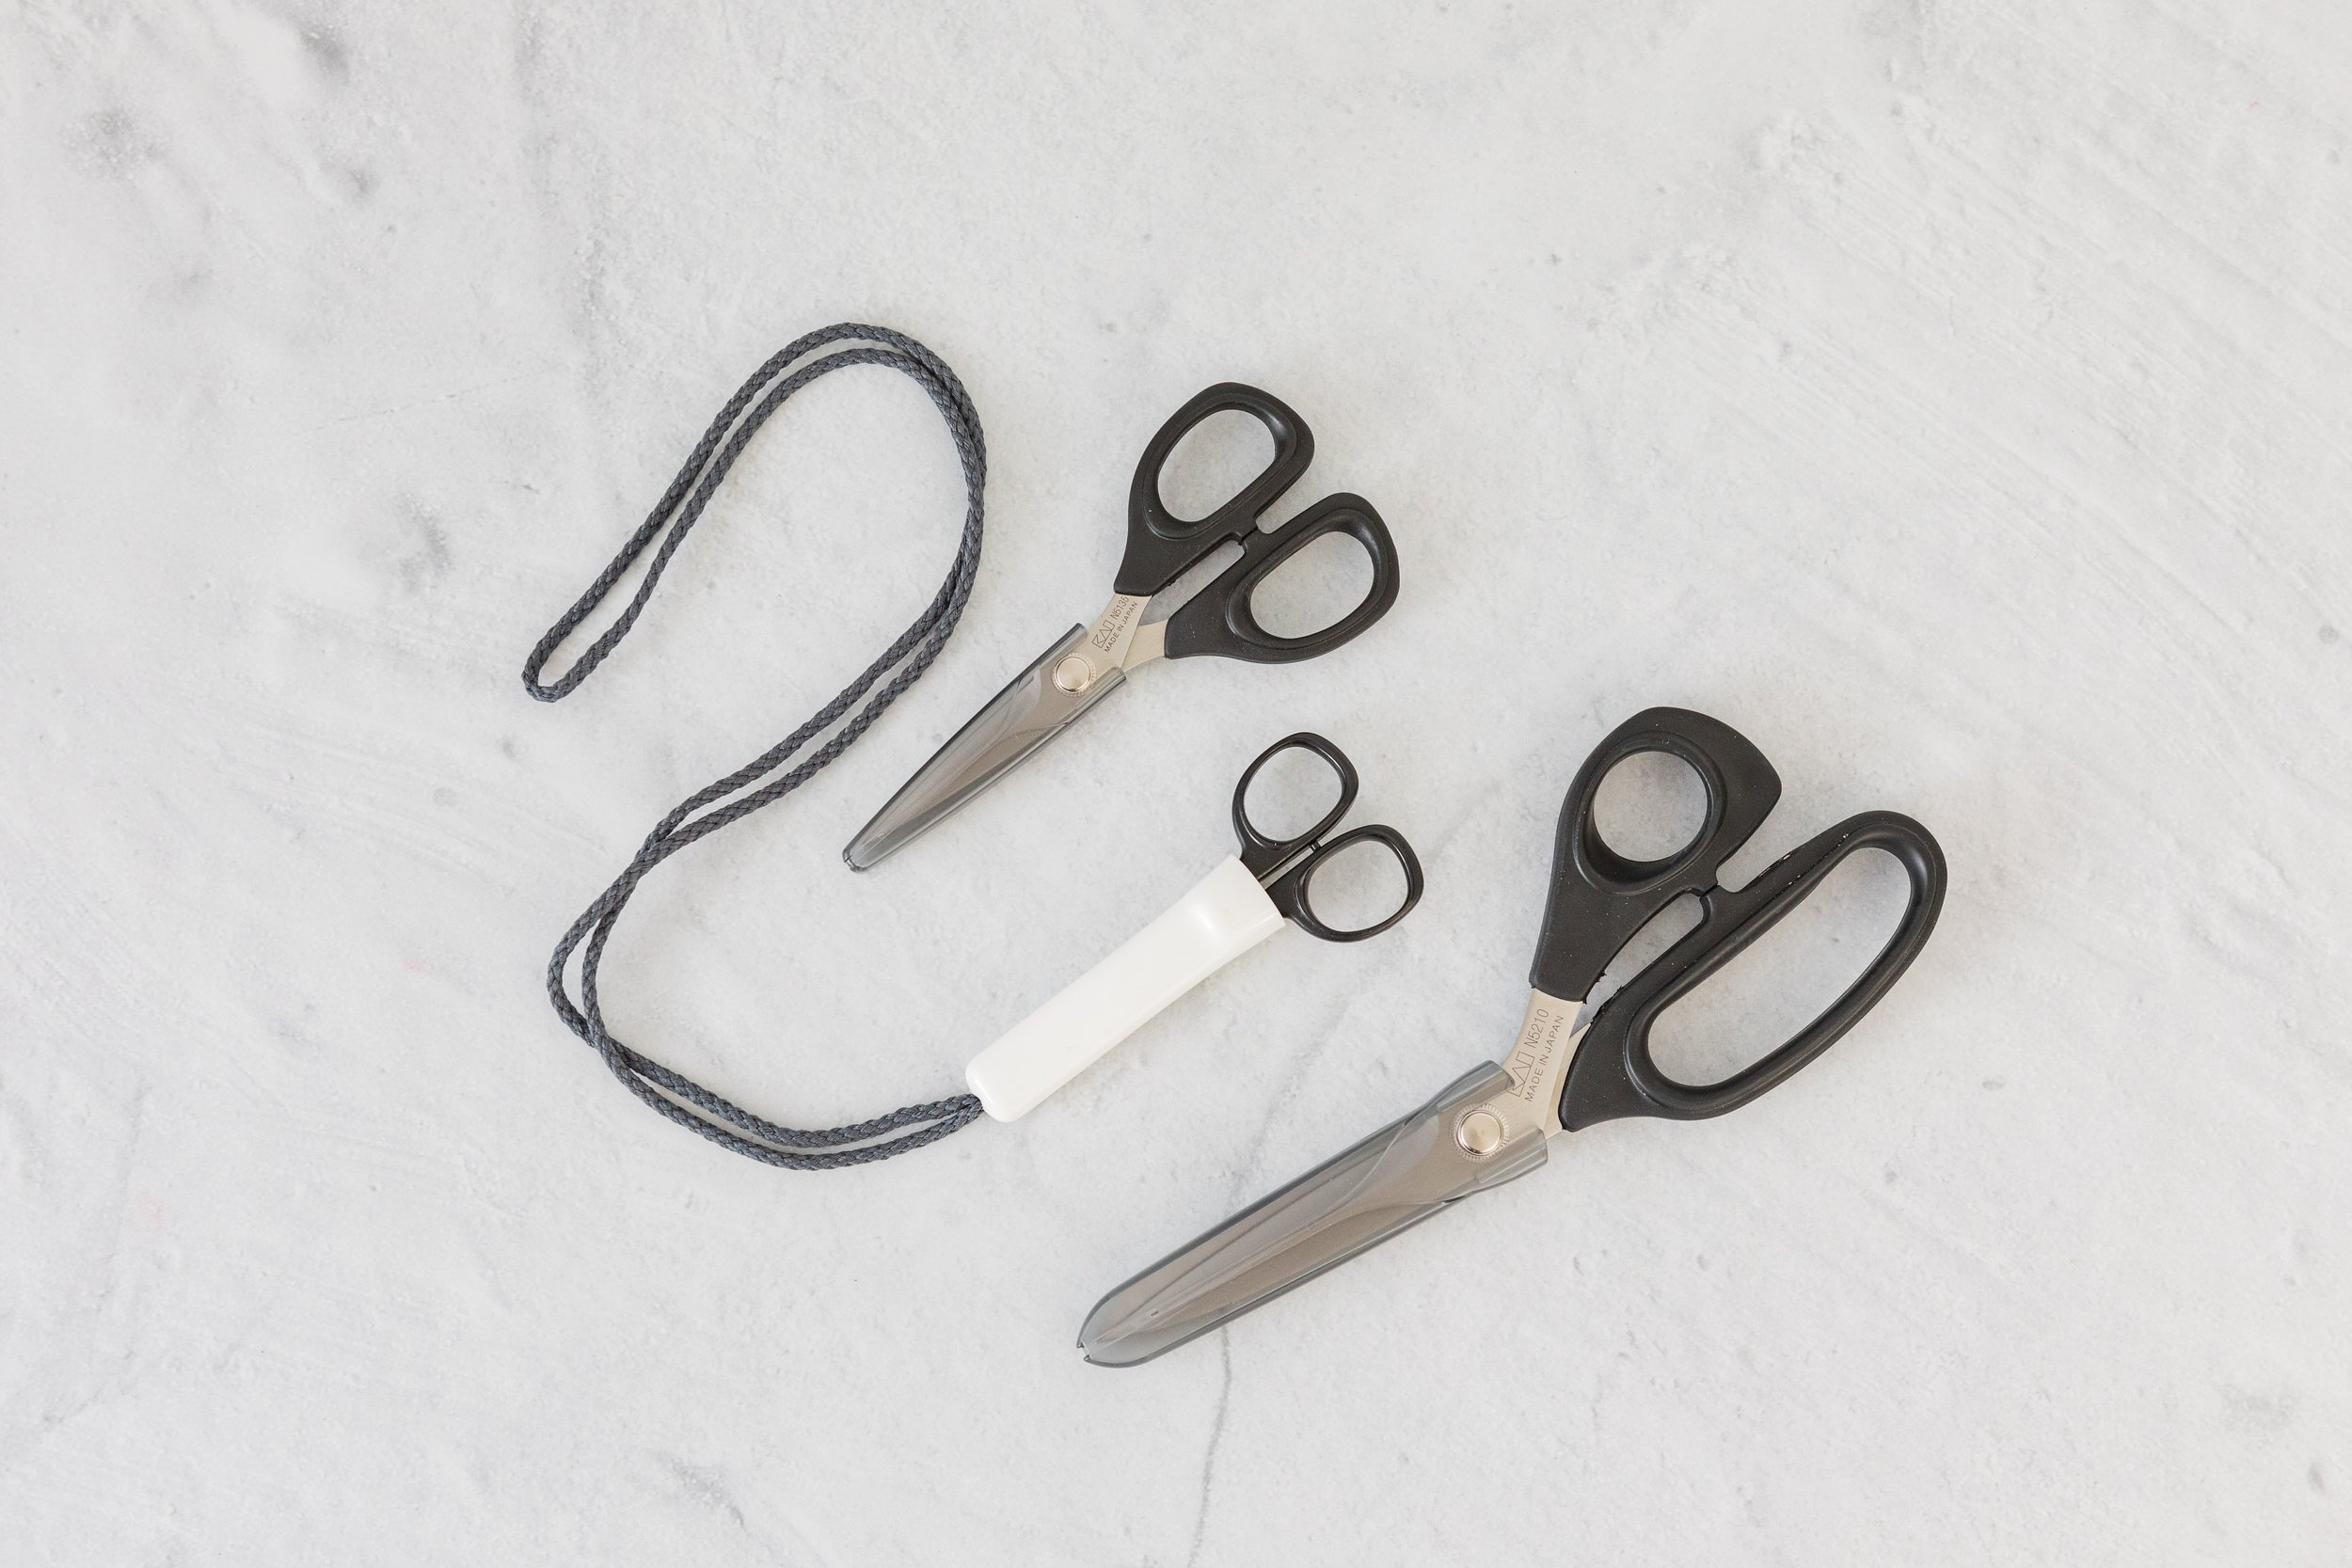
Kai Scissors are sharp and durable
Most of your time as a paper florist will be spent cutting petals and leaves. That makes scissors very important. And depending on which flower you’re making, you can need A LOT of petals. Without a good, sturdy pair of scissors, it can be hard to cut for hours on end.
Quynh’s favorite pair of scissors that she uses is Kai Scissors. Though they are intended for sewing, they still work fantastically for paper flowers! To learn more about how to choose the right scissors, read Quynh’s blog post.
Alongside scissors, you may need a good pair of wire cutters when the wire is too thick.
Here are some things to consider when picking the right pair of scissors for your project:
Sharpness
The purpose of the scissors is to cut paper, so the sharpness of the blade is an important factor to consider. Unfortunately, paper dulls the blade pretty quickly, so it’s good to invest in a pair of scissors made of titanium or steel.
Length
In general, the more precise a cut needs to be, the smaller your scissors should be. If you’re cutting bigger objects or things that don’t require as much detail, then longer and bigger scissors are good. But if you want to be more precise, then smaller scissors are recommended. Quynh uses 8” for general work , 5 ½” for fringe or detailed work, and 4” for really small and hard to cut spots.
Comfort
If you’re going to be cutting for hours, then the grip of the scissor really plays a huge role. Nobody wants sore hands or irritated skin. Also, it’s good to consider the size of your hands in relation to the size of the handle.
And that’s it! These are the basic materials that you need for creating a beautiful paper flower. Once you know your way around the materials, and what to use and when, you’re on your way to becoming an experienced paper florist!
Learn more about Quynh Nguyen and The Posey Box by following her at www.theposeybox.com or at www.pinkandposey.com. You can also find her on Instagram @pinkandposey. If you prefer a book format, be sure to check out my book, Paper Flower Art: Create beautifully realistic floral arrangements where I share everything there is to know about paper flower supplies!