DIY Paper Floral Ring

My large floral ring displayed in the windows of The Paper Place in downtown Toronto, Ontario.
DISCLOSURE — When you click on my affiliate links, I may earn a commission for qualifying purchases made through Amazon.com links in this post. This commission goes directly into the maintenance of my website, the technology that goes into my courses, and my art. Want to know more? Read my AMAZON AFFILIATE DISCLAIMER.
I thought I would share with you how I made this large floral ring window display which I installed at The Paper Place, so that if you decide you want to make one to, you'll have a head start. So here's my DIY Paper Floral Ring tutorial.
Here's how I did it:

The first challenge was to determine the size of the DIY paper floral ring so that it would fit comfortably within the large window that was 93 inches wide by 90 inches tall. I calculated that there should be about 1 foot space between the ring and the window frame. So I decided to create a ring with a diameter of 5 feet, accounting for the ring to be a little larger in the end because there would be leaves and flowers extending outside of the ring structure.
The second challenge was to create a round structure that could be transported easily. I knew it would have to be broken down into smaller pieces so that it could fit into my car. With a diameter of 5 feet, each half would be about 2.5 - 3 feet wide by 5 - 6 feet long, which was small enough to be easily placed into my car, with the backseats down. I initially considered using PVC piping, the type that plumbers use and the type that many paper floral artists use as stems for their larger than life flowers. But as I was exploring the different options at the hardware store, I realized that the disadvantage of the PVC piping was that I would need to use a heat gun to create the round shape I wanted. I would have to use a guide to make it. While looking at the other pipings, I came across flexible PVC tubing from the electrical section, these electrical PVC conduits. It was super flexible and easily shaped. I knew that if I had 2 pieces of the same length, and connected them together, it would automatically create a round shape because of the tension between the two pieces and the flexibility of the tubing to permit that. I bought 2 coupling connectors. I could easily push the ends of the conduits into the couplings to connect them; to disconnect them, I just had to pull them out of the couplings. To finish, I sprayed painted them in Krylon green spray paint.


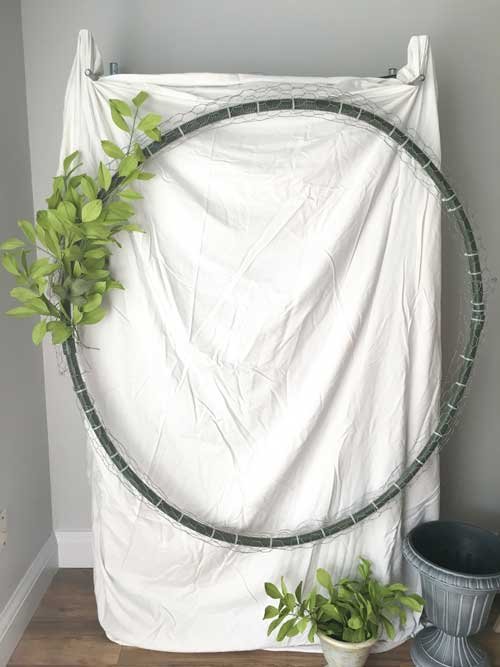
The third challenge was to hang the DIY paper floral ring while I worked on it. I initially tried to hang it on my Pax wardrobe, but I needed access to my art supplies, so it didn't work. I have a metal shelf from IKEA that I use to hold my paints, tools etc. and random household items. I used 18" zip ties to tie 2 short metal bars to the top of the shelf, with at least 5 inches protruding out from the top of the shelf. I then attached fishing wire to the ring at 10 o'clock and 2 o'clock, and hung them from the 2 metal bars. I had to adjust the positions several times, and as I worked on the paper floral ring, to keep the ring circular. At some point, the paper floral ring was heavy enough that the bottom of the ring at 6 0'clock was dragging. So I tied fishing wire to the bottom at 6 o'clock, and threaded that through the top of the ring at 12 o'clock, and then attached it to the top of the shelf. I tightened the fishing wire until the bottom of the DIY paper floral ring was no longer sinking, and the DIY paper floral ring was round again.
The fourth challenge was to find a way to easily attach the leaves and flowers to the actual DIY paper floral ring. I created a cage around the ring using chicken wire. I cut strips of it, the length of each section of the electrical PVC conduit, and width of it about 6 hexagons. I curled it around the conduit tubing and attached it using zip ties.
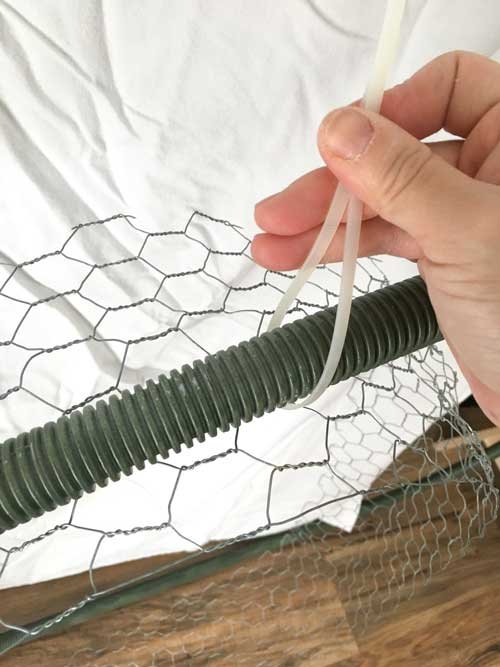
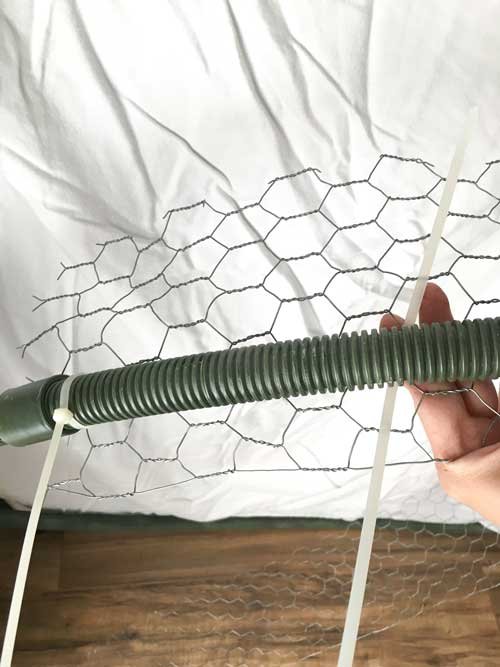
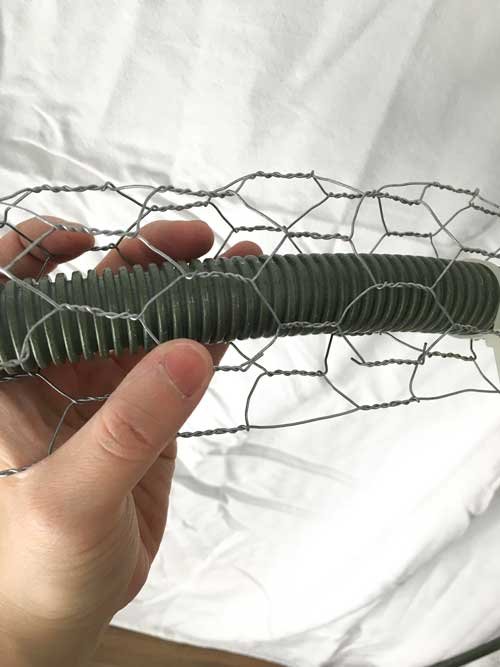
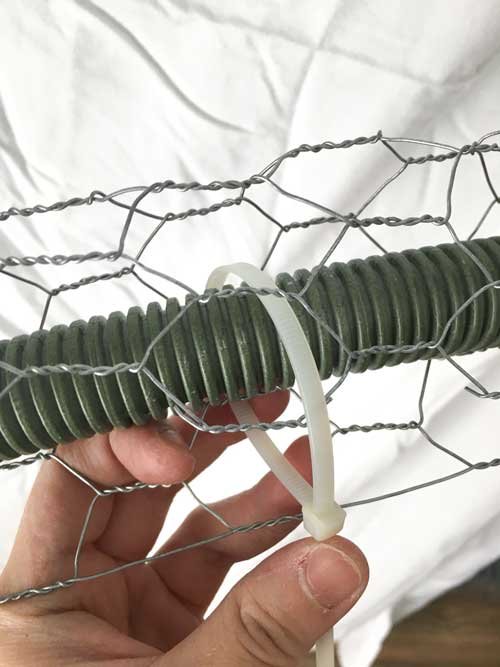
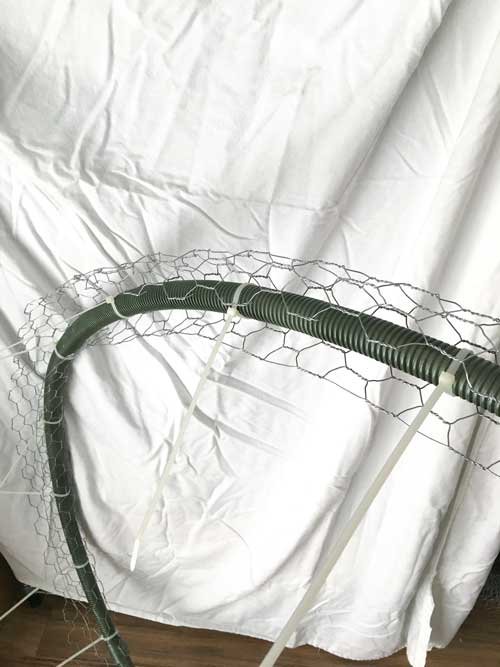
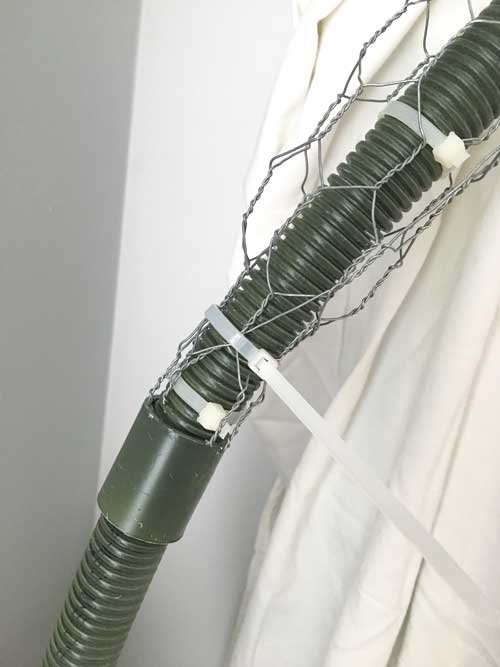
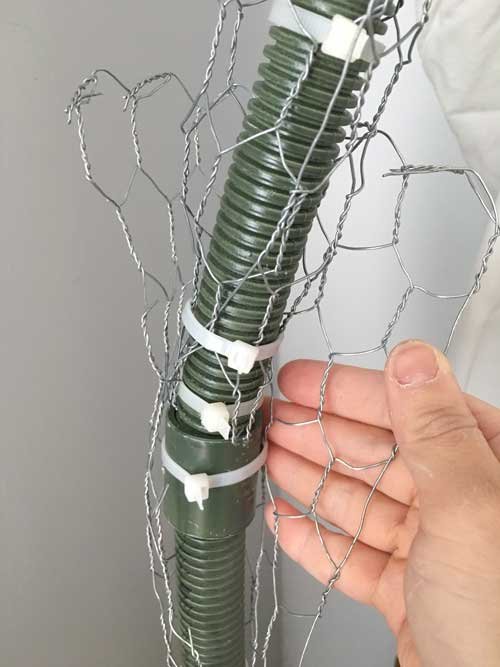
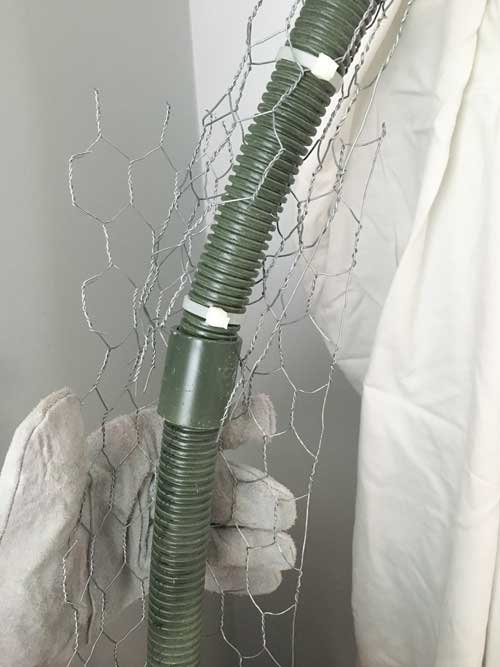
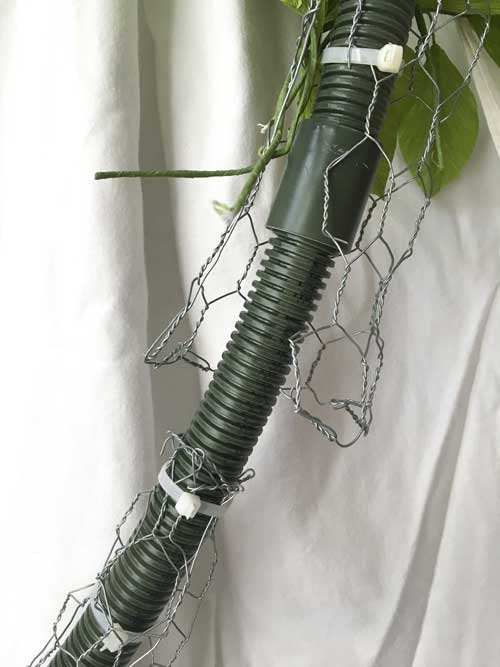
When I got to the sections where the couplings connected the tubes, I attached the chicken wire frame tightly around one side, and loosely on the other side so that the loose side could easily cup around the tight side.
Once the chicken wire cage was secured, I was able to insert the leave stems into the cage. I secured the stems by wrapping them around the chicken wire. I tried to do this as much as possible. In areas where I couldn't do this, I used a short stem wire, in a 26 gauge, to tie the stem to the chicken wire. Here's 2 short video demonstrations, one using the leaf's stem wire, and one using a separate stem wire: I worked on the paper floral ring by first attaching the leaves, and then the magnolia branches. I continued to installed the flowers and leaves as I made them.
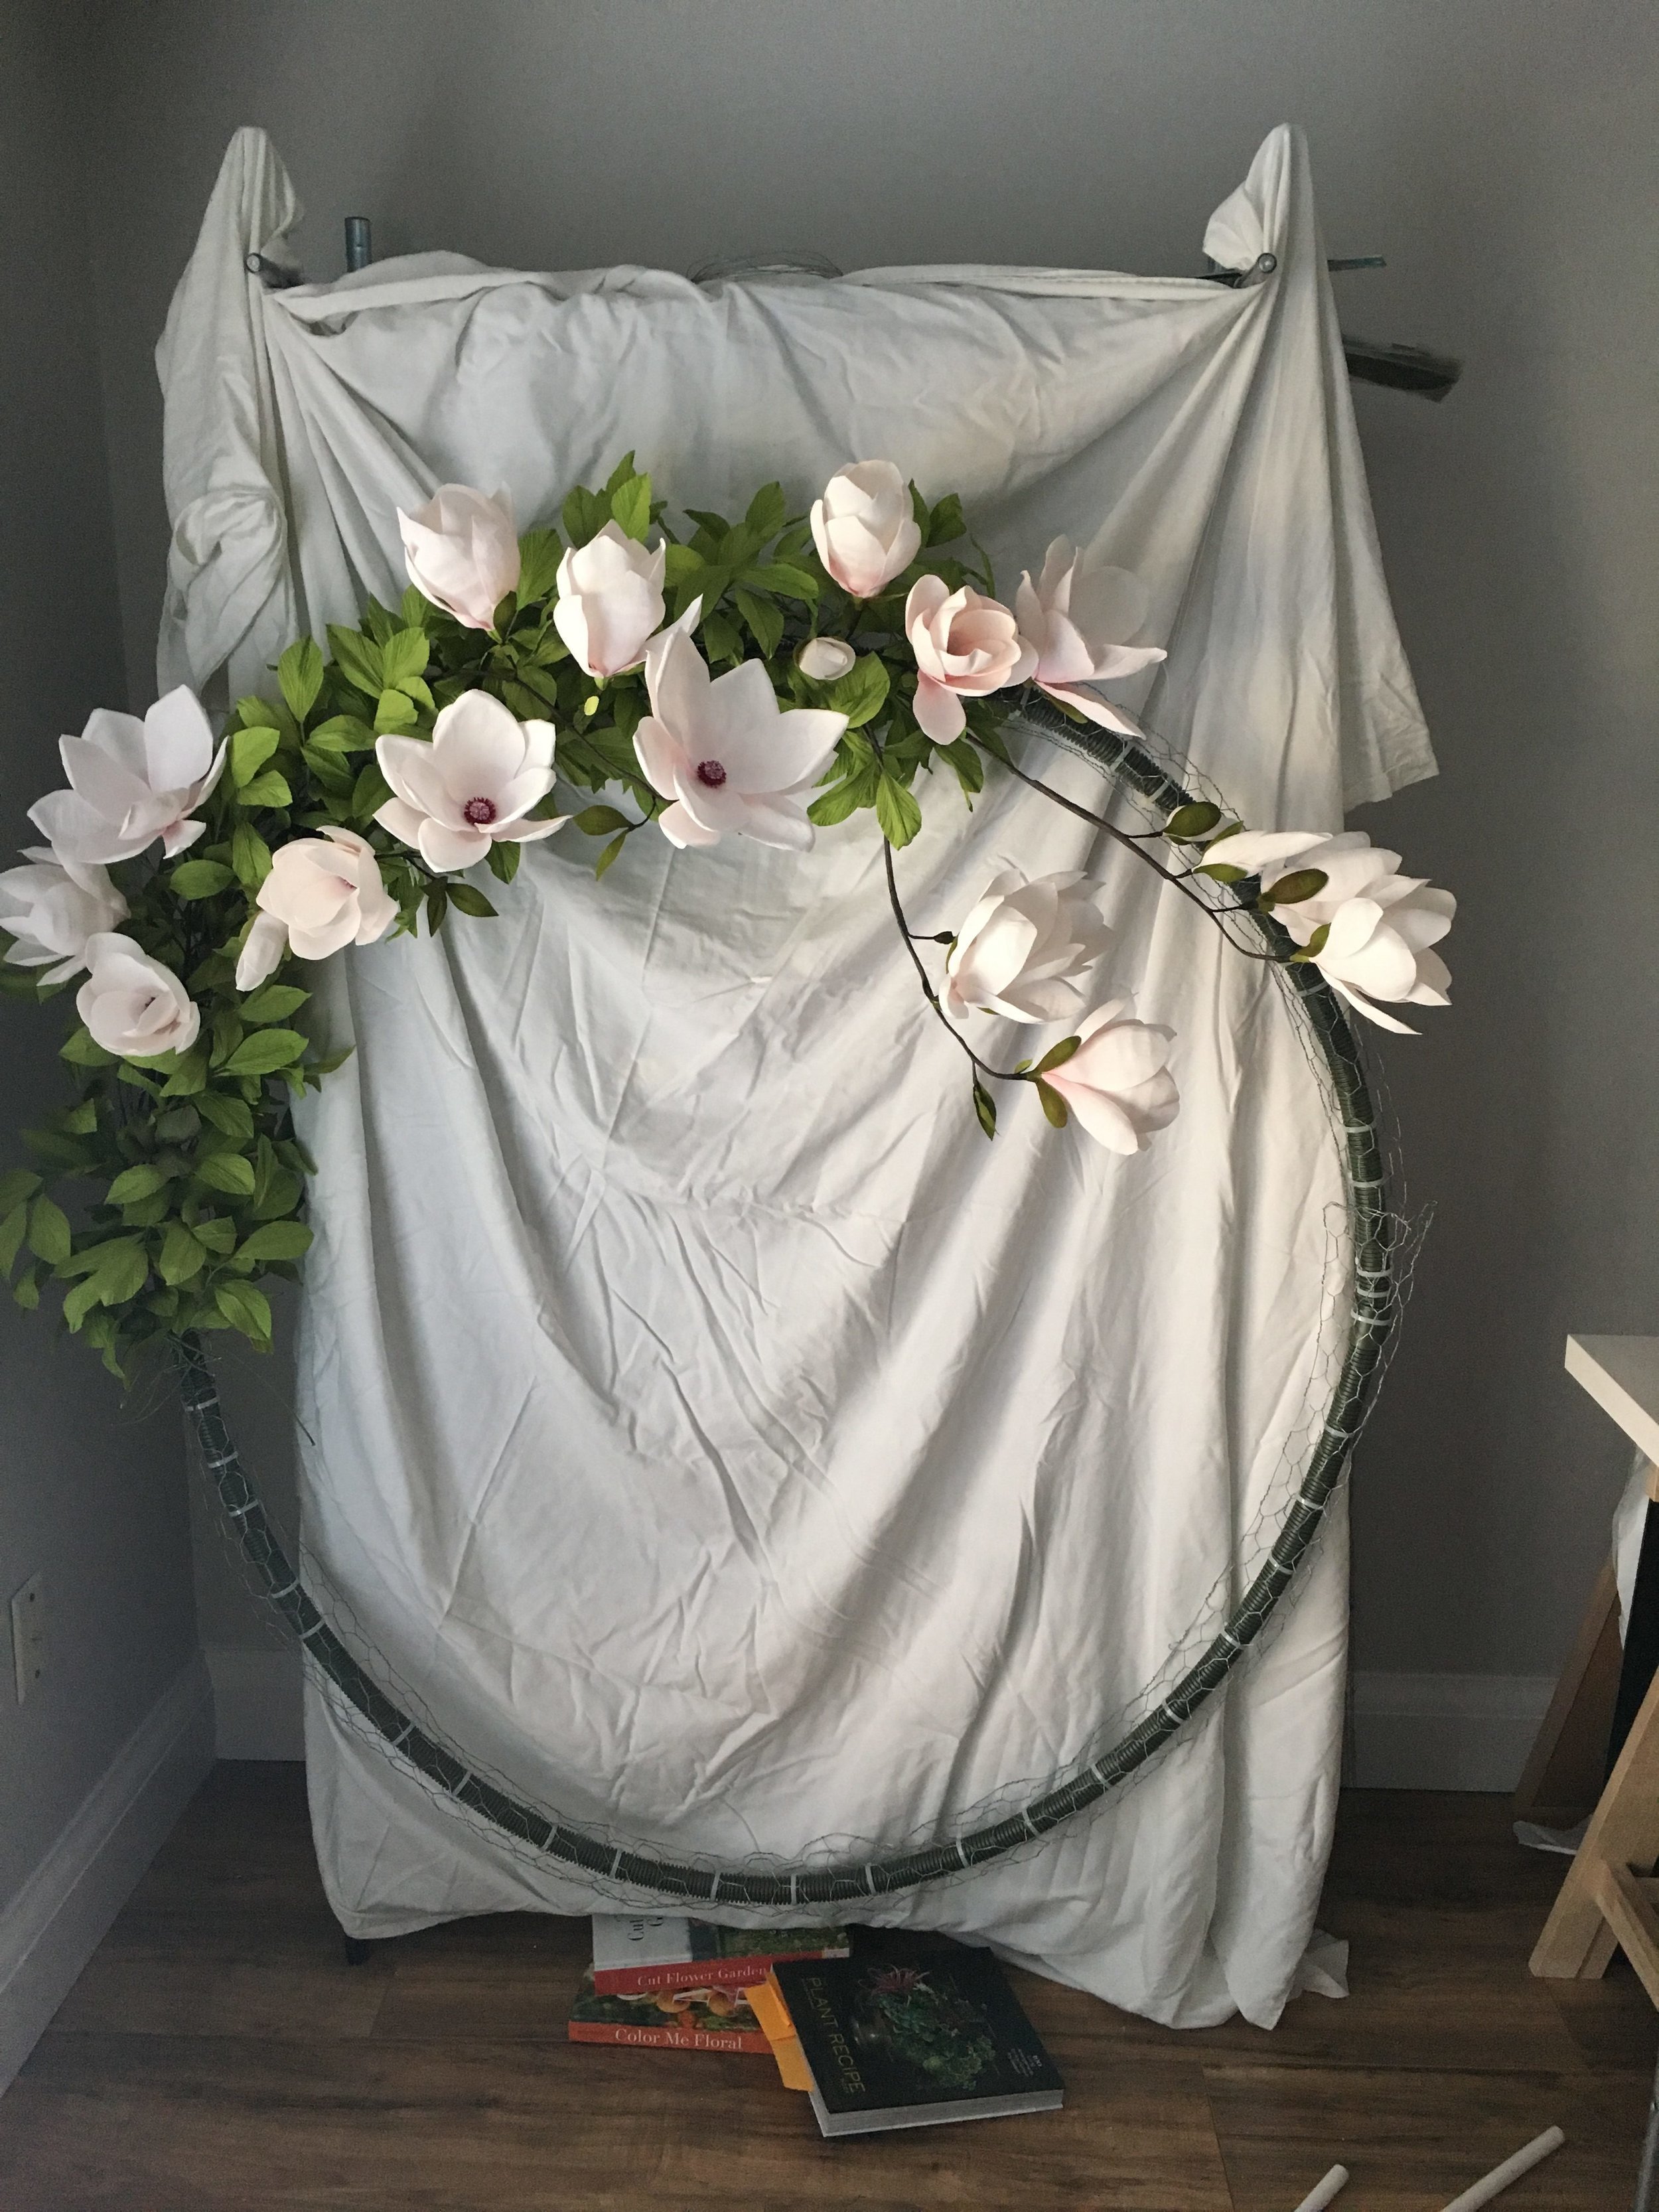
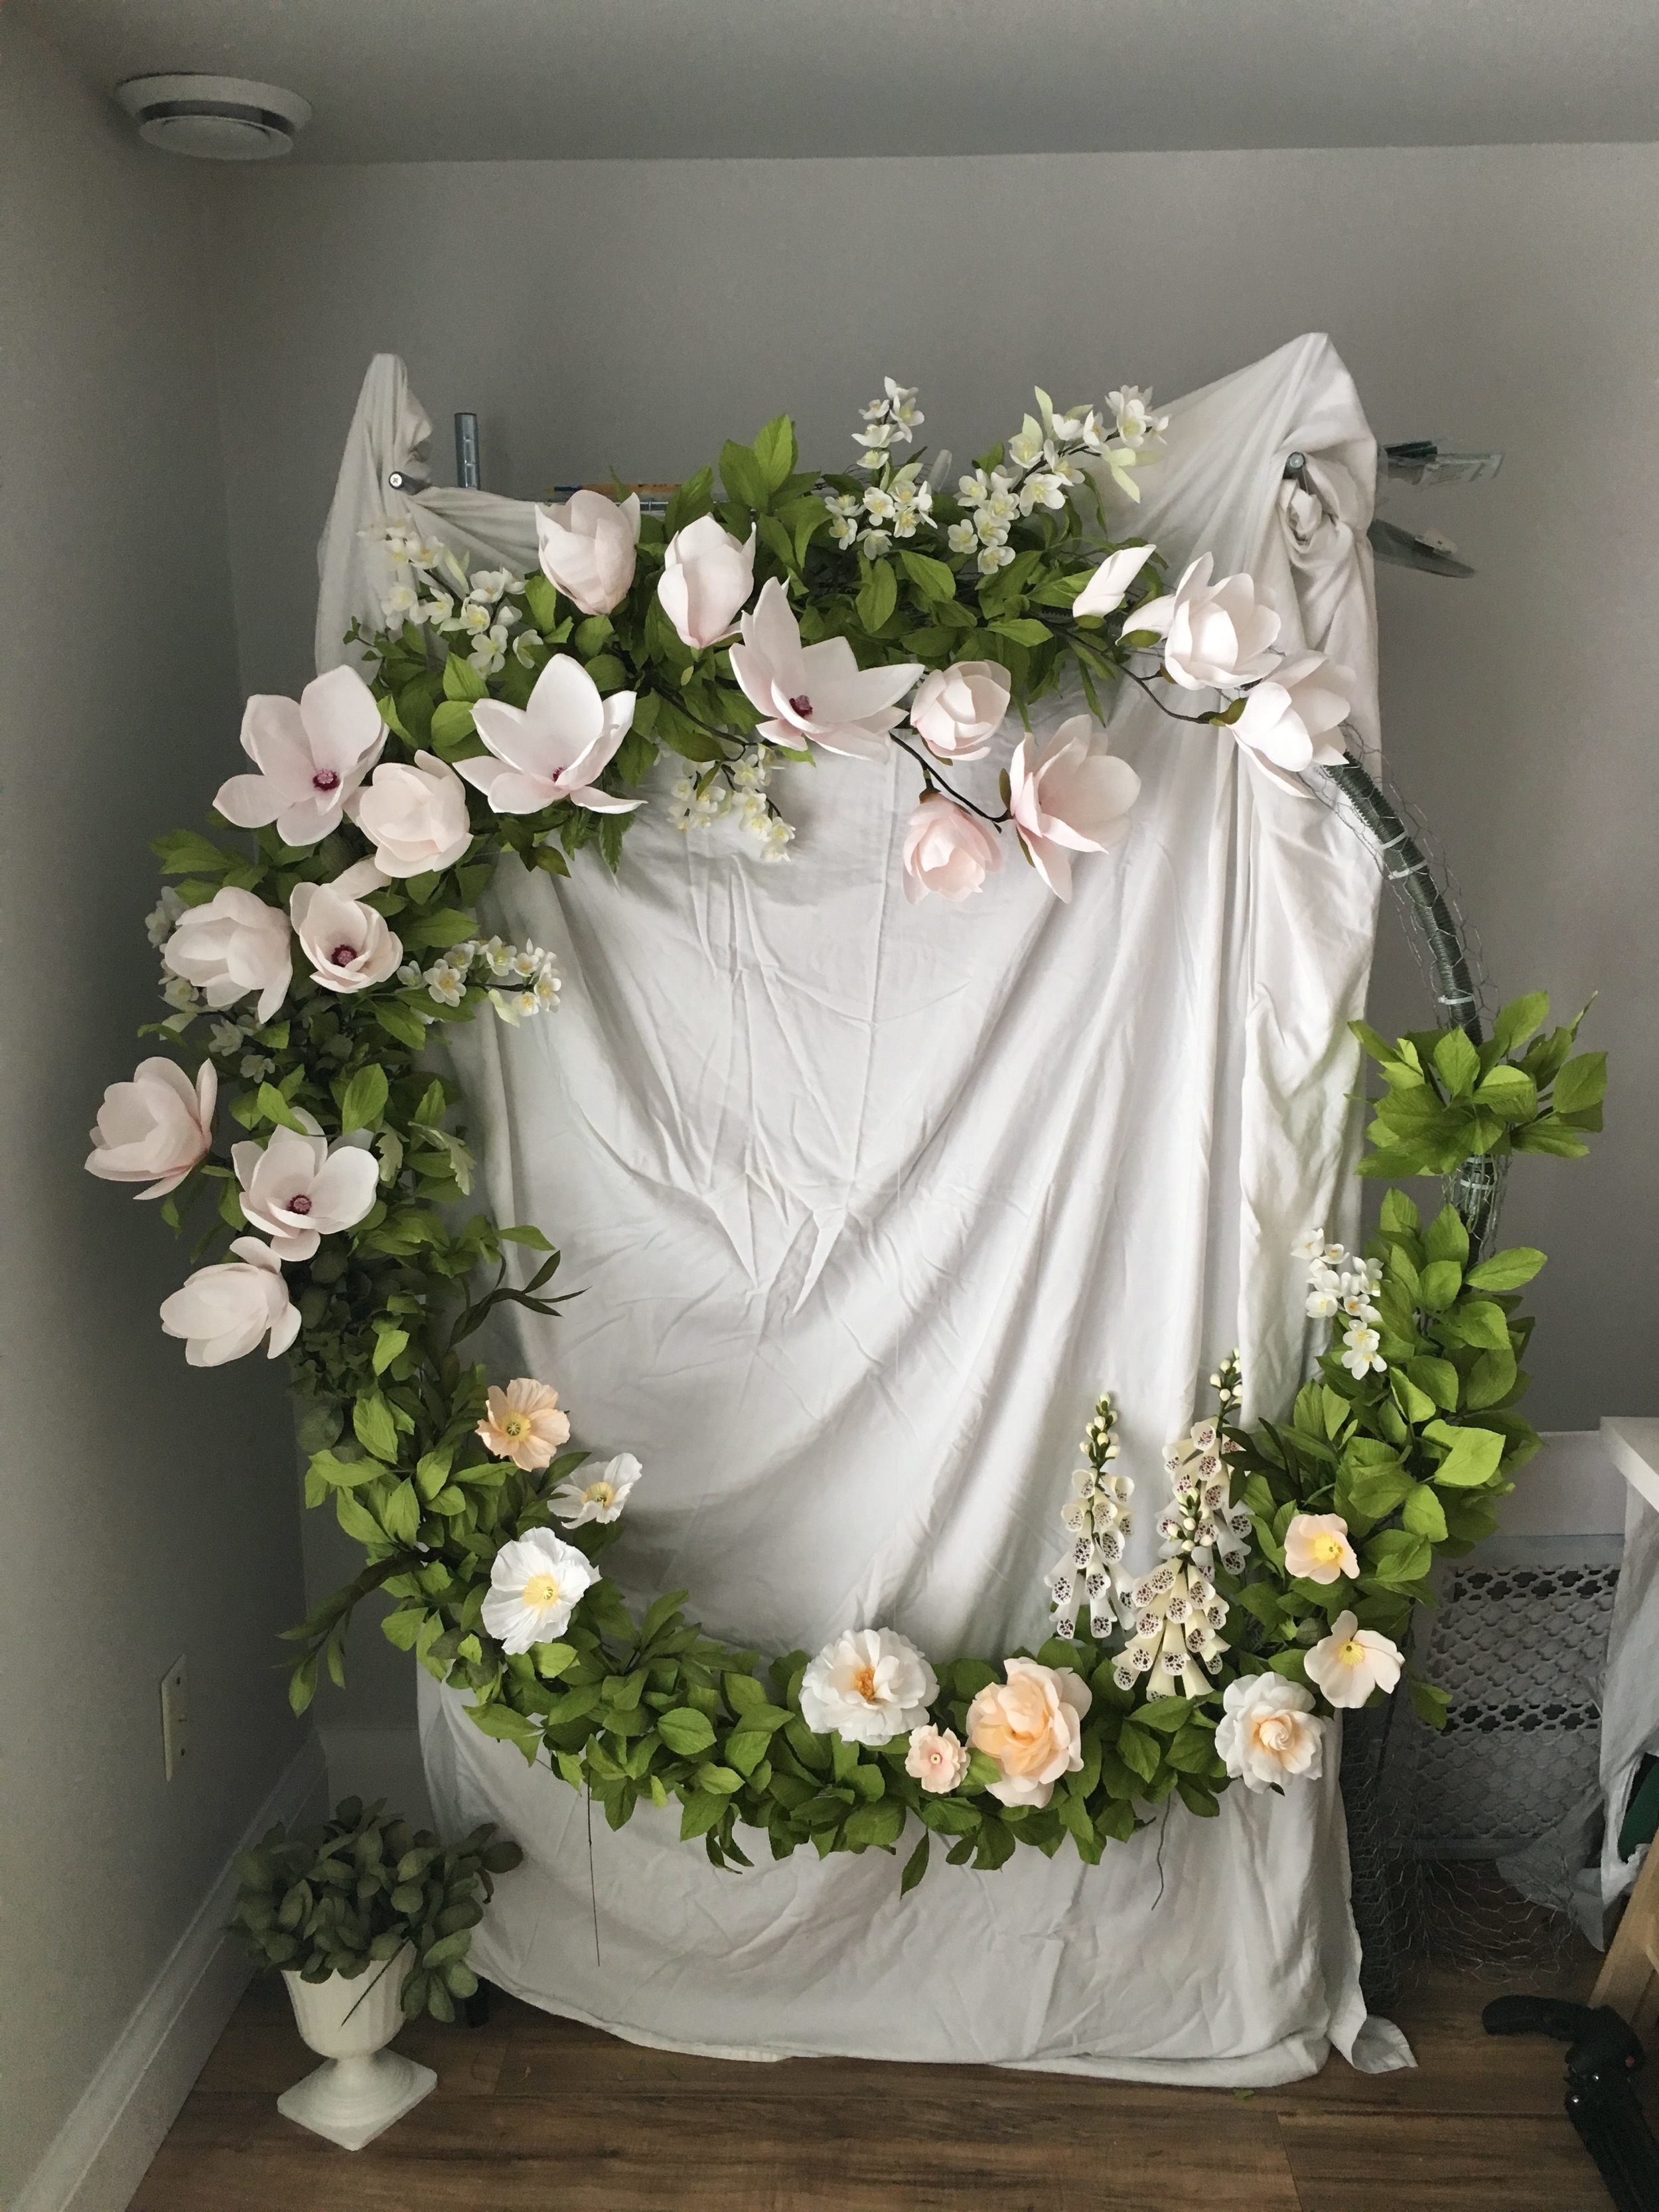
I experimented with different types of flowers and colours, and finally decided to stick with the white and blush, to reflect the colours and weight of the magnolias.Once everything was attached, I sprayed all of the foliage and flowers with 2 layers of Krylon K01305 Gallery Series Artist and Clear Coatings Aerosol, 11-Ounce, UV-Resistant Clear Gloss.
Let me know if you have any questions at all! This was my way of solving the problem of a large wire structure - there are probably many other more efficient and effective ways.
Here's the final installation at The Paper Place.


UPDATE AS OF JUNE 3/22 -
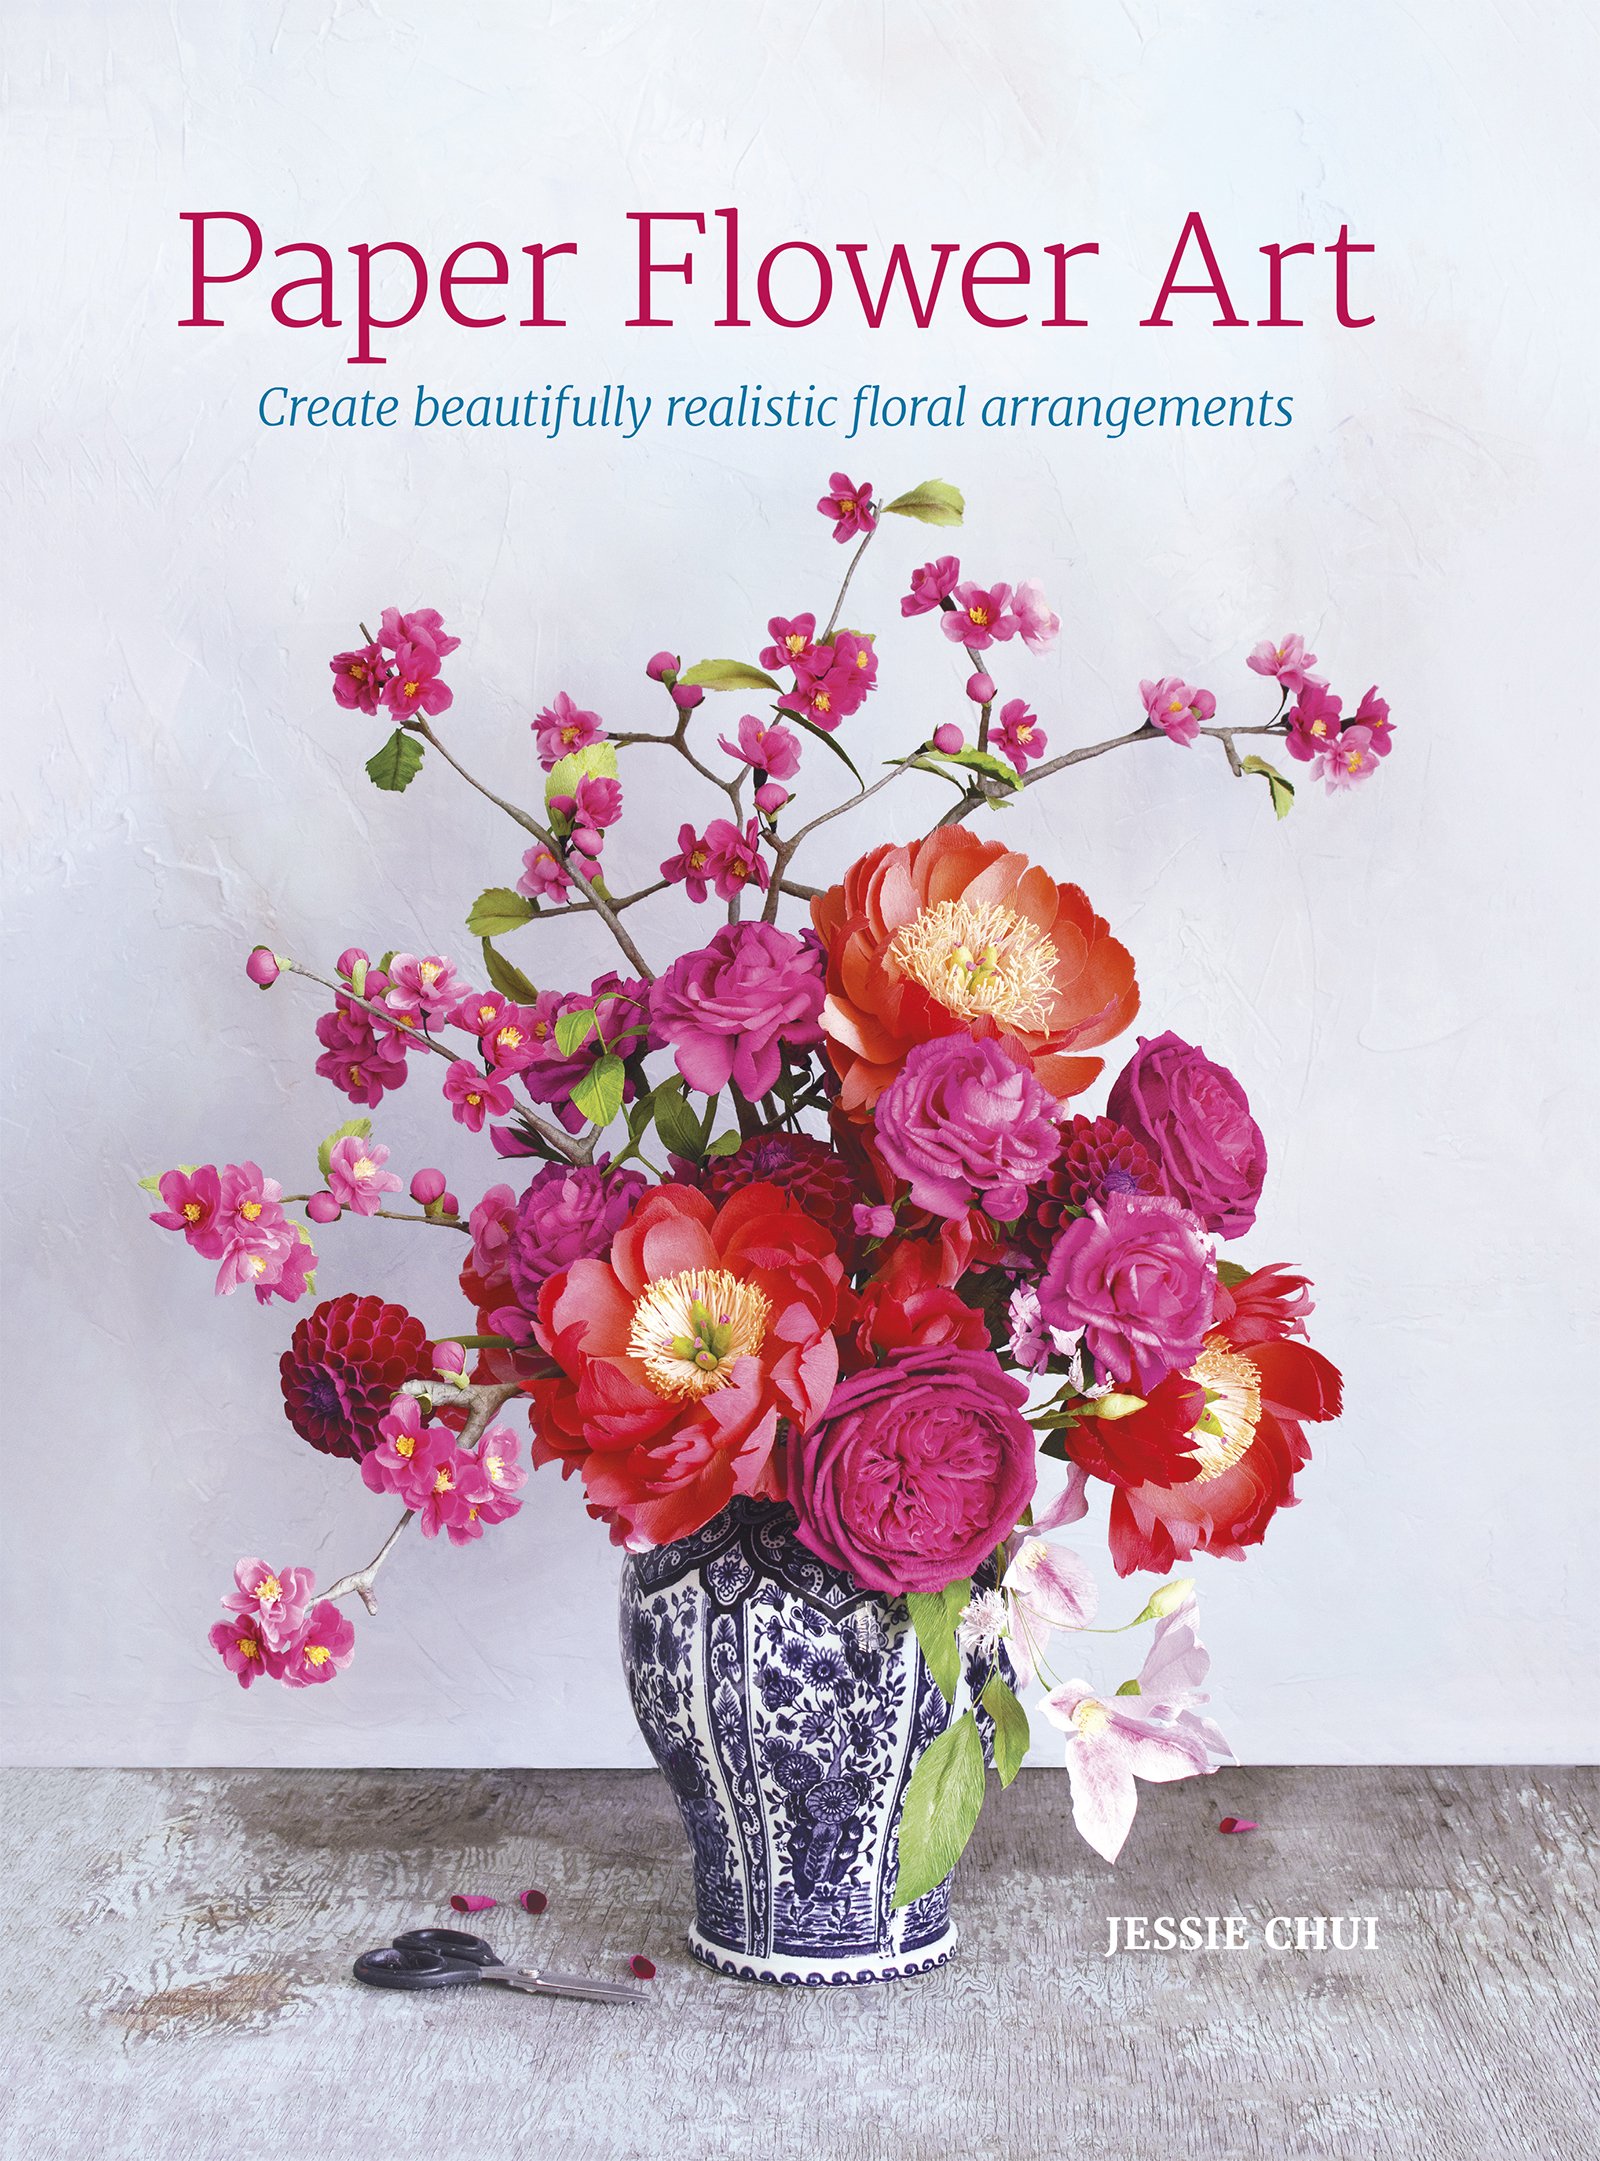
This blog post was written in 2018 and since then, I’ve developed more techniques of how to make branches. You can learn how to make a fruit blossom branch and other foliage and flowers in my book, Paper Flower Art (GMC, 2019) (BUY IN HARDCOVER or IN PAPERBACK) or head to my education website, CRAFTED TO BLOOM, to find more in-depth learning.