Making a Sunflower | Part 2 - Experimenting and Executing Ideas

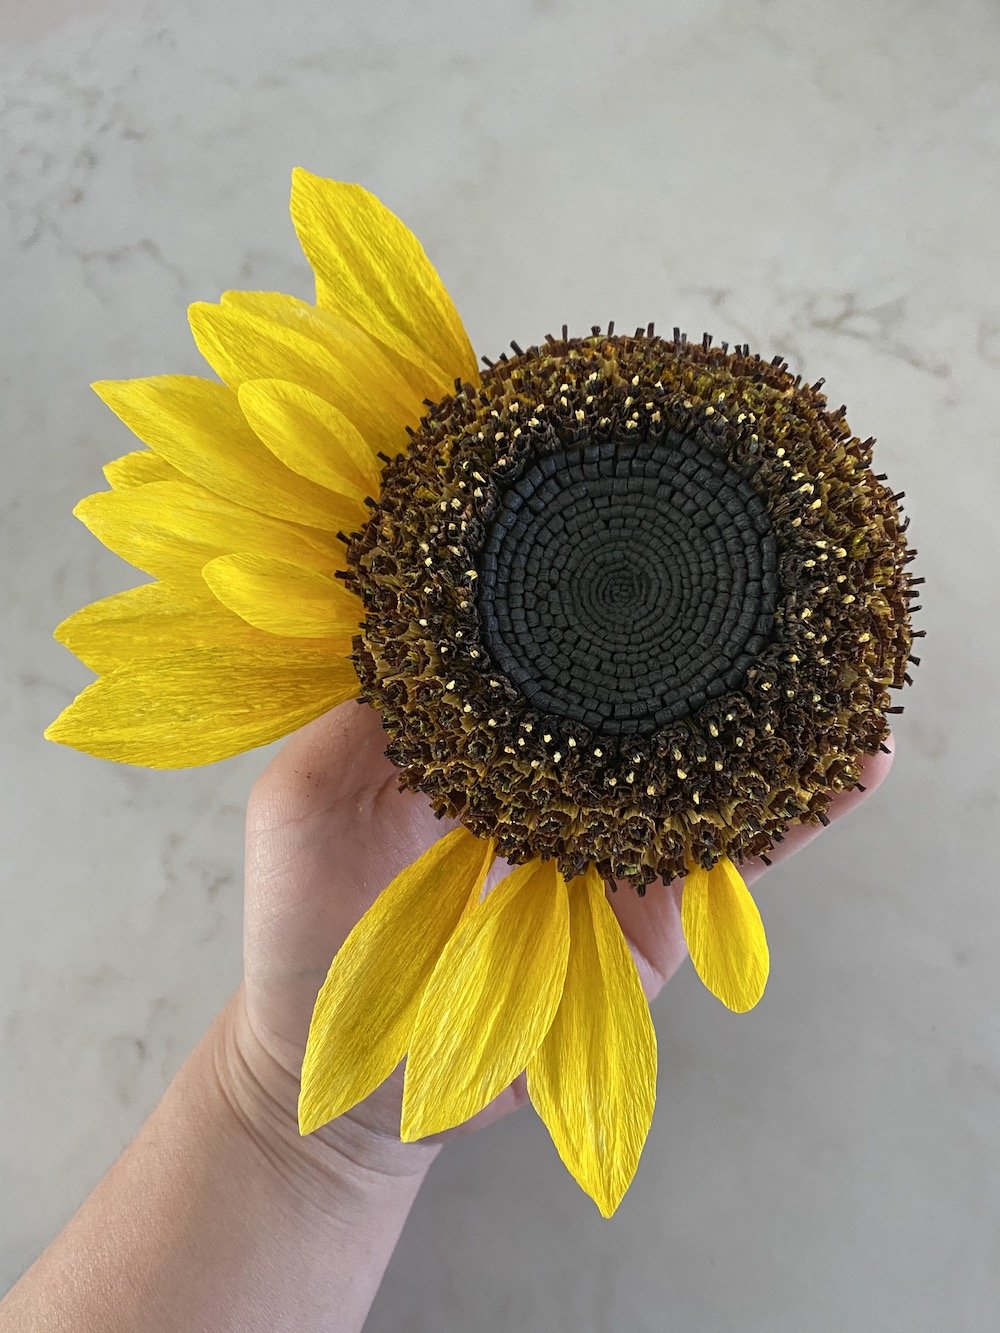
Completed sunflower commission.
If you haven’t read Part 1 of this 2-Part series, I suggest you do - in Part 1 I talk about how I planned this piece and my thought process. You can read it here.
This flower is incorporated into The Sweetest Thing, a mixed-media piece by Gee Horton, and as of Spring 2022, the work was acquired by the Cincinnati Art Museum for its permanent collection. It is currently being exhibited in The Coming of Age show at the Museum.
With a vision of the sunflower firmly set in my mind, I started working backwards to determine how to create the flower into that particular form.
Centre structure
It would be extremely challenging to alter the height of the fringes in the centre at every spiral - the measurements would have to be precise - and there were too many variables to consider. To reduce the unknowns, I relied on an underlying structure that already had a similar form and curve as the centre I wanted to create. The height of the fringes could remain consistent and still create the form I wanted. This is the exact same concept I use when creating my dahlias.
The other benefit of having an underlying structure with curved edges is when you attach the seed pods to it, as long as it’s perpendicular to the surface, the pods will naturally start facing outwards, thereby gradually creating that curved form.
The structure I needed would have to allow for a gentle curve in the centre and on the rim, as well as be ⅓ smaller than the actual structure itself. Initially I tried using paper mache to create it, however, I found it was difficult to create the exact shape in the same height and the same diameter that I wanted. Years ago, I created a 3-dimensional miniature structure of Le Corbusier’s Ronchamp chapel from foam core and through this experience, I knew that I could create shapes easily by gluing together layers of foam core. This is what I ended up doing. I traced circles using a measuring cup in the correct diameter, glued a few of the circles together, and then cut it to shape.

Sketch of underlying structure and images of the process
Black fringe
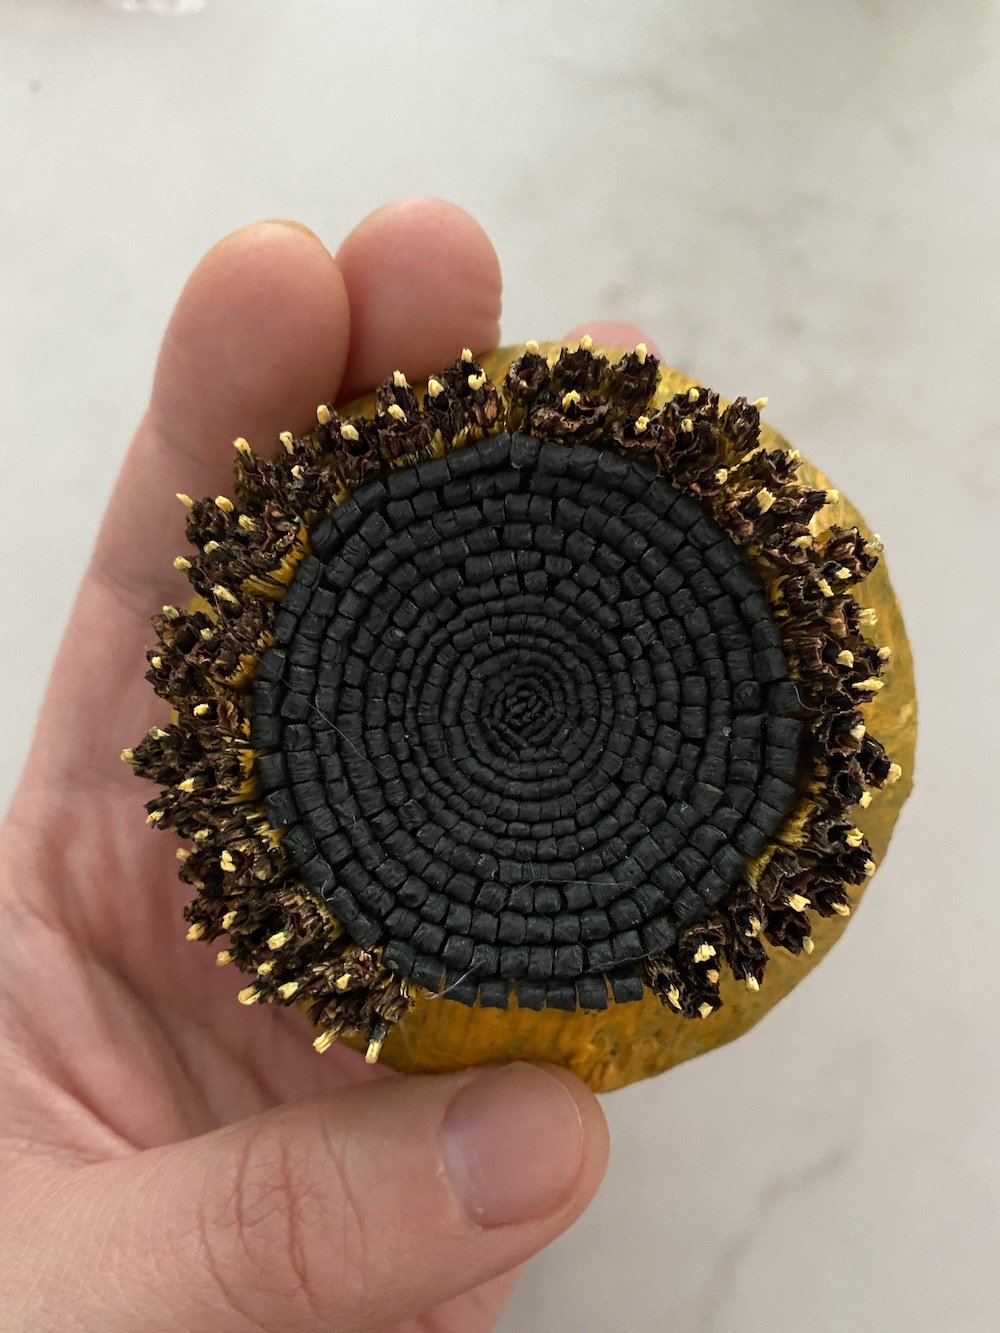
I initially had high hopes to create a Fibonacci spiral in the centre from black fringe, but it proved much more difficult than I thought! The size difference between the fringes in the centre and the fringes on the outside was a challenge too great for me to address. So I went with a spiral that’s familiar to most paper florists using one (seemingly) continuous strip. For this section, I did have to calculate the measurements for each spiral round so that the centre was shorter than the outer fringes. At every round, I thickened the fringe tip and cut less off of the base. I used a technique that I used for my collerette dahlias (tutorial in my book) to thicken the fringe tips (by creating piping - a sewing technique - with crepe paper). When the fringes wrap around each other, the tips tend to spray outwards because it is thicker than the fringe base. So I also thickened the base of the fringe significantly so that the fringe was parallel to each other and the tips then would point up instead of out.
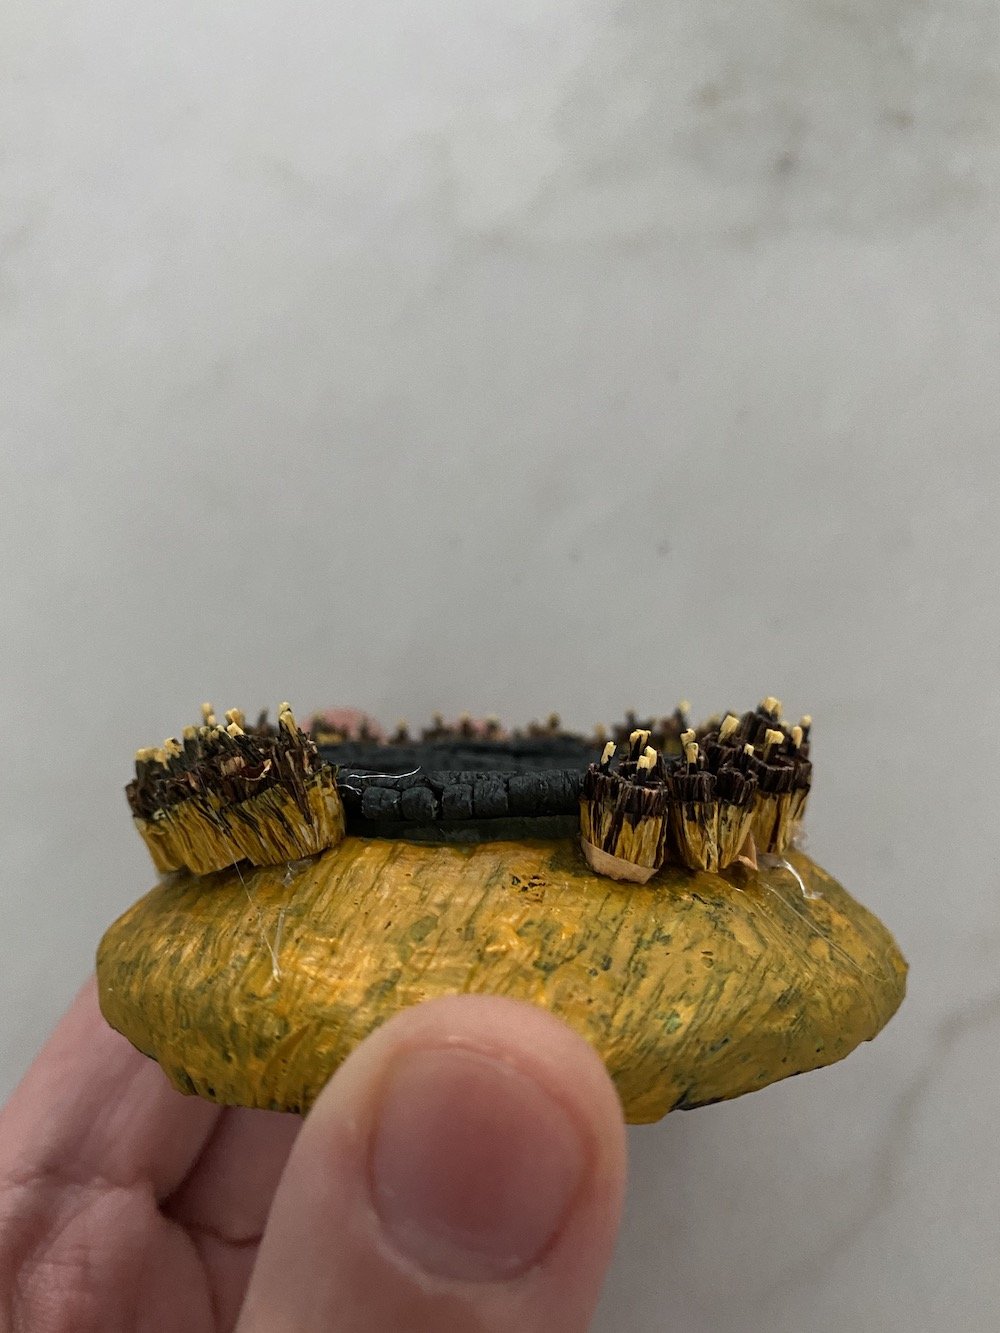
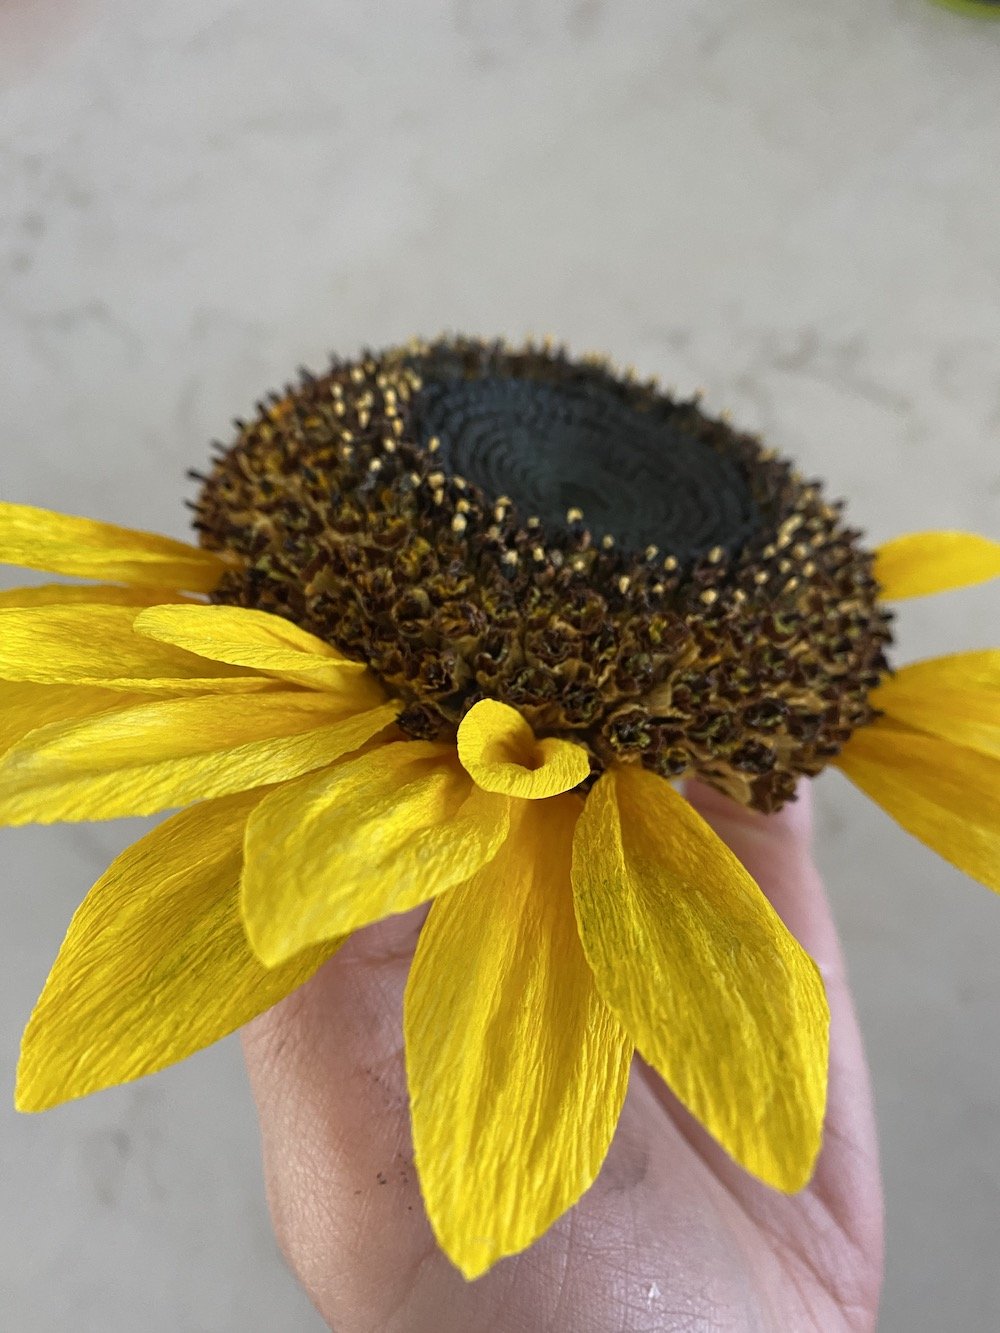
To exaggerate the dip, I cut a hole in the foam core structure and dropped the black fringe centre into it so that it was subsumed as opposed to sitting above the structure. The black 180 g crepe paper I used, once stretched, seemed to turn more gray. I coloured it with the darkest black I had - Sumi ink - to make it super dark.
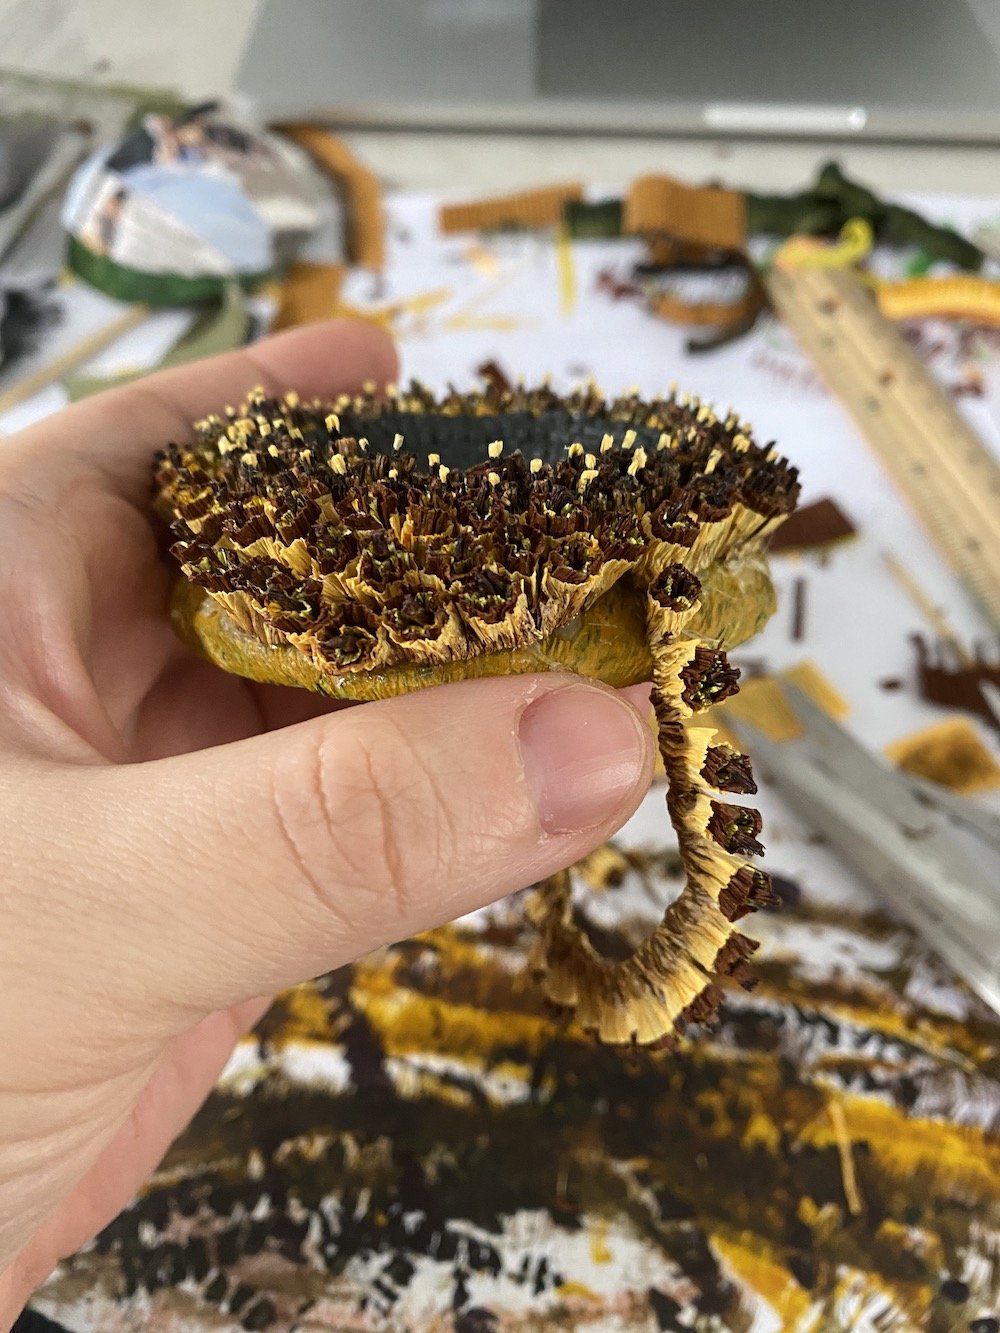
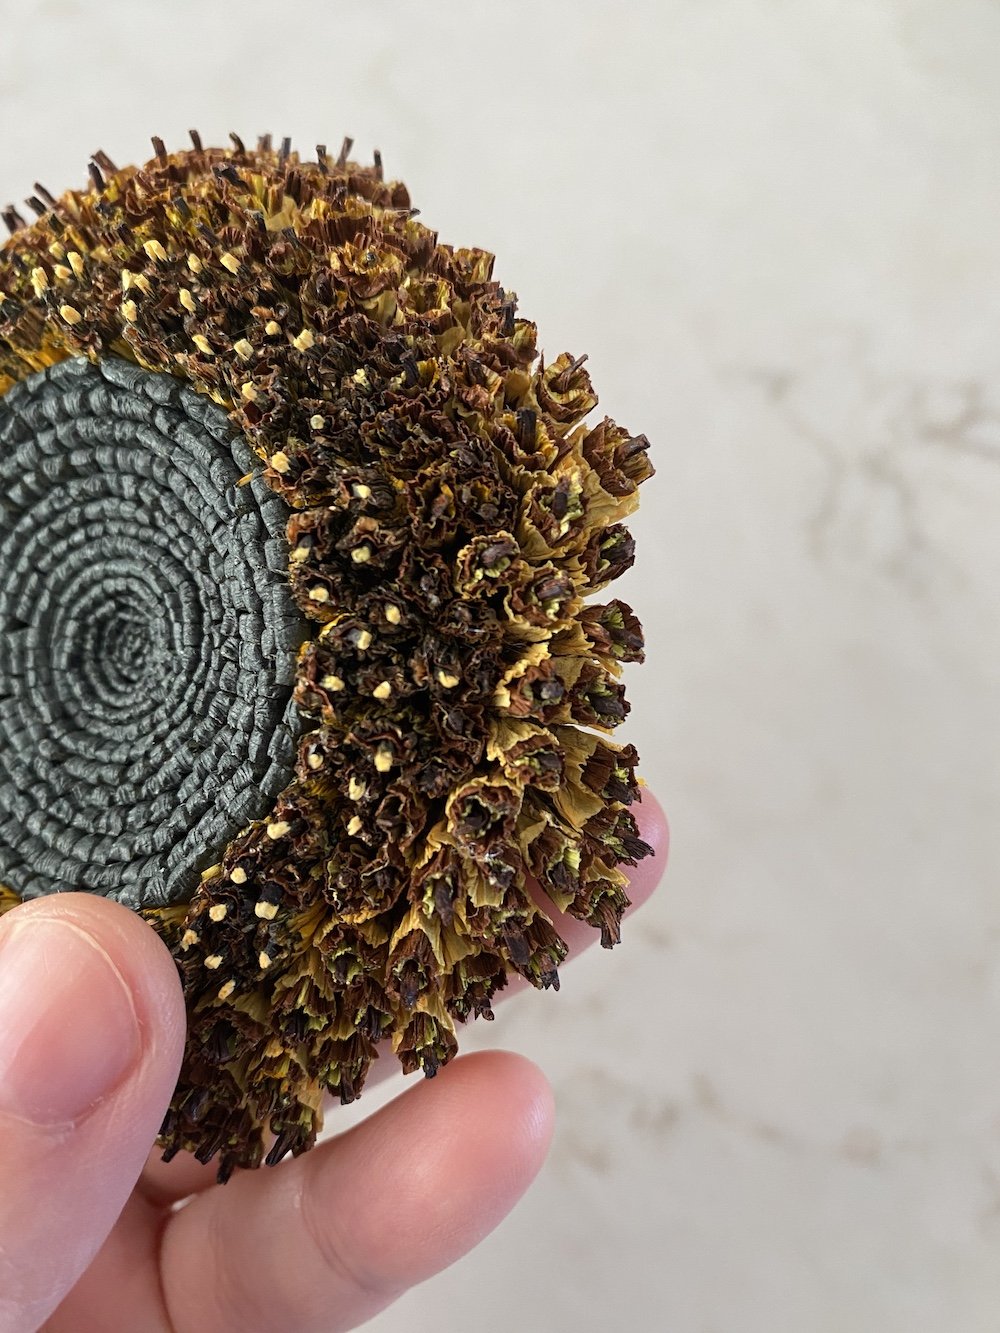
Seed pods
I had considered creating every seed pod individually, but then scrapped that idea when I thought of how much work that would be. Instead, I created linked seed pods which were probably more efficient overall (I hope!). I use multiple layers of stretched 180 g crepe paper and sandwiched them along a fringe strip before creating the individual pods. I experimented with different colour combinations to trick the eye into seeing the colours you normally see in seed pods, but I ultimately did not rely on the colour of the crepe paper. I found it too opaque. So I did what I normally do and coloured the strips unevenly with watercolour to let the underlying crepe paper colour show through. Then once the pods were assembled, I ruffle the edges to increase the area where its colour could be seen. I don’t know how many linked seed pod strips I made - probably about 15. I attached them in groups as opposed to doing rounds. Your eyes get drawn into the line and your eyes naturally follow it. Which is why, when we create these rounds and when we wrap a fringe around in circles, it can look sort of fake because we can see where the line is going and nature is rarely this perfect. Small imperfections become obvious because they deviate from what our eyes expect.
Petals
Now to petals - before cutting, I laminated my 90g crepe paper and then coloured my paper with watercolour so that a part of it was a darker orange (gamboge) and overall there were bits of greenish streaks on it to create texture. When I analyzed the shape and placement of the petals, I was drawn to how unevenly distributed they were (which I love!), but I noticed they tended to lie frontwards (if the sunflower was just blooming) or lie backwards, and the petals had some lines in the middle but were generally kind of flat looking. This just wasn’t my style so I took artistic liberties. I made my petals like my collerette (tutorial in my book) and Cafe au Lait dahlias but flattened it a little bit. I trimmed the petal tips so they suggested a slight preference to the left or the right.
For aesthetic and practical reasons, I also decided to include shorter petals near the opened seed pods. They filled in any gaps between the unevenly placed seed pods and they suggested growth and transformation in a piece that is otherwise not organic.
Side note: If you’re ever wondering - how do I define my style so that my work is recognizable? How do I define my artistic voice? - one way is to repeat things. When I repeatedly use the same or similar technique, it creates an aesthetic consistency in my pieces, which makes it easier to see a common thread throughout my work. If there’s a technique that speaks to you and excites you, repeat it in other pieces. As you continue to grow as an artist, you’ll find that you don’t even have to think about what techniques speak to you; you become your art. The more natural it comes to you, the more true your voice will be.
Finishing
The sunflower back is flat because my client needed to be able to secure it onto a pictorial illustration. I finished it with 2 sets of bracts. However, I can imagine if I had to add a stem to it, I’d still make it this exact way, and then attach the stem on the flat back before covering the ugly bits with the bracts.
By the time you’re finished reading both my posts about this sunflower, I hope you’re inspired to try it yourself and that you’ve picked up some tricks and tips!